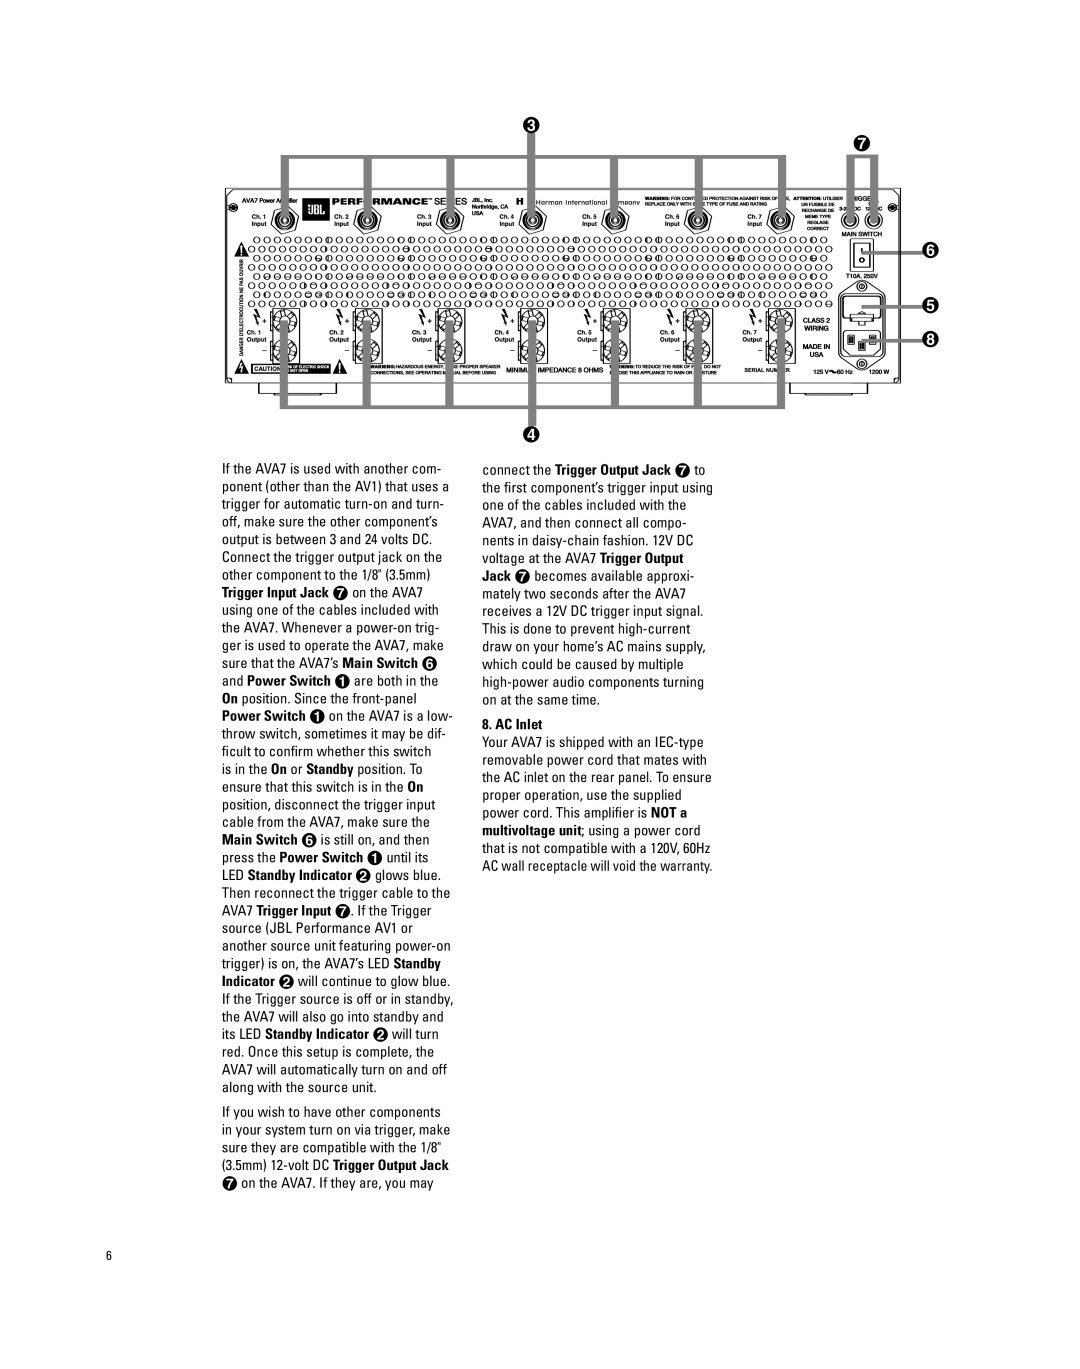
If the AVA7 is used with another com- ponent (other than the AV1) that uses a trigger for automatic turn-on and turn- off, make sure the other component’s output is between 3 and 24 volts DC. Connect the trigger output jack on the other component to the 1/8" (3.5mm) Trigger Input Jack ¶ on the AVA7 using one of the cables included with the AVA7. Whenever a power-on trig- ger is used to operate the AVA7, make sure that the AVA7’s Main Switch § and Power Switch ¡ are both in the On position. Since the front-panel Power Switch ¡ on the AVA7 is a low- throw switch, sometimes it may be dif- ficult to confirm whether this switch
is in the On or Standby position. To ensure that this switch is in the On position, disconnect the trigger input cable from the AVA7, make sure the Main Switch § is still on, and then press the Power Switch ¡ until its LED Standby Indicator ™ glows blue. Then reconnect the trigger cable to the AVA7 Trigger Input ¶. If the Trigger source (JBL Performance AV1 or another source unit featuring power-on trigger) is on, the AVA7’s LED Standby Indicator ™ will continue to glow blue. If the Trigger source is off or in standby, the AVA7 will also go into standby and its LED Standby Indicator ™ will turn red. Once this setup is complete, the AVA7 will automatically turn on and off along with the source unit.
If you wish to have other components in your system turn on via trigger, make sure they are compatible with the 1/8" (3.5mm) 12-volt DC Trigger Output Jack
¶on the AVA7. If they are, you may
connect the Trigger Output Jack ¶ to the first component’s trigger input using one of the cables included with the AVA7, and then connect all compo- nents in daisy-chain fashion. 12V DC voltage at the AVA7 Trigger Output Jack ¶ becomes available approxi- mately two seconds after the AVA7 receives a 12V DC trigger input signal. This is done to prevent high-current draw on your home’s AC mains supply, which could be caused by multiple high-power audio components turning on at the same time.
8. AC Inlet
Your AVA7 is shipped with an IEC-type removable power cord that mates with the AC inlet on the rear panel. To ensure proper operation, use the supplied power cord. This amplifier is NOT a multivoltage unit; using a power cord that is not compatible with a 120V, 60Hz AC wall receptacle will void the warranty.

