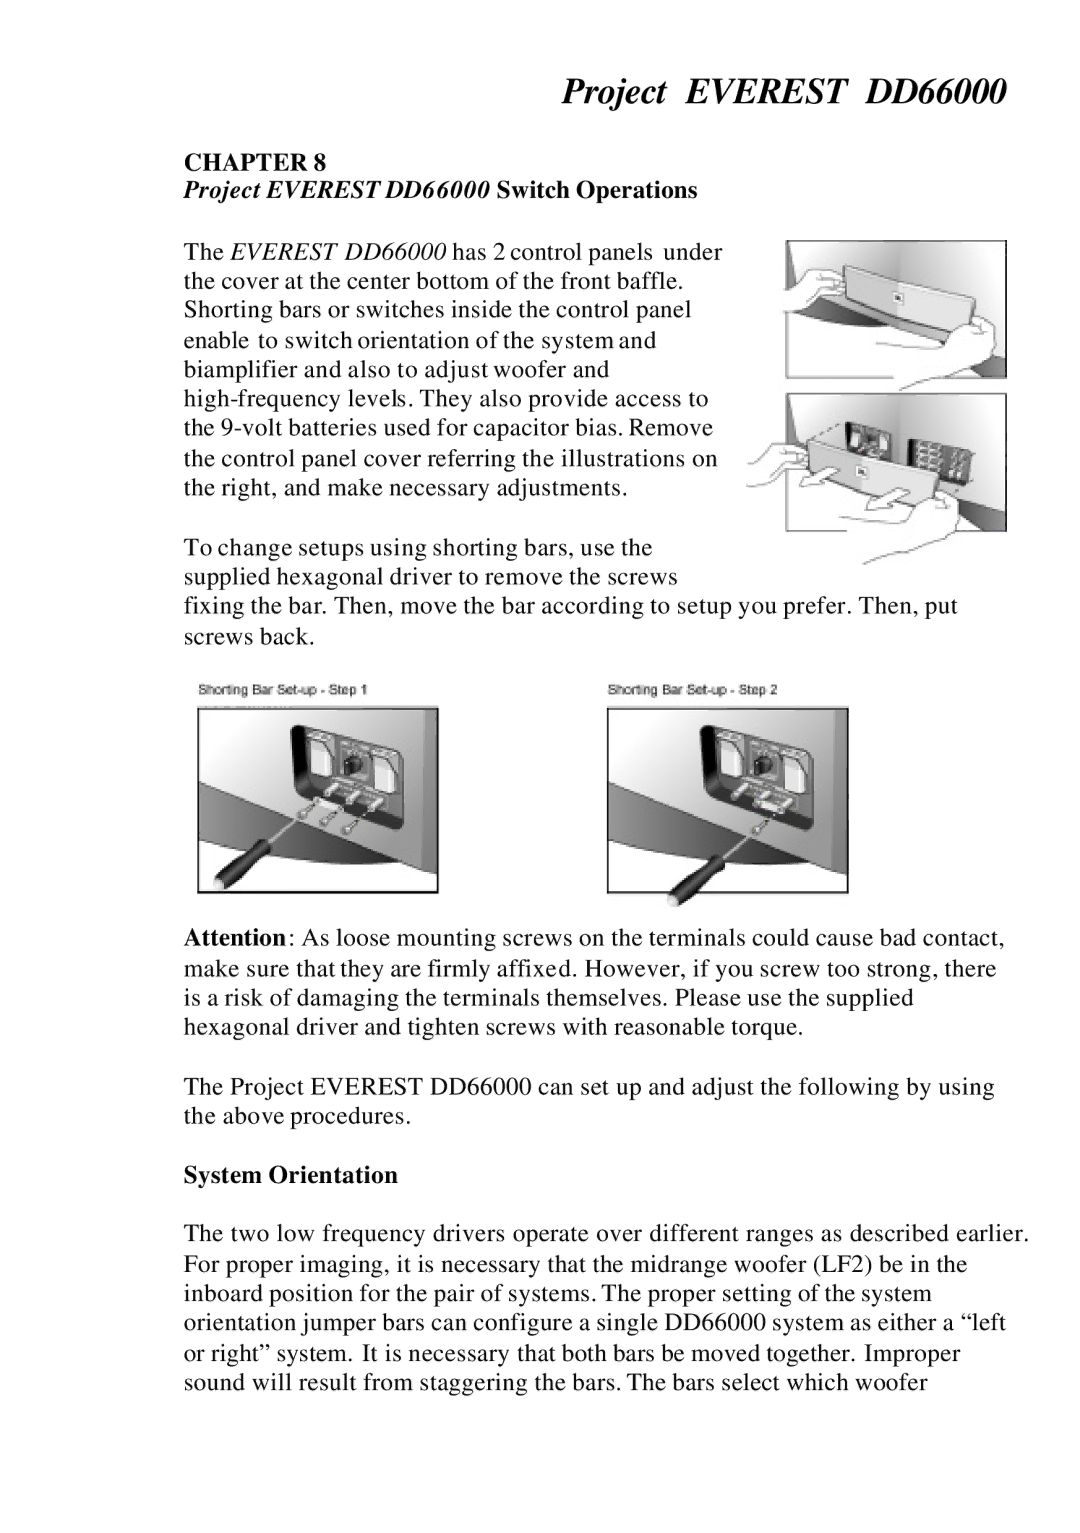
DD66000 specifications
The JBL DD66000 is a flagship model in the world of high-fidelity loudspeakers, designed to deliver an exceptional listening experience for audiophiles and music enthusiasts alike. With its rich heritage rooted in decades of acoustic engineering expertise, the DD66000 represents the pinnacle of JBL's commitment to superior audio performance.One of the standout features of the DD66000 is its innovative three-way speaker configuration. This includes a 15-inch bass driver, a 4-inch midrange driver, and a high-frequency compression driver that produces crystal-clear treble. This arrangement allows for a wide frequency response, ensuring that every note, from the lowest lows to the highest highs, is reproduced with remarkable accuracy and detail.
The DD66000 boasts advanced technologies that enhance its performance. The Integrated Waveguide Technology ensures that sound is evenly distributed throughout the listening space, creating a spacious and immersive soundstage. This technology minimizes distortion and ensures that the sound maintains its clarity, even at high volumes. Additionally, the dual high-frequency compression drivers provide extended dynamic range, allowing the speaker to handle both quiet and loud passages seamlessly.
Another key characteristic of the JBL DD66000 is its robust build quality. The speaker is encased in an elegantly crafted cabinet that not only minimizes resonance but also adds to its aesthetic appeal. The sleek design incorporates high-quality materials, giving it a premium look that complements any audio setup.
The DD66000 is also versatile in its connectivity options. Designed to work seamlessly with various audio components, it features compatibility with both analog and digital sources. Audiophiles can enjoy their favorite music in high-resolution formats, ensuring that every detail is captured and enjoyed.
In summary, the JBL DD66000 is a masterful integration of advanced technology and superior craftsmanship. With its three-way configuration, cutting-edge sound dispersion technology, and solid build quality, it stands out as a premier choice for serious listeners. Whether used in a dedicated home theater or a high-end audio setup, the DD66000 promises to deliver an unrivaled listening experience, making it a worthy investment for those who demand the best in audio fidelity.