I N S T A L L A T I O N S / S E T U P
Performing Auto EQ for MAIN OUT Loudspeakers
Before starting, check that the LOCKED indicator is off. If it is on, then use the rear panel switch (Feature 14 page 6) to enable Auto EQ buttons.
1.Press the round MAIN OUT SETUP 1&2 button (Figure 13). On release, the LED flashes, and the Auto EQ routine begins.
2.The EVO loudspeaker connected to MAIN OUTPUT 1A is instructed to Auto EQ and generates its own test signal. This lasts for a few seconds. It is recommended that during the test signal, background noise is kept to a minimum. It takes about 40 seconds after the test signal for the EVO loudspeaker’s
3.Once set, an instruction is automatically sent to the EVO loudspeaker connected to MAIN OUTPUT 2B. If an EVO loudspeaker is connected, then it also performs its own Auto EQ routine. If an EVO loud- speaker is not connected or when the EVO loudspeaker connected to MAIN OUTPUT 2B has completed its Auto EQ routine, the EQ SET indicator will light.
4.At the same instant EQ SET lights up, AEQ ON also illuminates indicating that Auto EQ is on.
Testing Auto EQ
1.Pass program signal to EVOi.net and listen to the result of Auto EQ.
2.Press the AUTO EQ button (the LED will illuminate when Auto EQ is active) and listen to the ‘Before & After’ Auto EQ.
SETTINGS |
| AUTO EQ SETTING |
|
LOCKED | EQ SET | EQ SET |
|
| MAIN OUT | AUX OUT |
|
TEST | SETUP 1&2 | SETUP 3&4 | AEQ ON |
| HOLD TO CLEAR MAIN HOLD TO CLEAR MAIN |
| |
Figure 14 - The Auto EQ Button
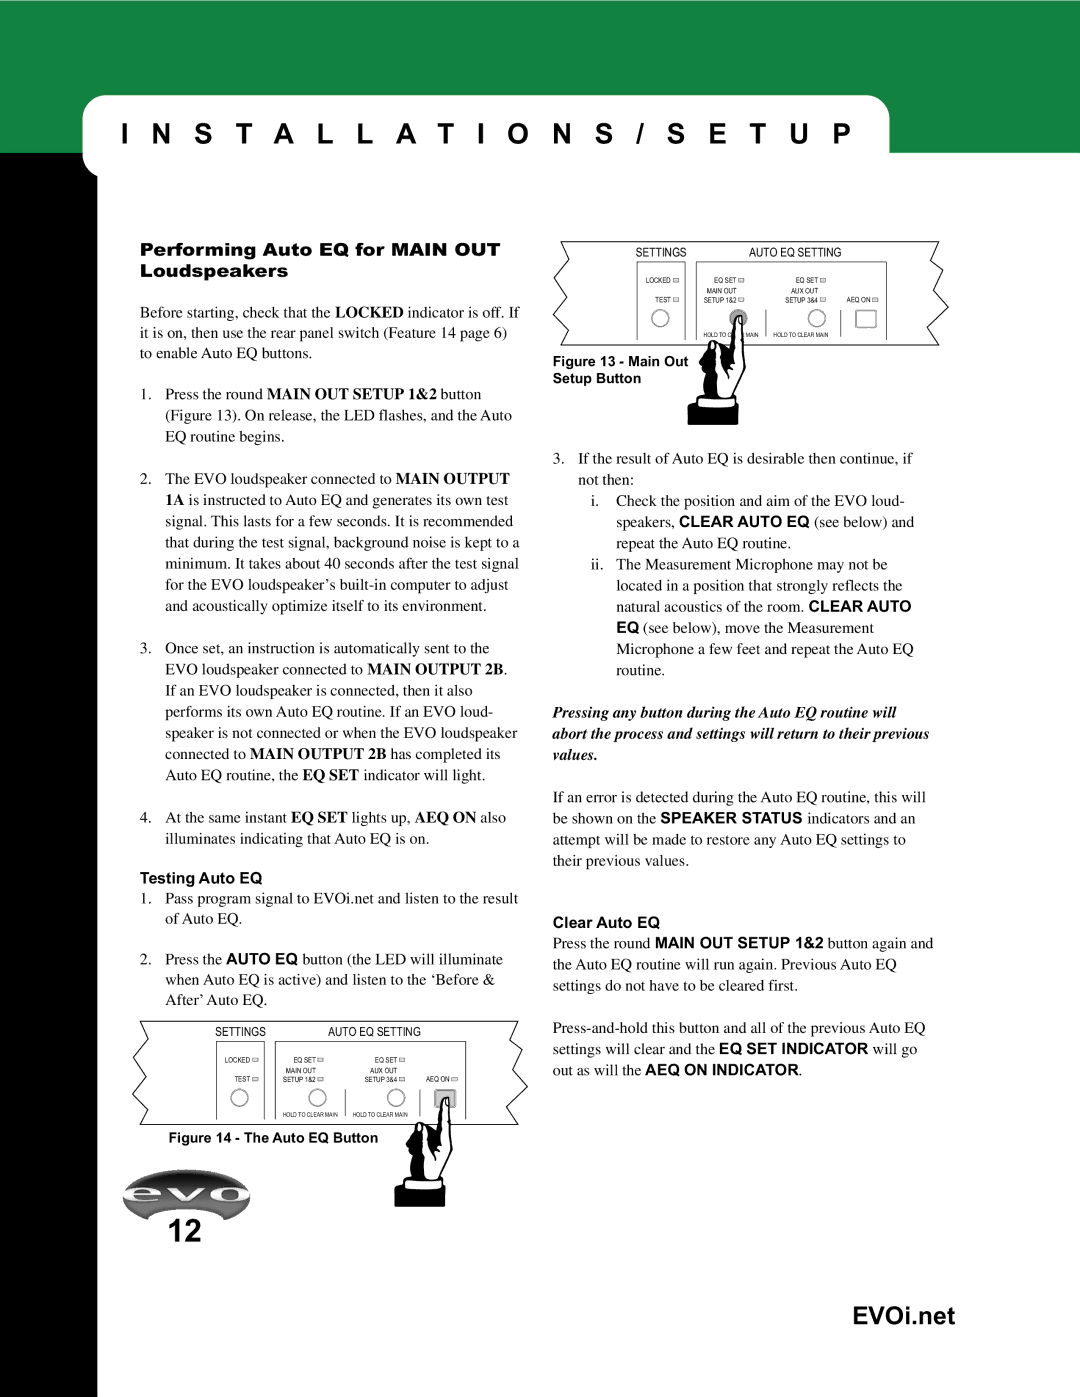
SETTINGS |
| AUTO EQ SETTING |
|
LOCKED | EQ SET | EQ SET |
|
| MAIN OUT | AUX OUT |
|
TEST | SETUP 1&2 | SETUP 3&4 | AEQ ON |
| HOLD TO CLEAR MAIN HOLD TO CLEAR MAIN |
| |
Figure 13 - Main Out
Setup Button
3.If the result of Auto EQ is desirable then continue, if not then:
i.Check the position and aim of the EVO loud- speakers, CLEAR AUTO EQ (see below) and repeat the Auto EQ routine.
ii.The Measurement Microphone may not be located in a position that strongly reflects the natural acoustics of the room. CLEAR AUTO EQ (see below), move the Measurement Microphone a few feet and repeat the Auto EQ routine.
Pressing any button during the Auto EQ routine will abort the process and settings will return to their previous values.
If an error is detected during the Auto EQ routine, this will be shown on the SPEAKER STATUS indicators and an attempt will be made to restore any Auto EQ settings to their previous values.
Clear Auto EQ
Press the round MAIN OUT SETUP 1&2 button again and the Auto EQ routine will run again. Previous Auto EQ settings do not have to be cleared first.
12