I N S T A L L A T I O N S / S E T U P
USING THE AUTO EQ SETTING
Placing Measurement Microphone for MAIN EVO Loudspeakers
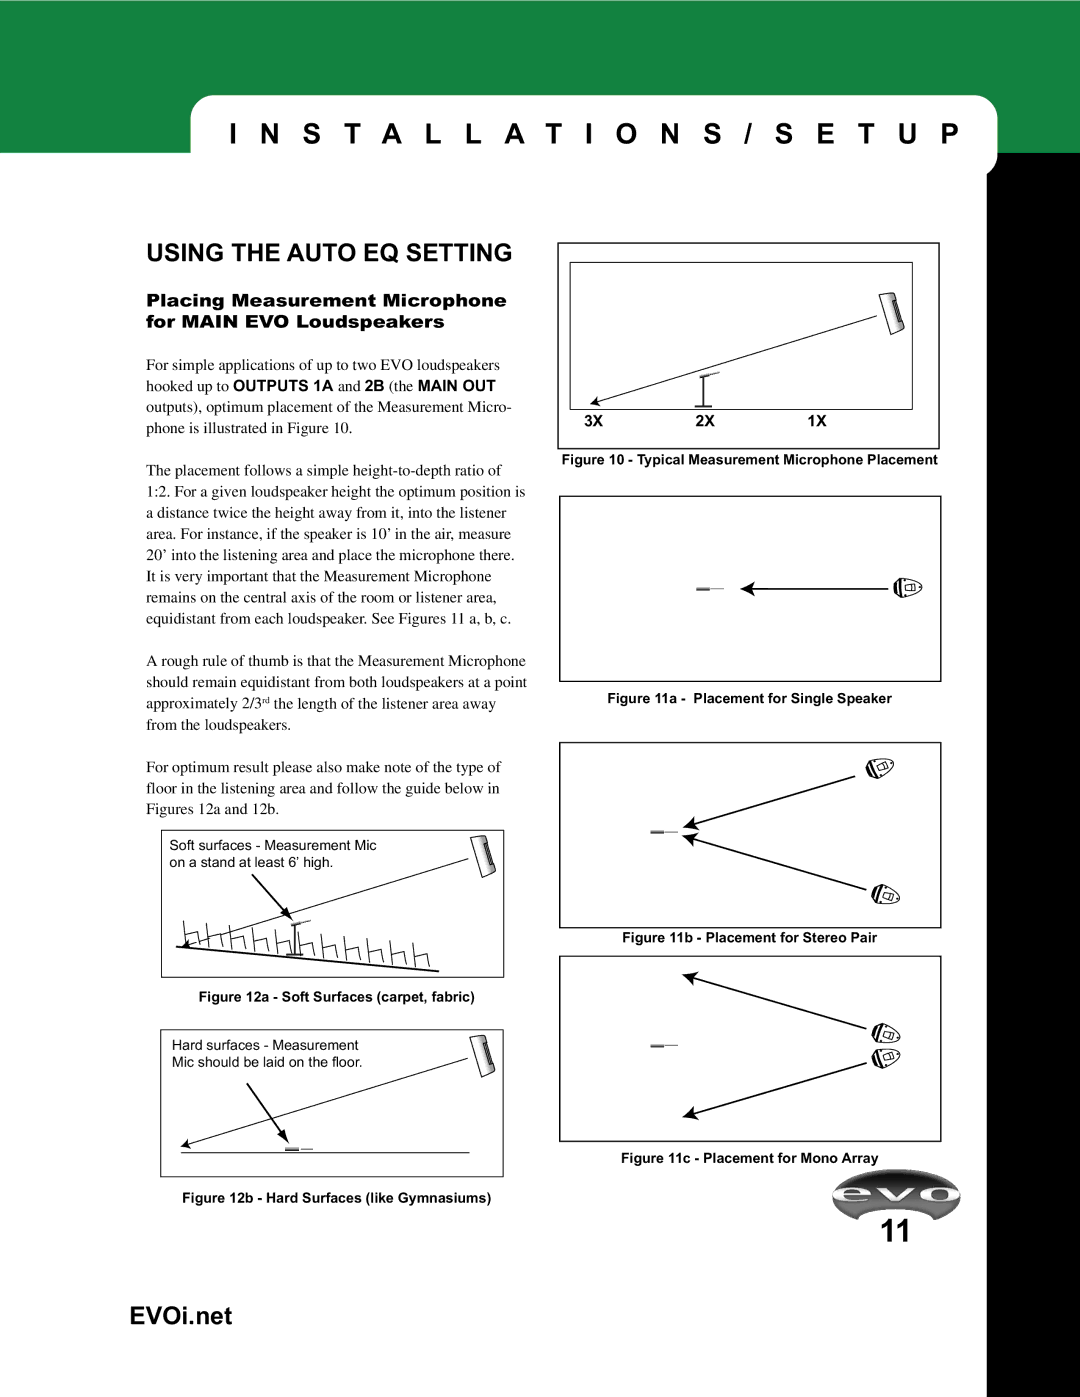
For simple applications of up to two EVO loudspeakers hooked up to OUTPUTS 1A and 2B (the MAIN OUT outputs), optimum placement of the Measurement Micro- phone is illustrated in Figure 10.
The placement follows a simple
A rough rule of thumb is that the Measurement Microphone should remain equidistant from both loudspeakers at a point approximately 2/3rd the length of the listener area away from the loudspeakers.
For optimum result please also make note of the type of floor in the listening area and follow the guide below in Figures 12a and 12b.
Soft surfaces - Measurement Mic on a stand at least 6’ high.
Figure 12a - Soft Surfaces (carpet, fabric)
Hard surfaces - Measurement
Mic should be laid on the floor.
Figure 12b - Hard Surfaces (like Gymnasiums)
3X | 2X | 1X |
Figure 10 - Typical Measurement Microphone Placement
Figure 11a - Placement for Single Speaker
Figure 11b - Placement for Stereo Pair
Figure 11c - Placement for Mono Array
11