
JIC4430X specifications
The Jenn-Air JIC4430X is a premium induction cooktop designed for cooking enthusiasts and those who seek modern kitchen technology. This high-performance cooktop integrates sophisticated design with smart features, ensuring that each meal is prepared with precision and ease.One of the standout features of the Jenn-Air JIC4430X is its powerful induction heating technology. Unlike traditional gas or electric cooktops, induction cooking uses electromagnetic energy to directly heat pots and pans, resulting in faster cooking times and enhanced energy efficiency. With four cooking zones, including an expansive 11-inch element, users can easily accommodate various pot sizes, enabling them to prepare multiple dishes simultaneously without compromising on space.
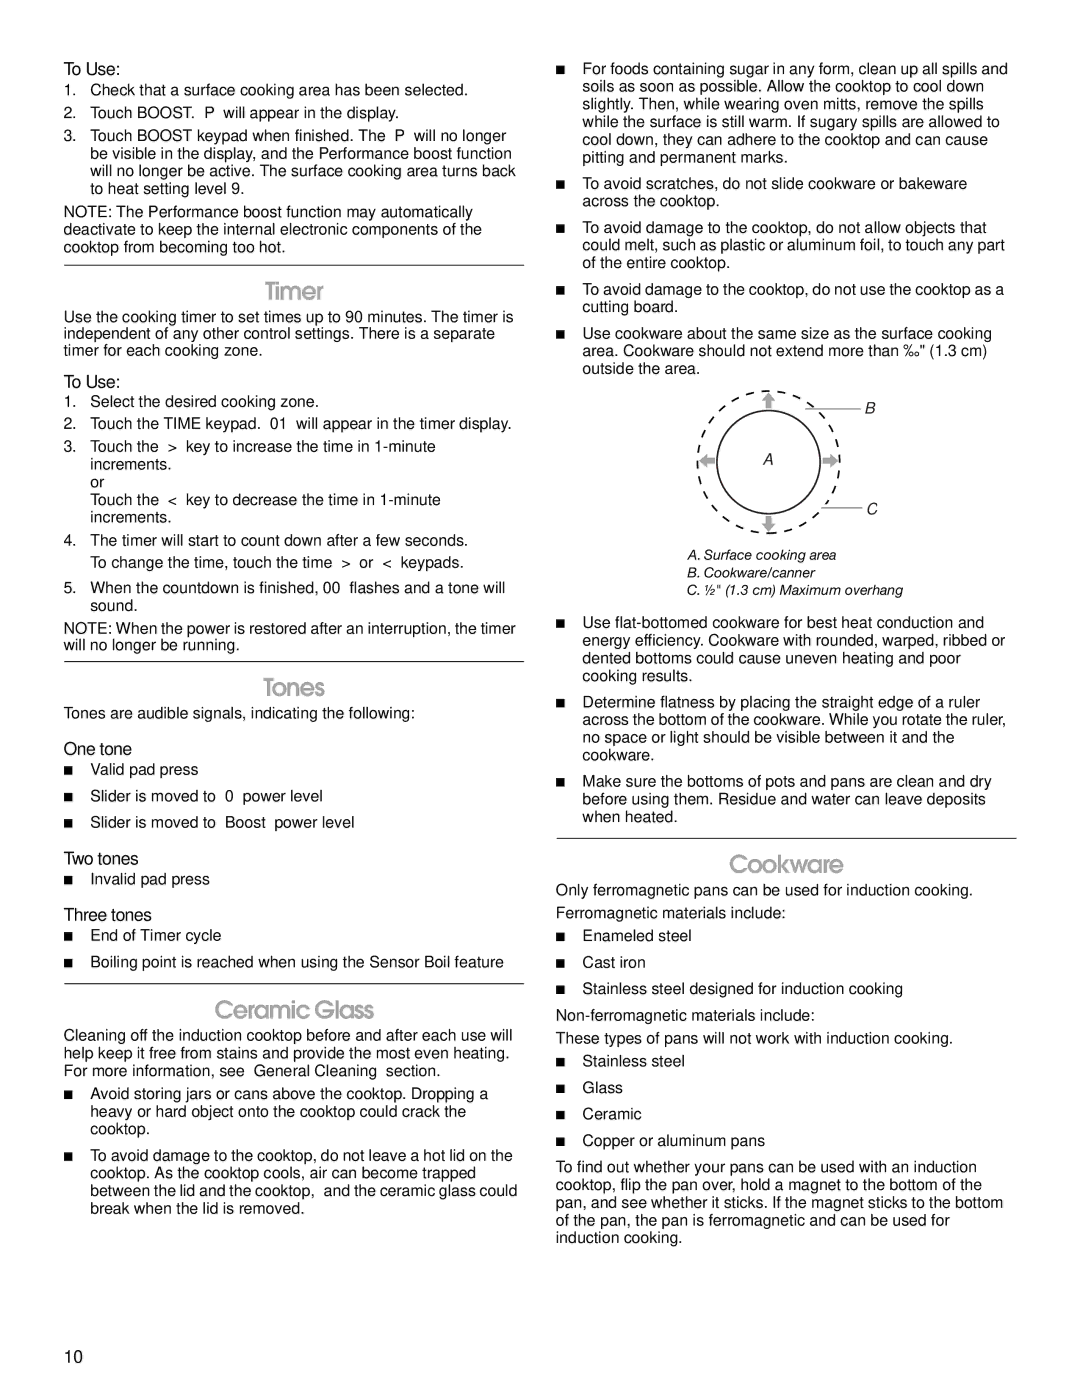
The cooktop is equipped with a sleek glass surface that not only adds a touch of elegance to the kitchen but also facilitates easy cleaning. Spills and stains can be wiped away effortlessly, making post-cooking clean-up a breeze. Additionally, the cooktop features a stainless steel trim that further enhances its contemporary aesthetic, seamlessly fitting into any modern kitchen design.
Another innovative aspect of the Jenn-Air JIC4430X is its precise temperature control options. With a range of adjustable heat settings, users can swap between gentle simmering and high-heat searing, giving them the ability to master various cooking techniques. The cooktop also incorporates a "Keep Warm" function, maintaining the ideal temperature for dishes until they are ready to serve.
Safety is paramount in kitchen appliances, and the Jenn-Air JIC4430X does not disappoint. With features such as child lock and automatic shut-off, users can feel assured of their safety while cooking. Additionally, the induction technology only heats the cookware, reducing the chances of burns from the cooktop itself.
Enhanced by touchscreen controls, the Jenn-Air JIC4430X allows for easy and intuitive operation. The control panel provides seamless access to settings and power levels, making it easy for chefs of all experience levels to utilize the cooktop effectively.
In summary, the Jenn-Air JIC4430X induction cooktop combines high-efficiency cooking technology with advanced features and elegant design. Whether it's the rapid heating capabilities, precise temperature control, or its intuitive interface, this cooktop is engineered for those who demand both performance and style in their culinary adventures. Embracing modern innovation, the JIC4430X is set to elevate the cooking experience for home chefs everywhere.