Dust Cover Latch
The dust cover latch prevents the dust cover from accidentally opening. To release the latch, press inward on the dust cover knob (D, Figure 21). This will cause the dust cover center to flex and release the latch. Note that the dust cover latch can be adjusted in or out by loosening the screw (E, Figure 21).
Conveyor Belt Tension/Tracking
Conveyor belt tension and tracking adjustments may occasionally be necessary during
IMPORTANT: The conveyor belt has been over- tensioned for shipping purposes. It must be re- tensioned before operating the sander.
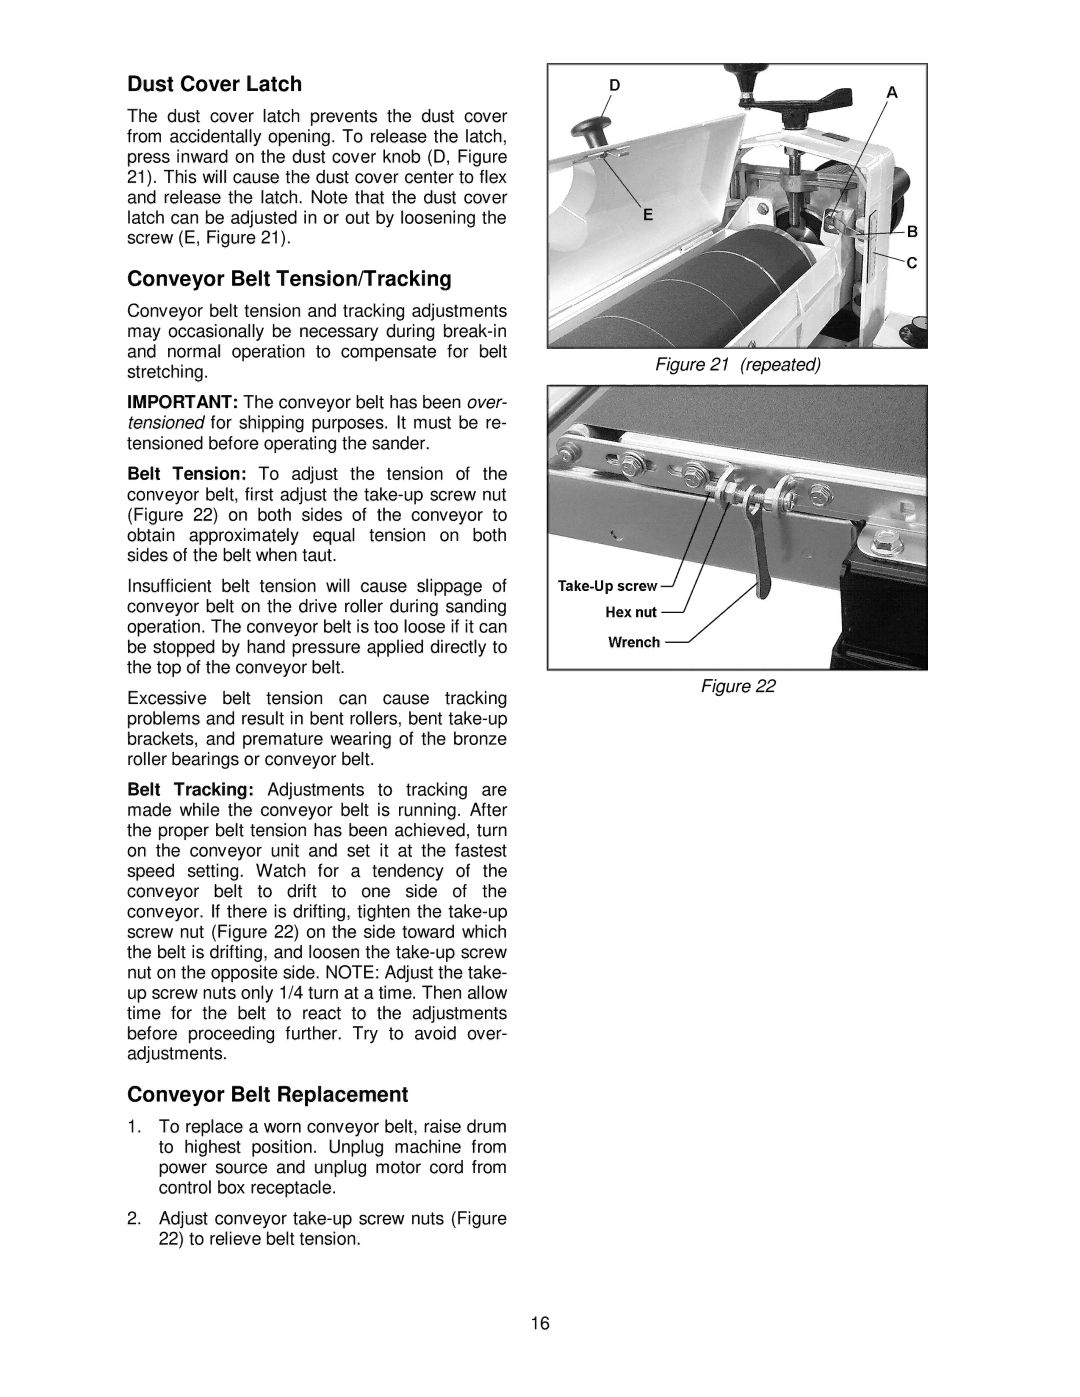
Belt Tension: To adjust the tension of the conveyor belt, first adjust the
Insufficient belt tension will cause slippage of conveyor belt on the drive roller during sanding operation. The conveyor belt is too loose if it can be stopped by hand pressure applied directly to the top of the conveyor belt.
Excessive belt tension can cause tracking problems and result in bent rollers, bent
Belt Tracking: Adjustments to tracking are made while the conveyor belt is running. After the proper belt tension has been achieved, turn on the conveyor unit and set it at the fastest speed setting. Watch for a tendency of the conveyor belt to drift to one side of the conveyor. If there is drifting, tighten the
Conveyor Belt Replacement
1.To replace a worn conveyor belt, raise drum to highest position. Unplug machine from power source and unplug motor cord from control box receptacle.
2.Adjust conveyor
Figure 21 (repeated)
Figure 22
16