Read and understand the entire contents of this manual before attempting
Assembly of Stand
Tools required for assembly:
Two
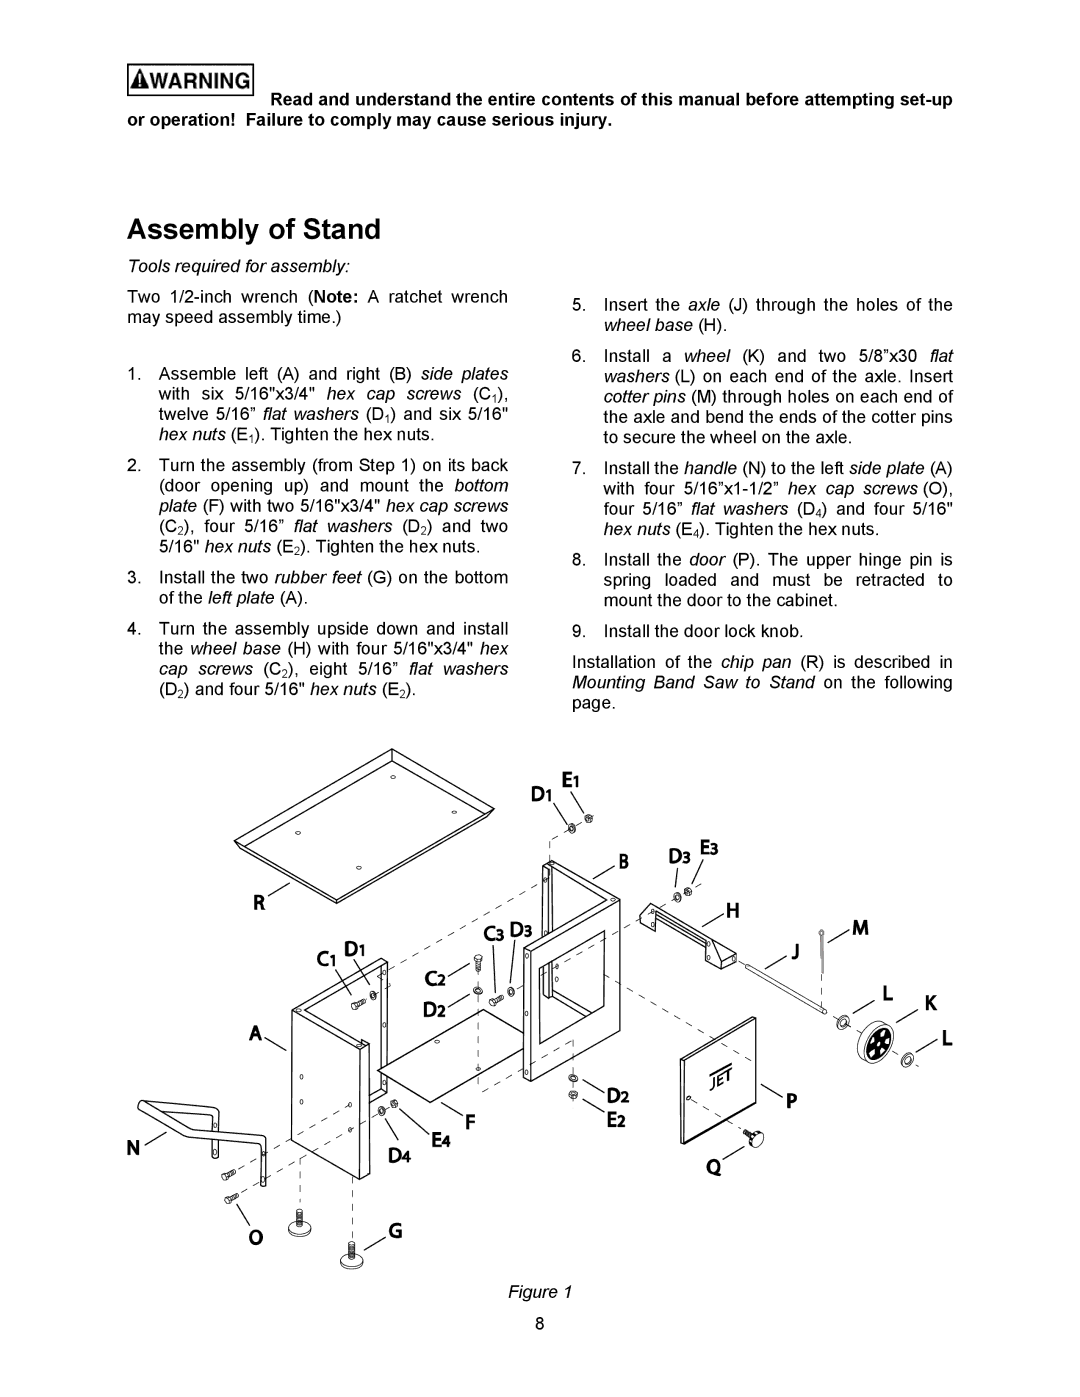
1.Assemble left (A) and right (B) side plates with six 5/16"x3/4" hex cap screws (C1), twelve 5/16” flat washers (D1) and six 5/16" hex nuts (E1). Tighten the hex nuts.
2.Turn the assembly (from Step 1) on its back (door opening up) and mount the bottom plate (F) with two 5/16"x3/4" hex cap screws (C2), four 5/16” flat washers (D2) and two 5/16" hex nuts (E2). Tighten the hex nuts.
3.Install the two rubber feet (G) on the bottom of the left plate (A).
4.Turn the assembly upside down and install the wheel base (H) with four 5/16"x3/4" hex cap screws (C2), eight 5/16” flat washers (D2) and four 5/16" hex nuts (E2).
5.Insert the axle (J) through the holes of the wheel base (H).
6.Install a wheel (K) and two 5/8”x30 flat washers (L) on each end of the axle. Insert cotter pins (M) through holes on each end of the axle and bend the ends of the cotter pins to secure the wheel on the axle.
7.Install the handle (N) to the left side plate (A) with four
8.Install the door (P). The upper hinge pin is spring loaded and must be retracted to mount the door to the cabinet.
9.Install the door lock knob.
Installation of the chip pan (R) is described in Mounting Band Saw to Stand on the following page.
Figure 1
8