Installing Fence to Bed
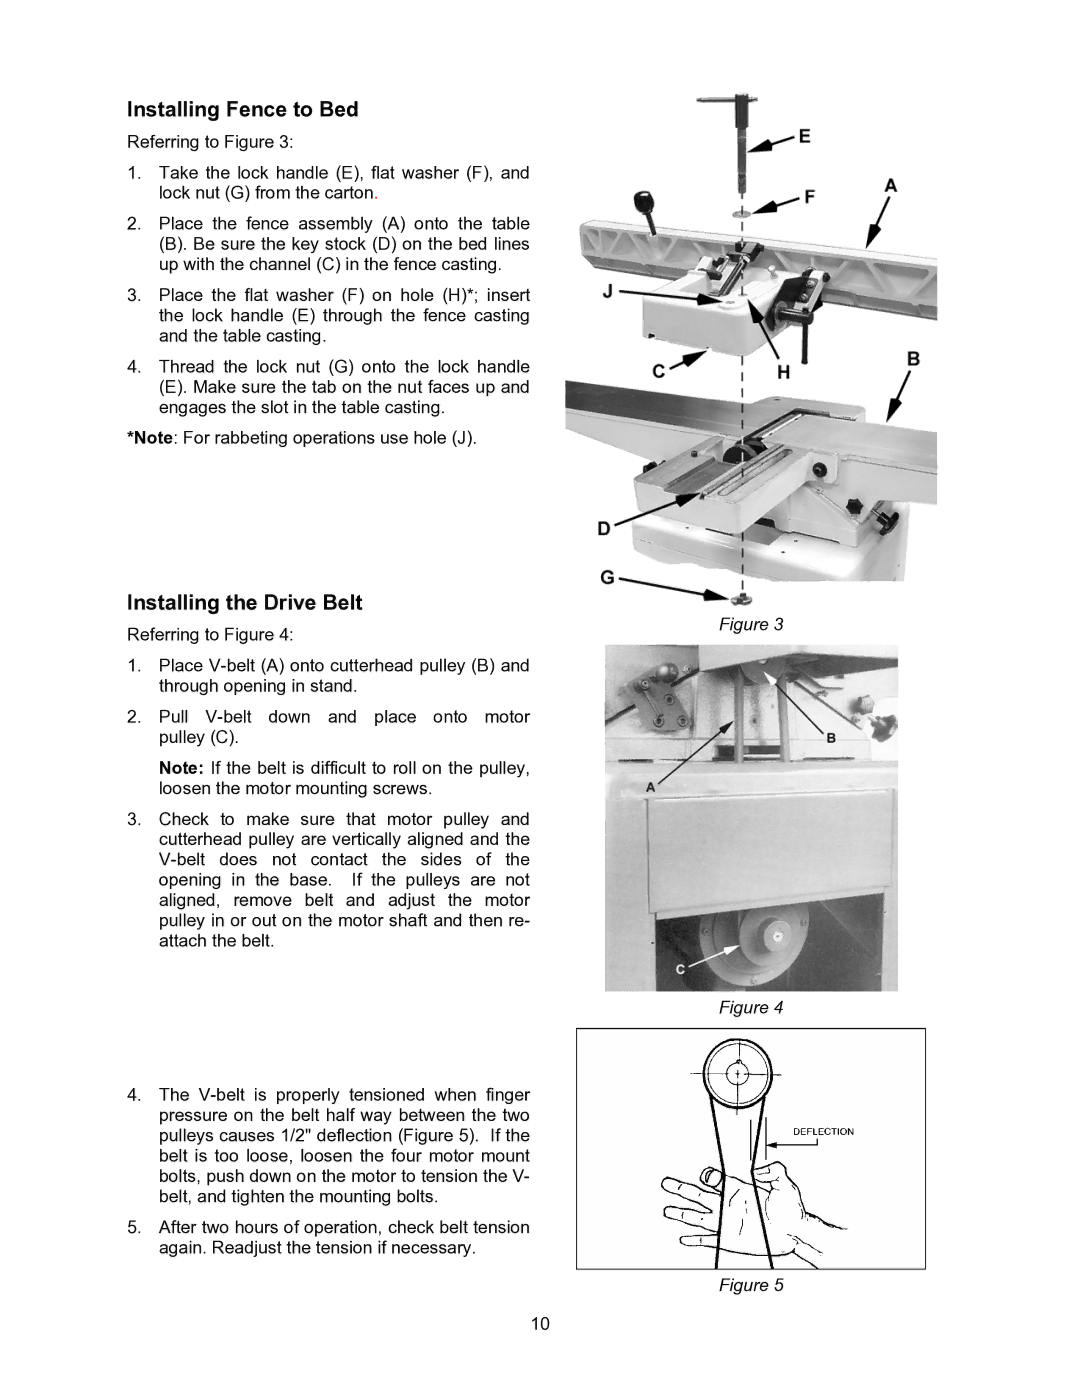
Referring to Figure 3:
1.Take the lock handle (E), flat washer (F), and lock nut (G) from the carton.
2.Place the fence assembly (A) onto the table
(B). Be sure the key stock (D) on the bed lines up with the channel (C) in the fence casting.
3.Place the flat washer (F) on hole (H)*; insert the lock handle (E) through the fence casting and the table casting.
4.Thread the lock nut (G) onto the lock handle
(E). Make sure the tab on the nut faces up and engages the slot in the table casting.
*Note: For rabbeting operations use hole (J).
Installing the Drive Belt
Referring to Figure 4:
1.Place
2.Pull
Note: If the belt is difficult to roll on the pulley, loosen the motor mounting screws.
3.Check to make sure that motor pulley and cutterhead pulley are vertically aligned and the
4.The
5.After two hours of operation, check belt tension again. Readjust the tension if necessary.
Figure 3
Figure 4
Figure 5
10
