Chuck Extension Adaptor
The provided Chuck Extension Adaptor is used to lower the chuck for use with
1.To install the adaptor, first remove the chisel and auger.
2.It may be necessary to remove the bushing to provide enough clearance when installing the chuck and adaptor. If so, loosen the set screw and remove the bushing.
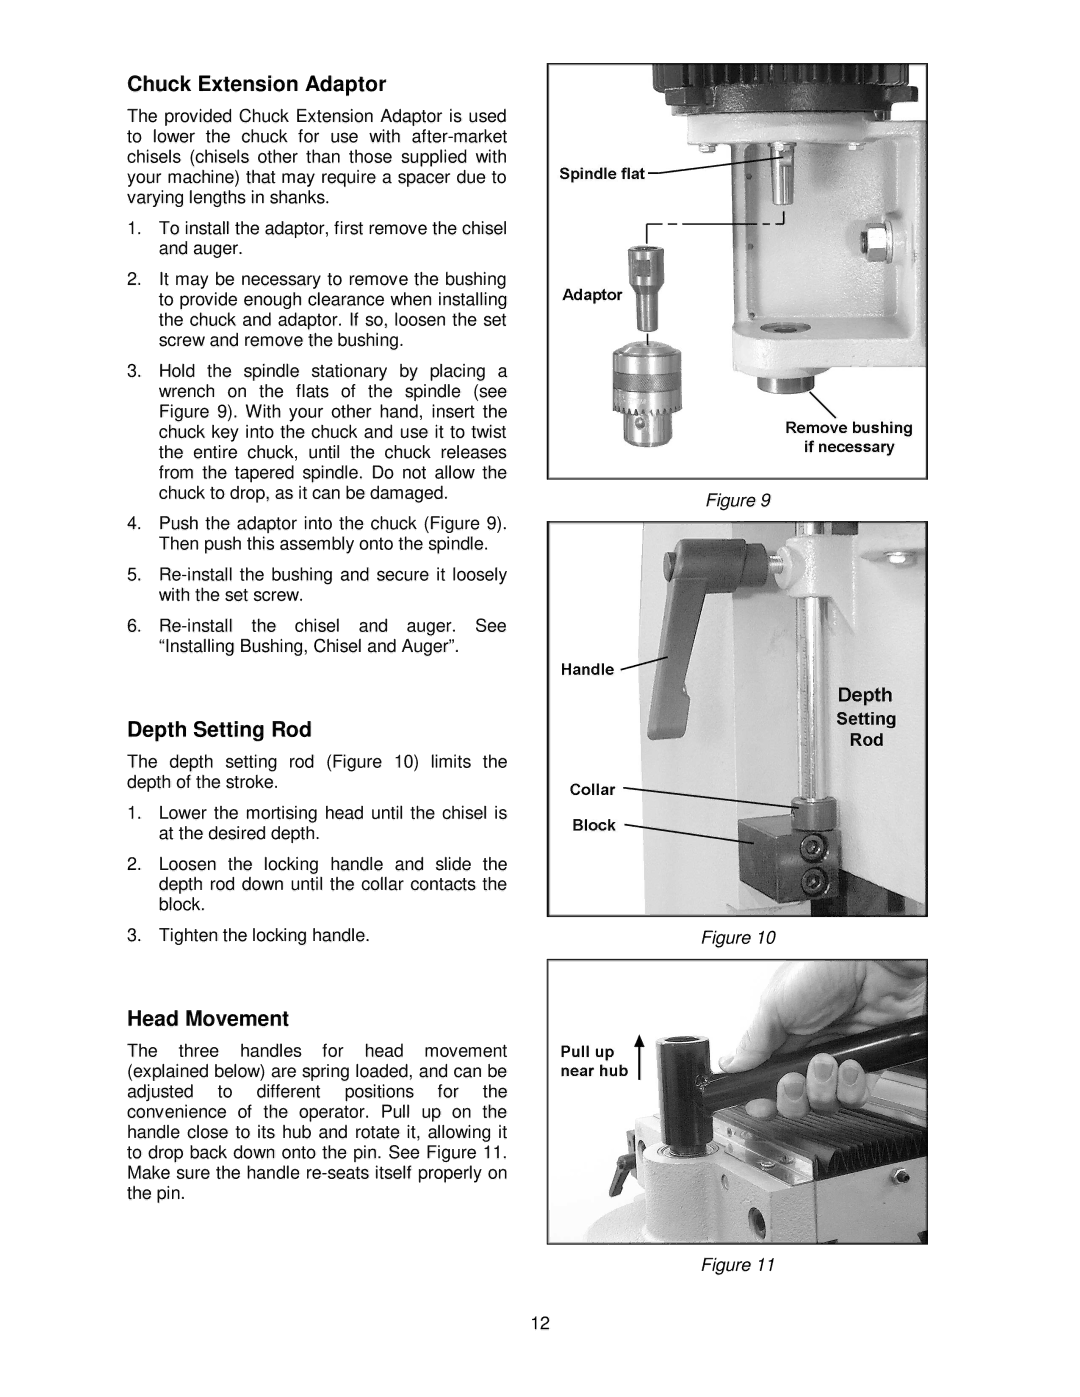
3.Hold the spindle stationary by placing a wrench on the flats of the spindle (see Figure 9). With your other hand, insert the chuck key into the chuck and use it to twist the entire chuck, until the chuck releases from the tapered spindle. Do not allow the chuck to drop, as it can be damaged.
4.Push the adaptor into the chuck (Figure 9). Then push this assembly onto the spindle.
5.
6.
Depth Setting Rod
The depth setting rod (Figure 10) limits the depth of the stroke.
1.Lower the mortising head until the chisel is at the desired depth.
2.Loosen the locking handle and slide the depth rod down until the collar contacts the block.
3.Tighten the locking handle.
Head Movement
The three handles for head movement (explained below) are spring loaded, and can be adjusted to different positions for the convenience of the operator. Pull up on the handle close to its hub and rotate it, allowing it to drop back down onto the pin. See Figure 11. Make sure the handle
Figure 9
Figure 10
Figure 11
12
