Chisel Parallel to Workpiece
For accurate mortise cuts, the chisel must be parallel to the workpiece. The workpiece should be cut square for this adjustment to be accurate. Check and adjust this parallelism as follows:
1.Move the head forward far enough that the workpiece can be inserted between fence and chisel.
2.Slightly loosen the set screw to allow the chisel to be rotated.
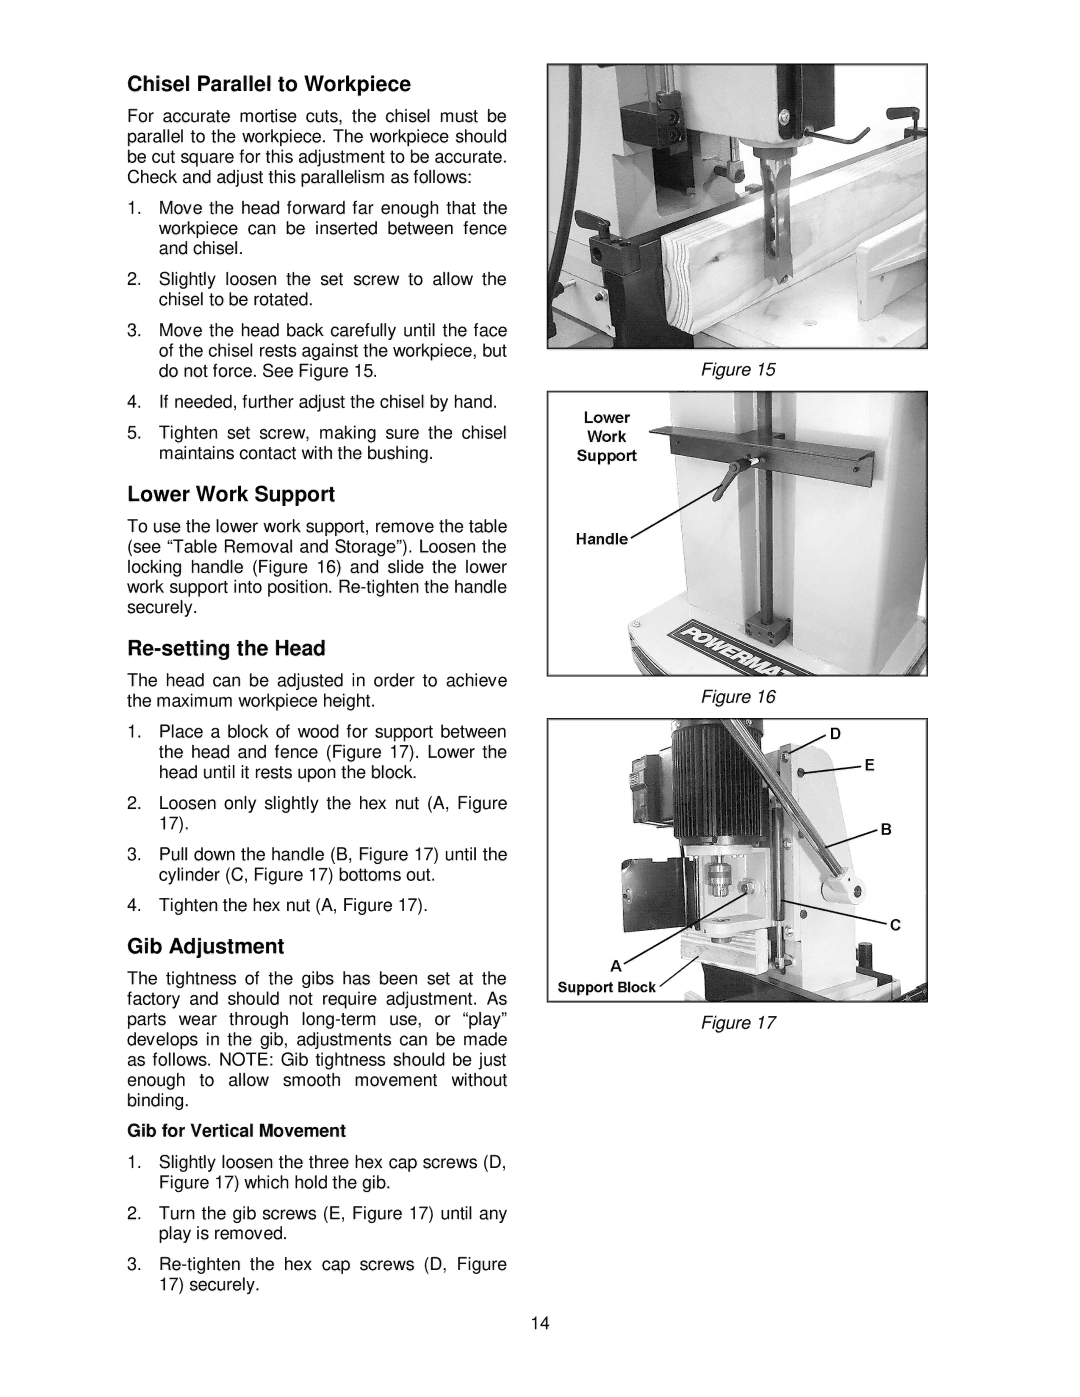
3.Move the head back carefully until the face of the chisel rests against the workpiece, but do not force. See Figure 15.
4.If needed, further adjust the chisel by hand.
5.Tighten set screw, making sure the chisel maintains contact with the bushing.
Lower Work Support
To use the lower work support, remove the table (see “Table Removal and Storage”). Loosen the locking handle (Figure 16) and slide the lower work support into position.
Re-setting the Head
The head can be adjusted in order to achieve the maximum workpiece height.
1.Place a block of wood for support between the head and fence (Figure 17). Lower the head until it rests upon the block.
2.Loosen only slightly the hex nut (A, Figure 17).
3.Pull down the handle (B, Figure 17) until the cylinder (C, Figure 17) bottoms out.
4.Tighten the hex nut (A, Figure 17).
Gib Adjustment
The tightness of the gibs has been set at the factory and should not require adjustment. As parts wear through
Gib for Vertical Movement
1.Slightly loosen the three hex cap screws (D, Figure 17) which hold the gib.
2.Turn the gib screws (E, Figure 17) until any play is removed.
3.
Figure 15
Figure 16
Figure 17
14
