
AFS-1000B, M-708620 specifications
The Jet Tools M-708620, AFS-1000B is a cutting-edge air filtration system designed for woodworking shops and environments where fine dust and airborne particles can pose health risks. This powerful device is engineered to provide high-efficiency filtration, ensuring a cleaner, safer workspace for woodworkers and hobbyists alike.One of the standout features of the AFS-1000B is its three-stage filtration process. The system includes a pre-filter, a main filter, and a HEPA filter. The pre-filter captures larger particles, such as wood chips and sawdust, while the main filter is designed to trap smaller particles. The HEPA filter is capable of filtering out 99.97% of particles down to 0.3 microns, including many harmful allergens and contaminants. This multi-tiered filtration system ensures that the air quality in your workshop remains at optimal levels, promoting a healthier work environment.
The AFS-1000B boasts a powerful motor that provides an impressive air movement of up to 1,000 CFM (cubic feet per minute), which allows for effective circulation of air throughout the shop. It features a durable, high-efficiency motor designed to run quietly, minimizing noise disruption in the workspace. The unit also offers multiple fan speeds, enabling users to select the appropriate level of filtration based on the intensity of the dust-generating activity.
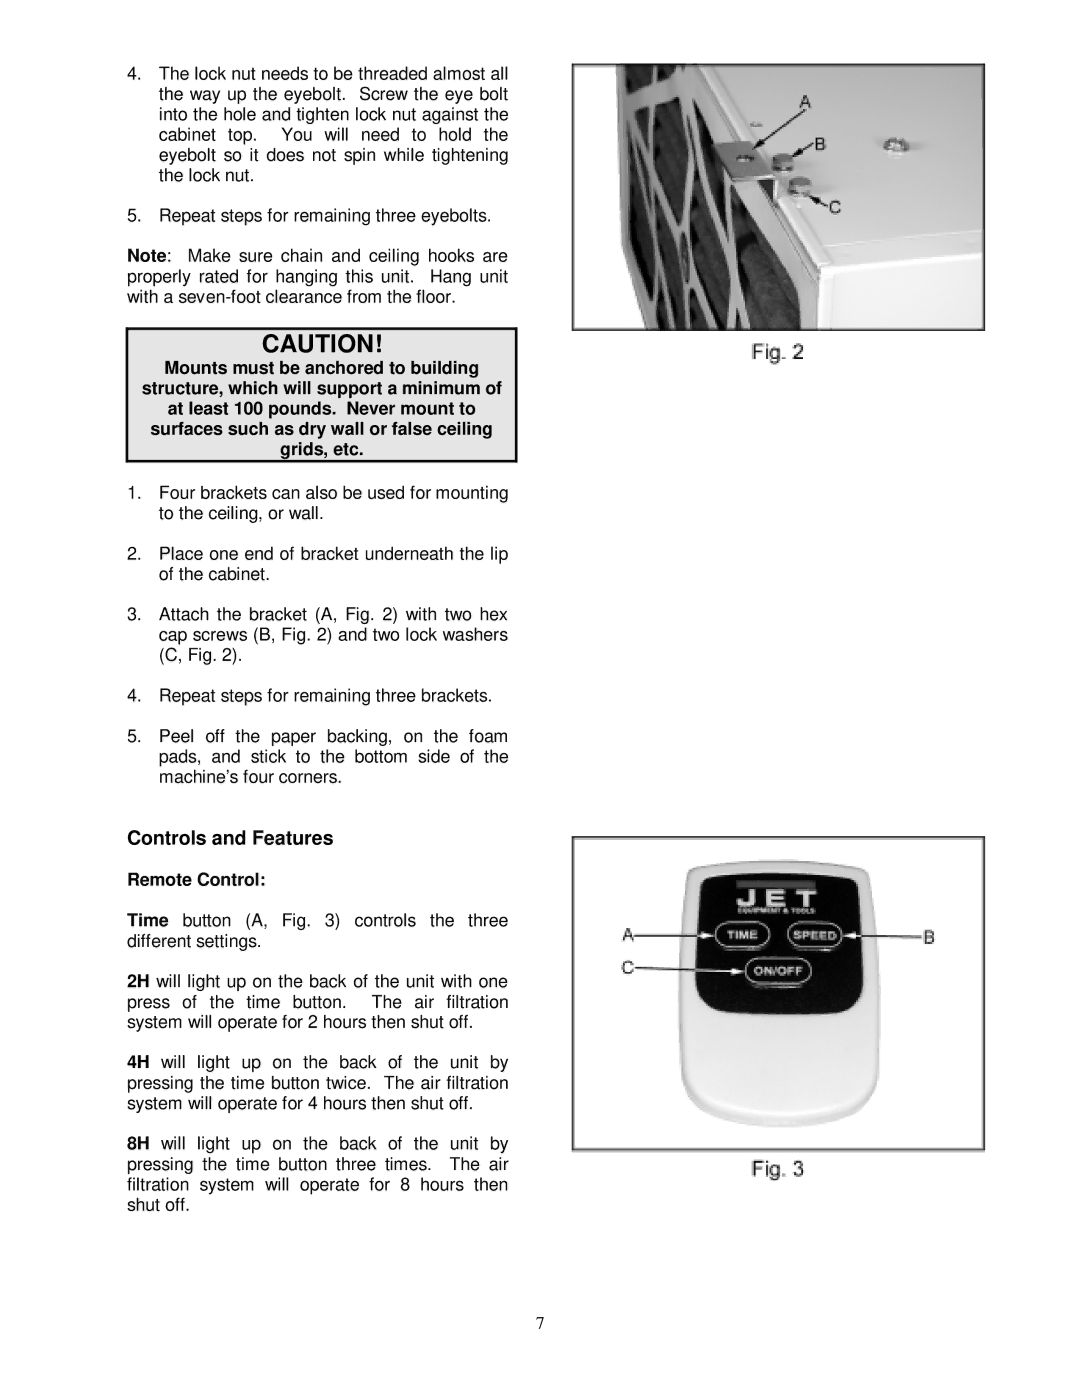
Ease of use is another key characteristic of the Jet Tools AFS-1000B. It features a convenient remote control for operation, allowing users to adjust settings from a distance. The built-in timer function can be programmed for up to 4 hours, automatically shutting off the unit after the designated time, freeing users to focus on their projects without worrying about the system running continuously.
Additionally, the AFS-1000B is designed for versatility. It can be mounted on the ceiling or placed on the floor, providing flexibility in how it fits into your workspace. Its compact design allows it to fit seamlessly in various shop layouts while its robust construction ensures durability and longevity.
In summary, the Jet Tools M-708620, AFS-1000B air filtration system combines high-efficiency filtration technology with user-friendly features. It is an essential investment for anyone serious about woodworking, ensuring cleaner air and a healthier work environment while enhancing overall productivity and comfort.