Adjusting Fence Parallel to the Miter Slot
1.Place the fence next to the outside edge of the right miter slot and lock it.
2.The fence should be even with the miter slot from front to back.
3.If the fence is not even along the length of the miter slot, unlock the fence, remove it and turn upside down.
4.Adjust one of the two setscrews (A, Fig. 18) until the fence is even with the miter slot edge along its entire length when locked.
Note: You may need to
Clamping Pressure
The XACTA Fence II has been adjusted at the factory to lock securely when the lock handle is pushed down. If adjustment is needed:
1.Unlock the fence.
2.Remove the fence from the guide rail.
3.Turn the fence over.
4.Adjust each of the two setscrews (A, Fig. 18) exactly the same number of rotations until the fence is held securely when the lock handle is pushed down.
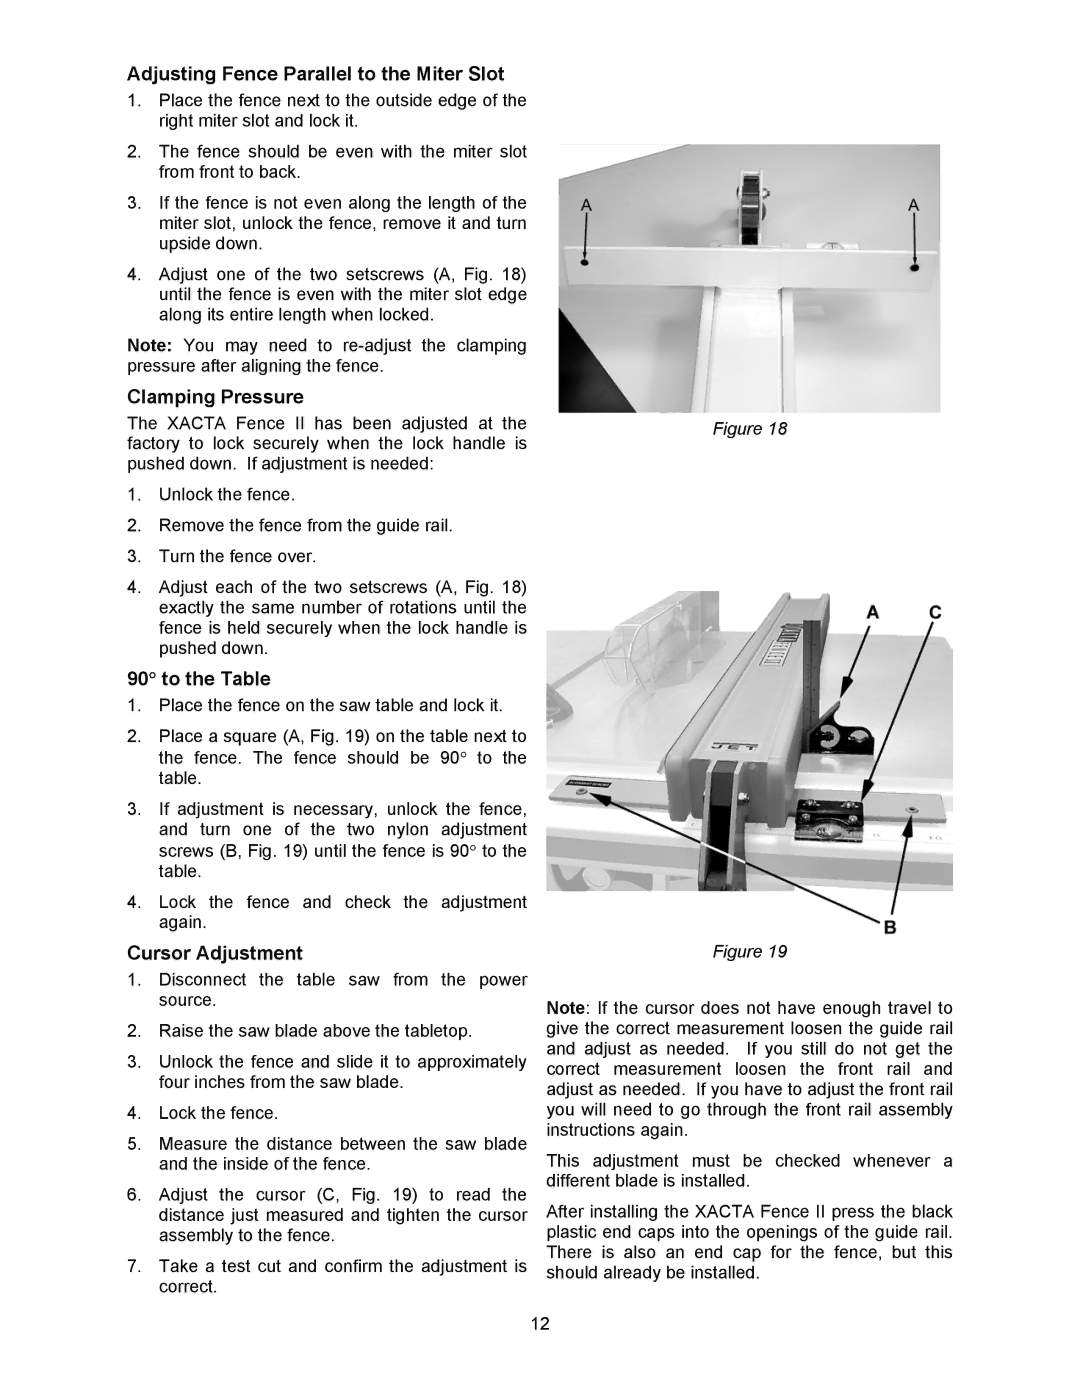
90° to the Table
1.Place the fence on the saw table and lock it.
2.Place a square (A, Fig. 19) on the table next to the fence. The fence should be 90° to the table.
3.If adjustment is necessary, unlock the fence, and turn one of the two nylon adjustment screws (B, Fig. 19) until the fence is 90° to the table.
4.Lock the fence and check the adjustment again.
Cursor Adjustment
1.Disconnect the table saw from the power source.
2.Raise the saw blade above the tabletop.
3.Unlock the fence and slide it to approximately four inches from the saw blade.
4.Lock the fence.
5.Measure the distance between the saw blade and the inside of the fence.
6.Adjust the cursor (C, Fig. 19) to read the distance just measured and tighten the cursor assembly to the fence.
7.Take a test cut and confirm the adjustment is correct.
Figure 18
Figure 19
Note: If the cursor does not have enough travel to give the correct measurement loosen the guide rail and adjust as needed. If you still do not get the correct measurement loosen the front rail and adjust as needed. If you have to adjust the front rail you will need to go through the front rail assembly instructions again.
This adjustment must be checked whenever a different blade is installed.
After installing the XACTA Fence II press the black plastic end caps into the openings of the guide rail. There is also an end cap for the fence, but this should already be installed.
12