Back Rail Installation
1.Locate the back rail which is 2" x 2" with holes running along one side only. The height of the back rail when attached to the saw is not critical.
2.Align the holes in the back rail to the holes in the table top, as shown in Figure 4.
Figure 4
3.Secure the back rail to the
Figure 5
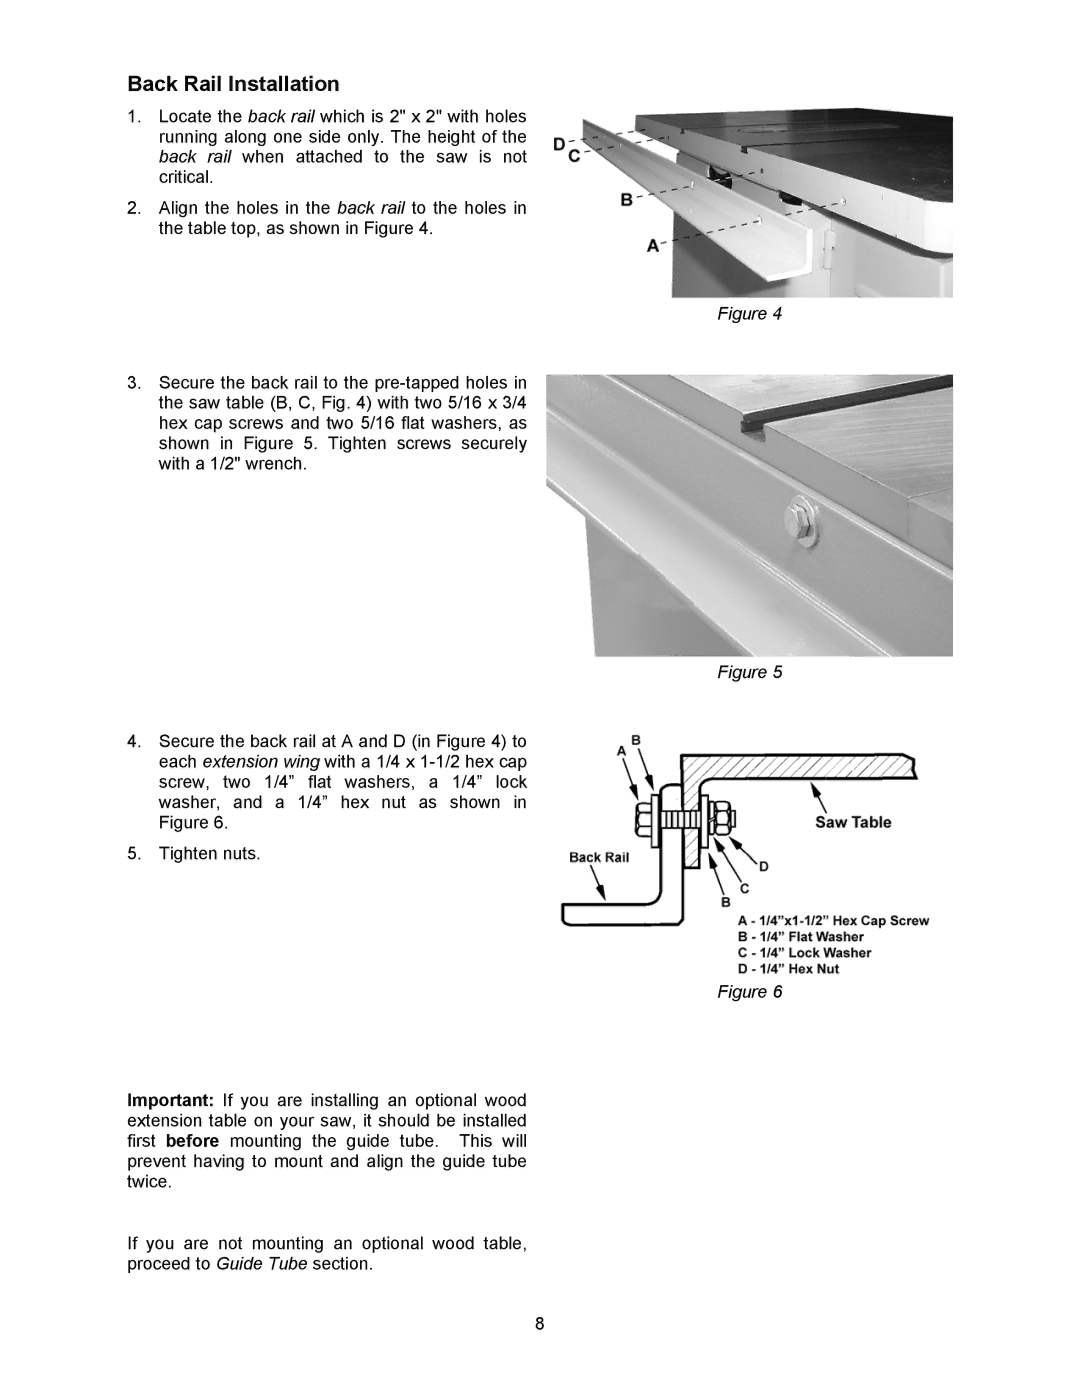
4.Secure the back rail at A and D (in Figure 4) to each extension wing with a 1/4 x
5.Tighten nuts.
Figure 6
Important: If you are installing an optional wood extension table on your saw, it should be installed first before mounting the guide tube. This will prevent having to mount and align the guide tube twice.
If you are not mounting an optional wood table, proceed to Guide Tube section.
8