
CA-MXG50 specifications
The JVC CA-MXG50 is a sophisticated home audio system designed for those who appreciate quality sound and versatile features. This compact yet powerful unit incorporates a variety of technologies aimed at delivering an exceptional audio experience.One of the standout features of the CA-MXG50 is its high-power output capabilities. The system boasts a robust amplifier that produces an impressive audio performance, making it suitable for everything from casual listening to lively parties. With a total power output of 200 watts, the speakers are designed to fill a room with rich and dynamic sound.
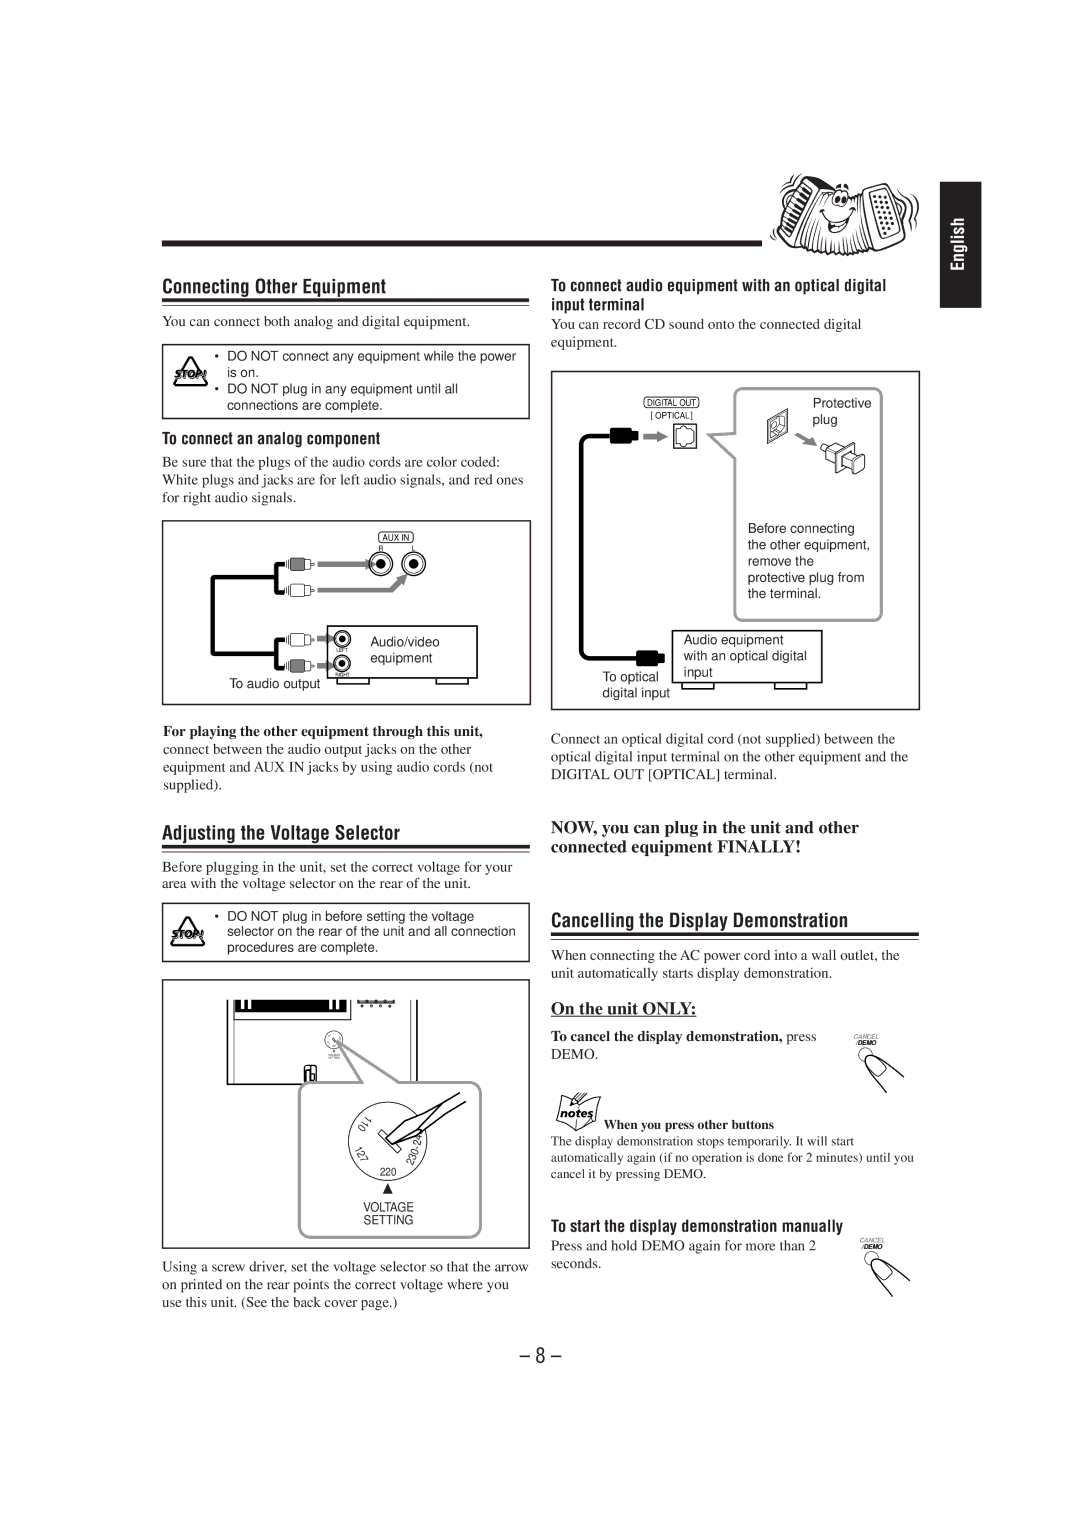
The CA-MXG50 supports multiple audio sources, ensuring that users can enjoy their favorite music in various formats. It includes a CD player, cassette deck, AM/FM radio tuner, and USB port for connecting external devices. This versatility allows users to play their extensive music collections, whether they're on CD, cassette, or digital files. The inclusion of a USB port supports MP3 files, making it easy to enjoy digital music directly from a flash drive.
Another key characteristic of the JVC CA-MXG50 is its enhanced bass response. The unit features a powerful subwoofer that delivers deep and punchy bass, making it ideal for genres like hip-hop and electronic music. The system also incorporates JVC's proprietary technologies that optimize sound quality, ensuring a clear and balanced audio experience with minimal distortion.
In terms of design, the CA-MXG50 is sleek and modern, featuring a compact size that makes it easy to fit into most home spaces. The user interface is intuitive, with clearly labeled buttons and a bright LED display that makes navigation straightforward. The remote control provides added convenience, allowing users to adjust settings from a distance.
Connectivity options are abundant, with the CA-MXG50 including aux inputs for additional devices. This means users can easily connect smartphones, tablets, or other audio sources. Furthermore, the system is equipped with headphone output for private listening, a great feature for late-night sessions.
Overall, the JVC CA-MXG50 is a versatile and powerful audio system that caters to various listening preferences. Its blend of high-quality sound, modern design, and easy connectivity options make it an attractive choice for music lovers looking to enhance their home audio experience. Whether for personal enjoyment or entertaining guests, the CA-MXG50 stands out as a reliable and enjoyable audio solution.