Picture Shift Setting
When projecting images with black bands at the top and bottom (cinema image), use this to move the image up or down while retaining one of the black bands at the upper or lower end.
ON | OPERATE | OFF |
|
CHP | LIGHT | TEST | b, e |
MENU |
| EXIT |
|
| ENTER |
| c, d |
|
|
| |
PRESET |
| HIDE |
|
T
ZOOMFOCUS
W
RS232C Rx Tx
| MENU | OPERATE |
| EXIT ON | |
T | + | b, e |
|
| OPERATE |
ZOOM | FOCUS | OFF |
| ||
|
| HIDE |
W | - |
|
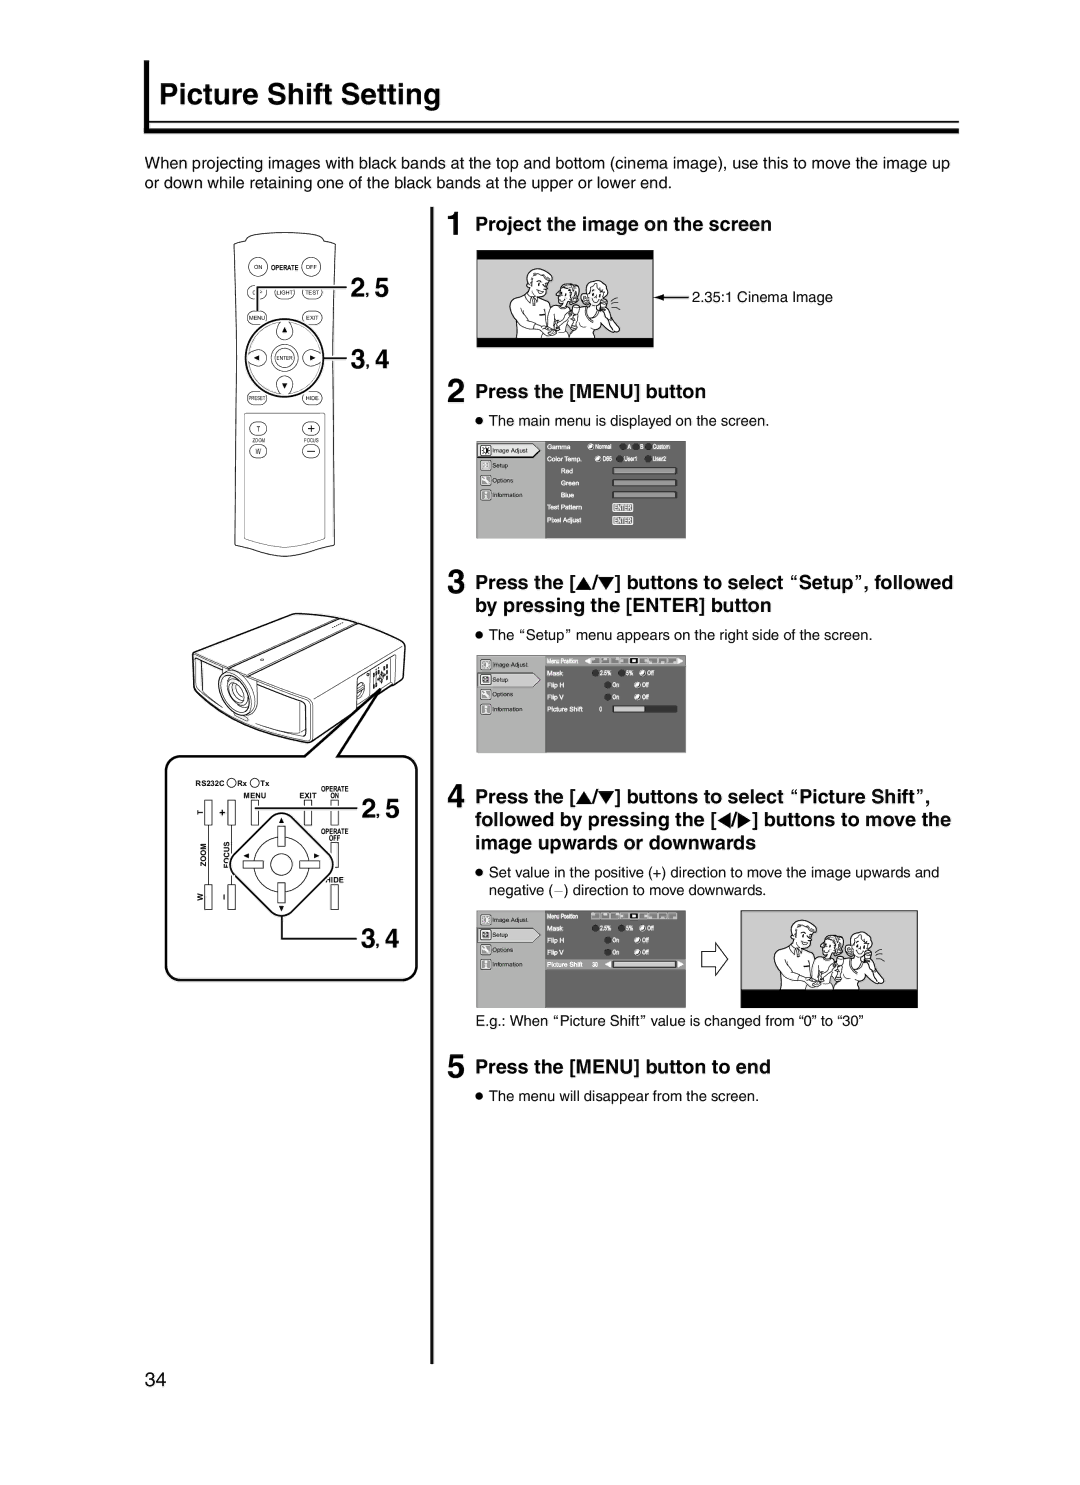
aProject the image on the screen
![]() 2.35:1 Cinema Image
2.35:1 Cinema Image
bPress the [MENU] button
●The main menu is displayed on the screen.
Image Adjust | Gamma | Normal | A B | Custom |
|
|
|
| |
Setup | Color Temp. | D65 | User1 | User2 |
Red |
|
|
| |
|
|
|
| |
Options | Green |
|
|
|
|
|
|
| |
Information | Blue |
|
|
|
| Test Pattern |
| ENTER |
|
| Pixel Adjust |
| ENTER |
|
cPress the [J/K] buttons to select ASetupB, followed by pressing the [ENTER] button
● The ASetupB menu appears on the right side of the screen.
Image Adjust | Menu Position |
|
|
|
|
|
|
| |
Setup | Mask | 2.5% | 5% | Off |
Flip H |
| On | Off | |
|
| |||
Options | Flip V |
| On | Off |
|
| |||
Information | Picture Shift | 0 |
|
|
dPress the [J/K] buttons to select APicture ShiftB, followed by pressing the [H/I] buttons to move the image upwards or downwards
●Set value in the positive (+) direction to move the image upwards and negative
Image Adjust
Menu Position
c, d
Setup | Mask | 2.5% | 5% | Off |
Flip H |
| On | Off | |
|
| |||
Options | Flip V |
| On | Off |
|
| |||
Information | Picture Shift | 30 |
|
|
E.g.: When APicture ShiftB value is changed from “0” to “30”
ePress the [MENU] button to end
● The menu will disappear from the screen.
34