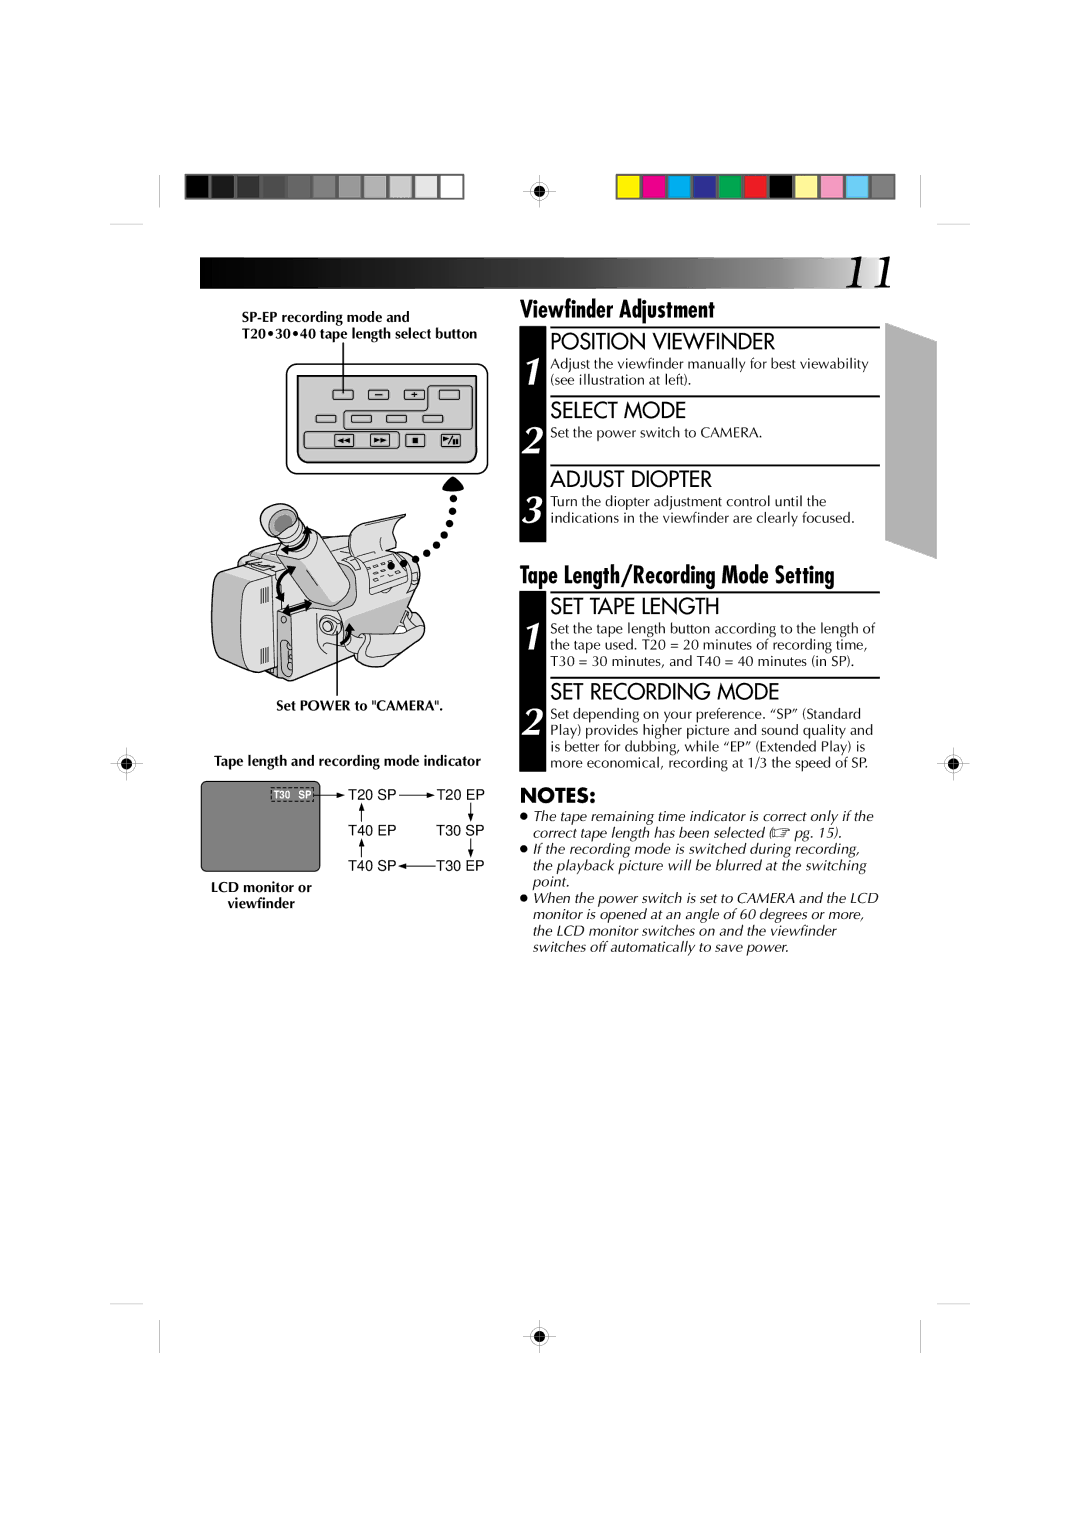
Set POWER to "CAMERA".
Tape length and recording mode indicator
T30 SP ![]() T20 SP
T20 SP ![]() T20 EP
T20 EP
T40 EP | T30 SP |
T40 SP![]() T30 EP
T30 EP
LCD monitor or
viewfinder
![]() 11
11
Viewfinder Adjustment
POSITION VIEWFINDER
1 Adjust the viewfinder manually for best viewability (see illustration at left).
SELECT MODE
2 Set the power switch to CAMERA.
ADJUST DIOPTER
3 Turn the diopter adjustment control until the indications in the viewfinder are clearly focused.
Tape Length/Recording Mode Setting
SET TAPE LENGTH
1 Set the tape length button according to the length of the tape used. T20 = 20 minutes of recording time, T30 = 30 minutes, and T40 = 40 minutes (in SP).
SET RECORDING MODE
2 Set depending on your preference. “SP” (Standard Play) provides higher picture and sound quality and is better for dubbing, while “EP” (Extended Play) is more economical, recording at 1/3 the speed of SP.
NOTES:
●The tape remaining time indicator is correct only if the correct tape length has been selected (☞ pg. 15).
●If the recording mode is switched during recording, the playback picture will be blurred at the switching point.
●When the power switch is set to CAMERA and the LCD monitor is opened at an angle of 60 degrees or more, the LCD monitor switches on and the viewfinder switches off automatically to save power.