Manuals
/
JVC
/
Photography
/
Camcorder
JVC
GR-AXM1U
manual
PQW we R
Models:
GR-AXM1U
1
44
56
56
Download
56 pages
42.35 Kb
41
42
43
44
45
46
47
48
Install
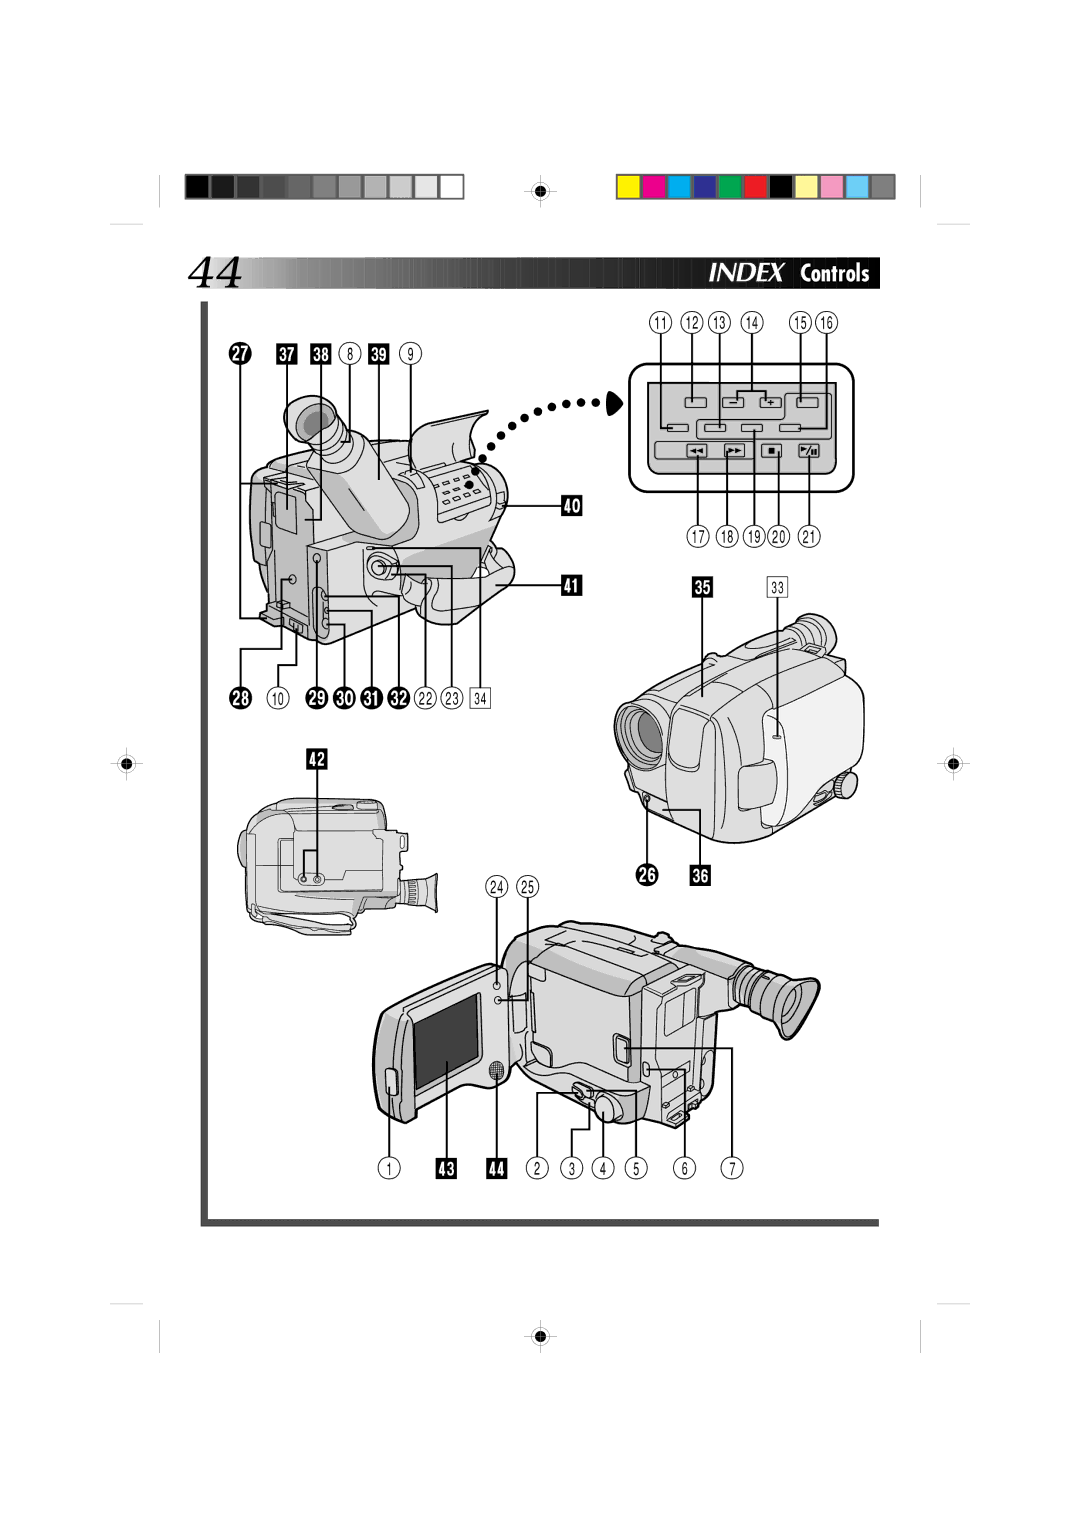
Indicators
Warranty
Select Preset Title
Using the battery pack
Viewfinder Adjustment
Date/Time Settings
Restore Normal Screen
Speaker volume control
Safety
Page 44
Image 44
44
I
N
D
EX
C
o
nt
ro
l
s
! @ # $
%^
u
U I
8
O
9
P
& *() q
a
T
E
i
0
o pQW
we
R
s
r t
y
Y
1
d
f
2 3 4 5
6 7
Page 43
Page 45
Page 44
Image 44
Page 43
Page 45
Contents
GR-AXM1U
Dear Customer
It is recommended that you
Installation
Antenna Installation Instructions
USE
Servicing
Using the battery pack
To remove the battery pack
Ajor Features
AC Power Battery Pack Cassette Adapter DC Cord
Zoom-in Zoom-out
BN-V18U VHS PlayPak
Contents
Power
Supply Power
Attach Battery Pack
Detach Battery Pack
Charge Marker Optional Battery
Only
Date/Time Settings
Viewfinder Adjustment
Tape Length/Recording Mode Setting
Getting S Tarted
Loading/Unloading a Cassette
Tripod Mounting
Grip Adjustment
Shoulder Strap Attachment
RM-V20U Remote Control Unit optional
To Remote Buttons Functions
Enter RECORD-STANDBY Mode
Shooting while watching the LCD monitor
Load a Cassette
Start Shooting
Ding
Start/Stop
Brightness control
High-angle shooting
Low-angle shooting
START/STOP Viss
Recording Basic Features
Retake
Recording Advanced Features
Program AE With Special Effects
White Balance Adjustment
Adjust Focus
Adjust White Balance
Advanced Featur es
Fader
Engage Cinema Mode
Restore Normal Screen
Reco Rding Advanced Featur es
Cinema
Focusing
Lock Focus
Release Focus Lock
F1 button Function SEL. button
Release Manual Focus Mode
Power zoom switch F1 button Function SEL. F2 button button
To Farther Subject
To Nearer Subject
Restore Initial Setting
Exposure Control
Brighten Image
Darken Image
Recordi NG Advanced Featur es
Date/Time Character Insert
Character
SET Mode screen
+ SET
Example of Character Generator & Title
Select Preset Title
Instant Titles
Program AE
START/STOP Interval REC Time
Fade-in/out cannot be performed during Animation shooting
Rewind or Fast-forward the tape
Adjust the brightness of the LCD monitor
Speaker volume control
PL Ayback Features
Feature
Tracking PLAY/PAUSE Counter R/M REW Stop
Purpose
Playback Basic Connections
Connect Camcorder to VCR
VCR
Connection To a VCR a Editing, Dubbing and Playback
PL Ayback Using The Cassette Adapter
Cassette Adapter VHS PlayPak
Insert Cassette in Adapter
Play Back on Connected VCR
PLAY/PAUSE Edit
Power switch
VCR Recording deck
Editing
Random Assemble Editing R.A.Edit
SET Remote to Operate VCR
Operate the VCR
Access R.A. Edit Counter Display
Prepare Camcorder
Prepare VCR
Register Beginning of Scene
Engage VCR’S RECORD-PAUSE Mode
Begin Automatic Editing
END Automatic Editing
Edit Stop VCR REC Stby
REW Play Pause Audio DUB Insert
Counter R/M Power
01234Tape Counter
Engage Audio DUB Standby Mode
Audio Dubbing
Find EDIT-IN Point
Begin Audio Dubbing
Set to Power OFF
BATT. Release Push Eject Open
Roubleshooting
Tape won’t eject
Some functions are not available
Vertical white lines appear when
Shooting a very bright object
PQW we R
Indicators
Index LCD monitor/Viewfinder
8 9
Index Terms
Information
Using Household AC Plug Adapter
Serious malfunctioning
To prevent damage and prolong service life
To avoid hazard
To prevent damage to the camcorder
During use
For safety, do not
Avoid using the unit
To prolong service life
Do not leave the unit
AC Power ADAPTER/BATTERY Charger AA-V11U
General
Camera
LCD Monitor
Español
Alimentación
Alimentacion
Colocacion DEL Paquete DE Pilas
Utilización de la batería
Para extraer la batería
1Enganche 2Empuje BATT. Release extracción de la batería
Colóquelo en Play
HOW to Locate Your JVC Service Center
For Serv Icing
Warranty
Limited Warranty
GR-AXM1U
Top
Page
Image
Contents