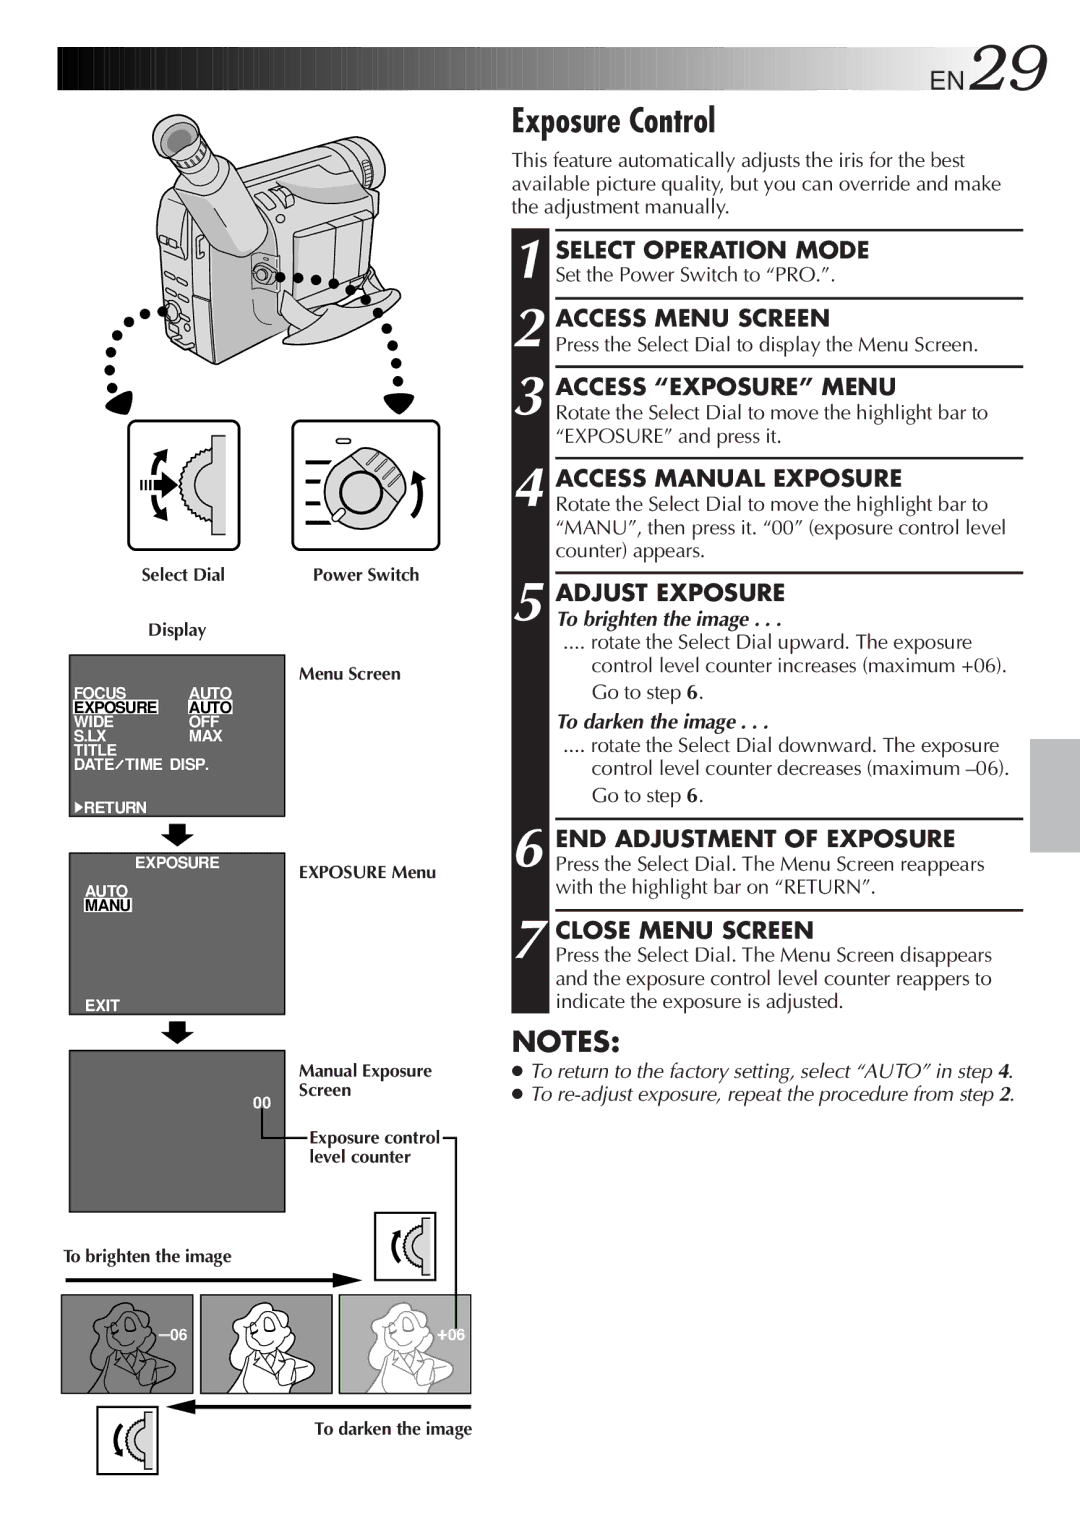
![EN29](/images/new-backgrounds/186897/18689757x1.webp)
Select Dial
Display
FOCUS AUTO
EXPOSURE AUTO
WIDEOFF
S.LXMAX TITLE
DATETIME DISP.
4RETURN
Power Switch
Menu Screen
![3 ACCESS “EXPOSURE” MENU](/images/new-backgrounds/186897/18689757xi3.webp)
![To darken the image . . .](/images/new-backgrounds/186897/18689757xi4.webp)
![7 CLOSE MENU SCREEN](/images/new-backgrounds/186897/18689757xi5.webp)
![●To return to the factory setting, select “AUTO” in step 4.](/images/new-backgrounds/186897/18689757xi6.webp)
![●To re-adjust exposure, repeat the procedure from step 2.](/images/new-backgrounds/186897/18689757xi7.webp)
![Manual background](/images/new-backgrounds/186897/18689757xi8.webp)
![Manual background](/images/new-backgrounds/186897/18689757xi9.webp)
![Manual background](/images/new-backgrounds/186897/18689757xi10.webp)
![Manual background](/images/new-backgrounds/186897/18689757xi11.webp)
![Manual background](/images/new-backgrounds/186897/18689757xi12.webp)
![Manual background](/images/new-backgrounds/186897/18689757xi13.webp)
![Manual background](/images/new-backgrounds/186897/18689757xi14.webp)
![Manual background](/images/new-backgrounds/186897/18689757xi15.webp)
![Manual background](/images/new-backgrounds/186897/18689757xi16.webp)
![Manual background](/images/new-backgrounds/186897/18689757xi17.webp)
![Manual background](/images/new-backgrounds/186897/18689757xi18.webp)
![Manual background](/images/new-backgrounds/186897/18689757xi19.webp)
![Manual background](/images/new-backgrounds/186897/18689757xi20.webp)
![Manual background](/images/new-backgrounds/186897/18689757xi21.webp)
![Manual background](/images/new-backgrounds/186897/18689757xi22.webp)
![Manual background](/images/new-backgrounds/186897/18689757xi23.webp)
![Manual background](/images/new-backgrounds/186897/18689757xi24.webp)
![Manual background](/images/new-backgrounds/186897/18689757xi25.webp)
![Manual background](/images/new-backgrounds/186897/18689757xi26.webp)
![Manual background](/images/new-backgrounds/186897/18689757xi27.webp)
![Manual background](/images/new-backgrounds/186897/18689757xi28.webp)
EN29![Manual background](/images/new-backgrounds/186897/18689757xi30.webp)
![Manual background](/images/new-backgrounds/186897/18689757xi31.webp)
Exposure Control
This feature automatically adjusts the iris for the best available picture quality, but you can override and make the adjustment manually.
1 SELECT OPERATION MODE Set the Power Switch to “PRO.”.
2 ACCESS MENU SCREEN
Press the Select Dial to display the Menu Screen.
3 ACCESS “EXPOSURE” MENU
Rotate the Select Dial to move the highlight bar to “EXPOSURE” and press it.
4 ACCESS MANUAL EXPOSURE Rotate the Select Dial to move the highlight bar to “MANU”, then press it. “00” (exposure control level counter) appears.
5 ADJUST EXPOSURE To brighten the image . . .
.... rotate the Select Dial upward. The exposure
control level counter increases (maximum +06). Go to step 6.
To darken the image . . .
.... rotate the Select Dial downward. The exposure
control level counter decreases (maximum
EXPOSURE
AUTO
MANU
EXIT
EXPOSURE Menu
6 END ADJUSTMENT OF EXPOSURE Press the Select Dial. The Menu Screen reappears with the highlight bar on “RETURN”.
7 CLOSE MENU SCREEN
Press the Select Dial. The Menu Screen disappears and the exposure control level counter reappers to indicate the exposure is adjusted.
NOTES:
Manual Exposure
Screen
00
Exposure control level counter
To brighten the image
+06 |
To darken the image