10
 EN
EN


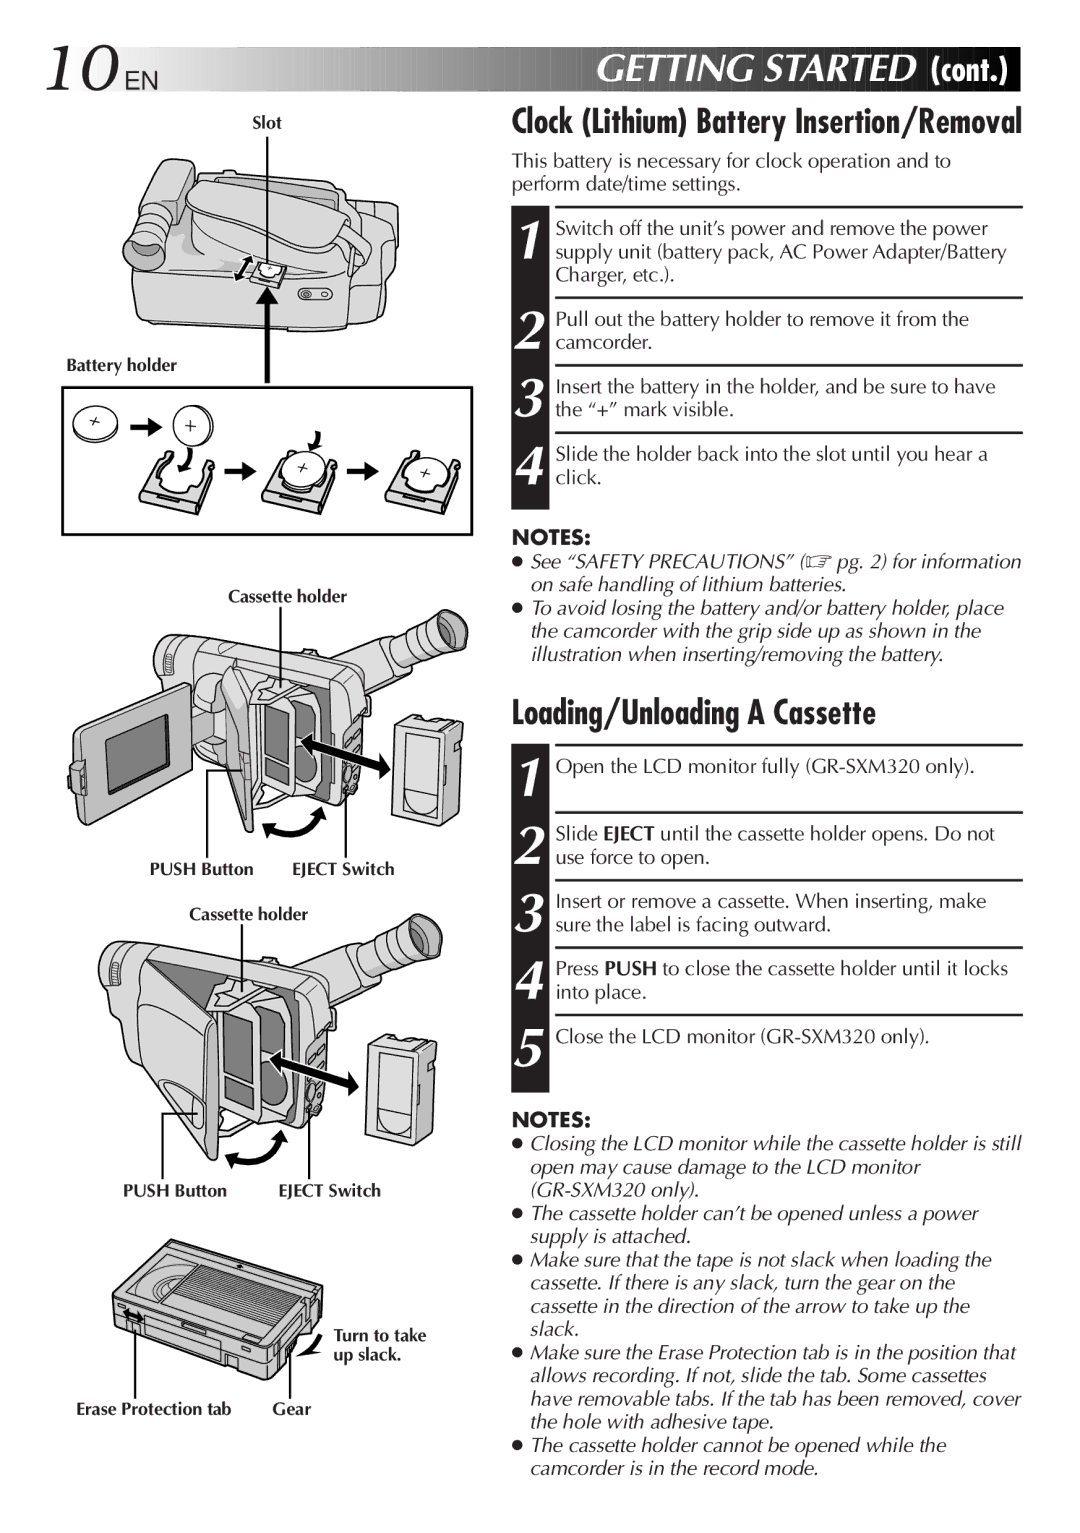
Slot


 GETTING
 STARTED

 (cont.)

Clock (Lithium) Battery Insertion/Removal
Battery holder
Cassette holder
PUSH Button | EJECT Switch |
Cassette holder
PUSH Button | EJECT Switch |
Turn to take ![]() up slack.
up slack.
Erase Protection tab | Gear |
This battery is necessary for clock operation and to perform date/time settings.
1 Switch off the unit’s power and remove the power supply unit (battery pack, AC Power Adapter/Battery Charger, etc.).
2 Pull out the battery holder to remove it from the camcorder.
3 Insert the battery in the holder, and be sure to have the “+” mark visible.
4 Slide the holder back into the slot until you hear a click.
NOTES:
●See “SAFETY PRECAUTIONS” (☞ pg. 2) for information on safe handling of lithium batteries.
●To avoid losing the battery and/or battery holder, place the camcorder with the grip side up as shown in the illustration when inserting/removing the battery.
Loading/Unloading A Cassette
1 Open the LCD monitor fully
2 Slide EJECT until the cassette holder opens. Do not use force to open.
3
4
5
NOTES:
●Closing the LCD monitor while the cassette holder is still open may cause damage to the LCD monitor
●The cassette holder can’t be opened unless a power supply is attached.
●Make sure that the tape is not slack when loading the cassette. If there is any slack, turn the gear on the cassette in the direction of the arrow to take up the slack.
●Make sure the Erase Protection tab is in the position that allows recording. If not, slide the tab. Some cassettes have removable tabs. If the tab has been removed, cover the hole with adhesive tape.
●The cassette holder cannot be opened while the camcorder is in the record mode.