12
 EN
EN


 GETTING
 STARTED
Recording Mode Setting

 (cont.)

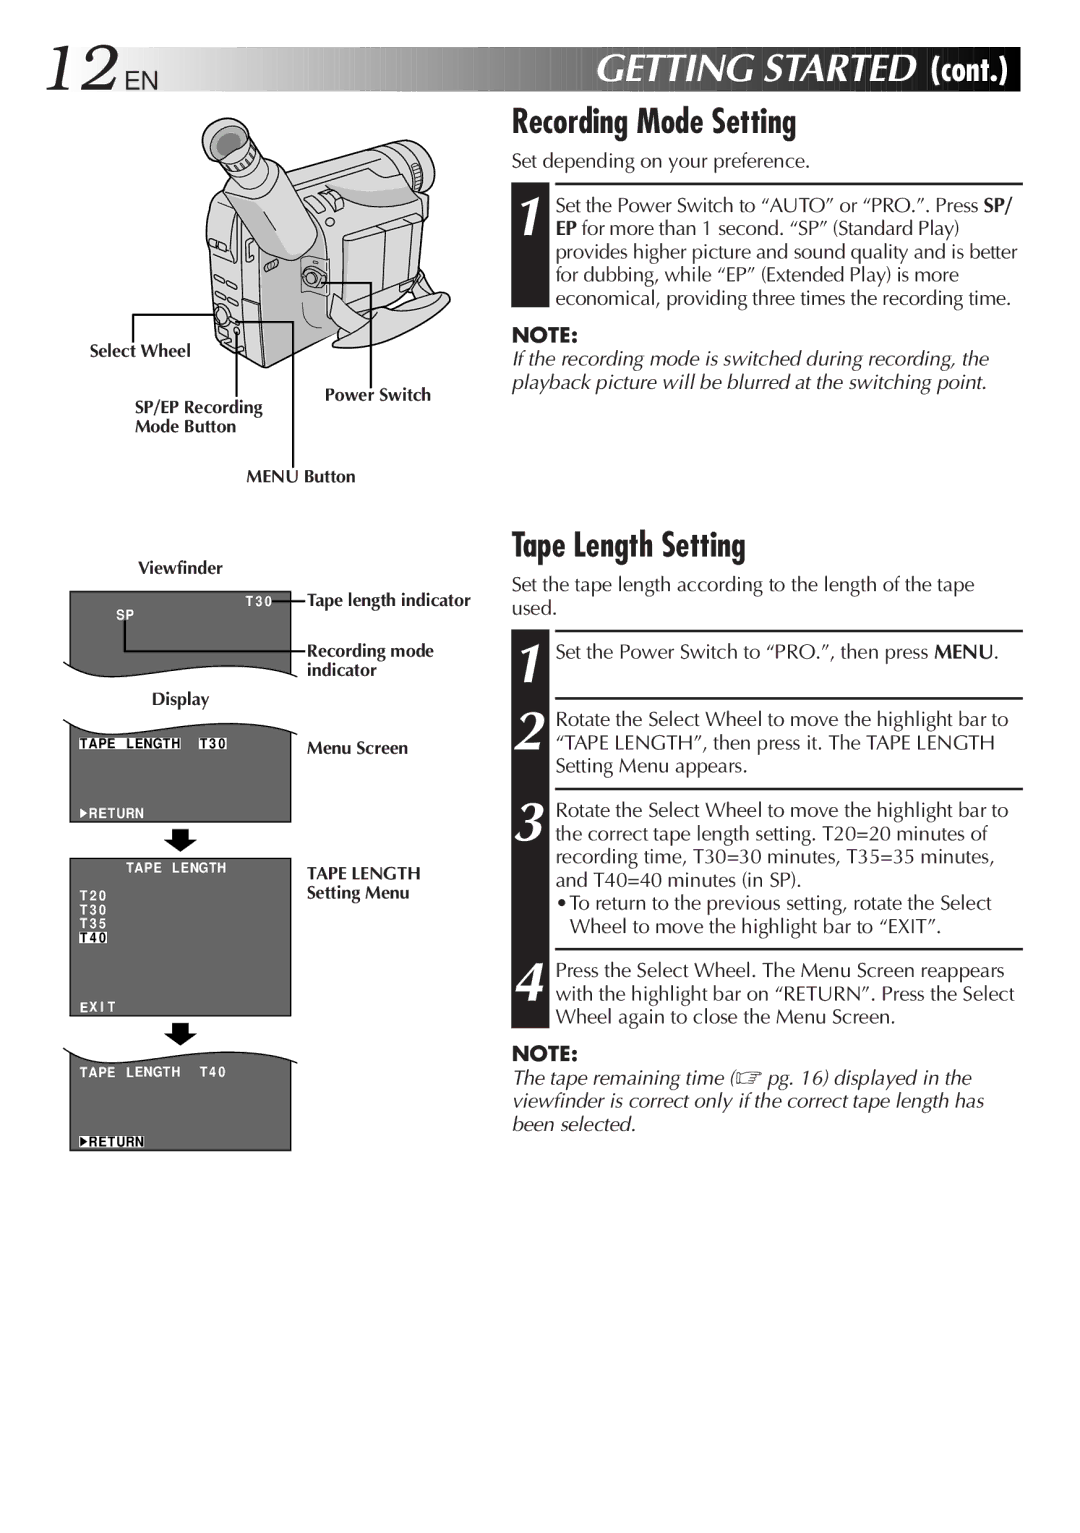
Select Wheel
SP/EP Recording
Mode Button
Power Switch
Set depending on your preference.
1 Set the Power Switch to “AUTO” or “PRO.”. Press SP/ EP for more than 1 second. “SP” (Standard Play) provides higher picture and sound quality and is better for dubbing, while “EP” (Extended Play) is more economical, providing three times the recording time.
NOTE:
If the recording mode is switched during recording, the playback picture will be blurred at the switching point.
|
| MENU Button | |
| Viewfinder |
| |
| SP | T 3 0 | Tape length indicator |
|
|
| |
|
|
| Recording mode |
|
|
| indicator |
| Display |
| |
T EL E MACRO | OF F |
| |
TAPE | L ENGTH | T 3 0 | Menu Screen |
4RE TURN |
|
| |
| TAPE L ENGTH | TAPE LENGTH | |
T 2 0 |
|
| Setting Menu |
T 3 0 |
|
|
|
T 3 5 |
|
|
|
T 4 0 |
|
|
|
EX I T |
|
|
|
T EL E MACRO | OF F |
| |
TAPE | L ENGTH | T 4 0 |
|
4RE TURN
Tape Length Setting
Set the tape length according to the length of the tape used.
1
2 Rotate the Select Wheel to move the highlight bar to “TAPE LENGTH”, then press it. The TAPE LENGTH Setting Menu appears.
3 Rotate the Select Wheel to move the highlight bar to the correct tape length setting. T20=20 minutes of recording time, T30=30 minutes, T35=35 minutes, and T40=40 minutes (in SP).
•To return to the previous setting, rotate the Select Wheel to move the highlight bar to “EXIT”.
4 Press the Select Wheel. The Menu Screen reappears with the highlight bar on “RETURN”. Press the Select Wheel again to close the Menu Screen.
NOTE:
The tape remaining time (☞ pg. 16) displayed in the viewfinder is correct only if the correct tape length has been selected.