![]()
![]()
![]()
![]()
![]()
![]()
![]()
![]()
![]()
![]()
![]()
![]()
![]()
![]()
![]()
![]()
![]()
![]()
![]()
![]()
![]()
![]()
![]()
![]()
![]()
![]()
![]()
![]()
![]()
![]()
![]()
![]()
![]()
![]()
![]()
![]()
![]()
![]()
![]()
![]()
![]()
![]()
![]()
![]()
![]()
![]()
![]()
![]()
![]()
![]()
![]()
![]()
![]()
![]()
![]()
![]()
![]()
![]()
![]()
![]()
![]()
![]()
![]()
![]()
![]()
![]()
![]()
![]()
![]()
![]()
![]()
![]()
![]()
![]()
![]()
![]()
![]()
![]()
![]()
![]()
![]()
![]()
![]()
![]()
![]() EN13
EN13
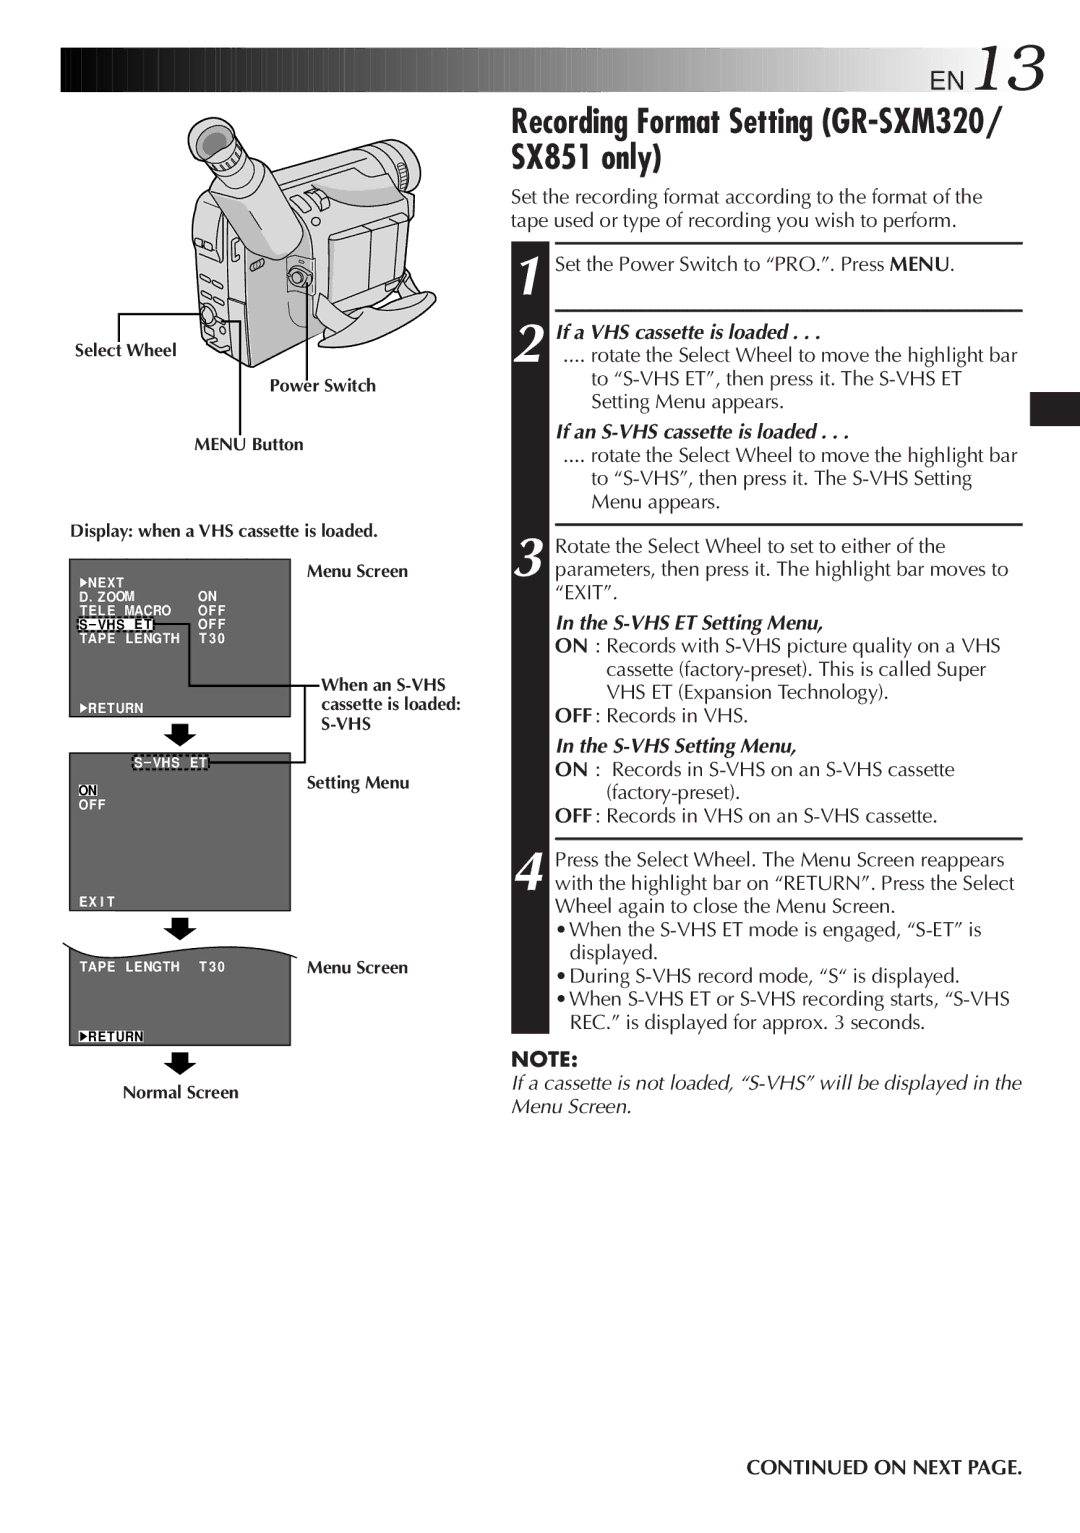
Select Wheel
Power Switch
MENU Button
Display: when a VHS cassette is loaded.
Recording Format Setting (GR-SXM320/ SX851 only)
Set the recording format according to the format of the tape used or type of recording you wish to perform.
1 Set the Power Switch to “PRO.”. Press MENU.
2 If a VHS cassette is loaded . . .
.... rotate the Select Wheel to move the highlight bar
to
If an S-VHS cassette is loaded . . .
.... rotate the Select Wheel to move the highlight bar
to
3 Rotate the Select Wheel to set to either of the
4NEX T | ON | |
D . ZOOM | ||
TE L E MACRO | OF F | |
S – VHS E T |
| OF F |
TAPE L ENGTH | T 3 0 | |
4RE TURN |
| |
| ||
Menu Screen
When an
parameters, then press it. The highlight bar moves to “EXIT”.
In the S-VHS ET Setting Menu,
ON : Records with
OFF : Records in VHS.
In the S-VHS Setting Menu,
S – VHS E T
|
|
| Setting Menu |
ON |
|
| |
OF F |
|
| |
EX I T |
|
| |
T EL E MACRO | OF F |
| |
TAPE L ENGTH | T 3 0 | Menu Screen | |
4RE TURN |
|
| |
ON : Records in
OFF : Records in VHS on an
4 Press the Select Wheel. The Menu Screen reappears with the highlight bar on “RETURN”. Press the Select Wheel again to close the Menu Screen.
•When the
•During
REC.” is displayed for approx. 3 seconds.
NOTE:
Normal ScreenIf a cassette is not loaded,
Menu Screen.
CONTINUED ON NEXT PAGE.