30![]()
![]()
![]()
![]()
![]()
![]()
![]()
![]()
![]()
![]()
![]()
![]()
![]()
![]()
![]()
![]()
![]()
![]()
![]()
![]()
![]()
![]()
![]()
![]()
![]()
![]()
![]()
![]()
![]()
![]()
![]()
![]()
![]()
![]()
![]()
![]()
![]()
![]()
![]()
![]()
![]()
![]()
![]()
![]()
![]()
![]()
![]()
![]()
![]()
![]()
![]() ADVAN
ADVAN![]()
![]() CED
CED![]()
![]() OPERATIONS
OPERATIONS![]() (cont.)
(cont.)![]()
![]()
![]()
Edit From
A Camcorder
–
1 2 3
2
4 5 6
7 8 9
4
AUX0
PR
1![]() ?
?
NOTES:
●All necessary cables can be obtained from your dealer.
●You can also use another video recorder as the player instead of a camcorder.
●When you select "EDIT" to dub tapes in step 3, be sure to select "AUTO" (or "NORM" when "B.E.S.T." is set to "OFF") after you finish dubbing the tapes.
Recorder
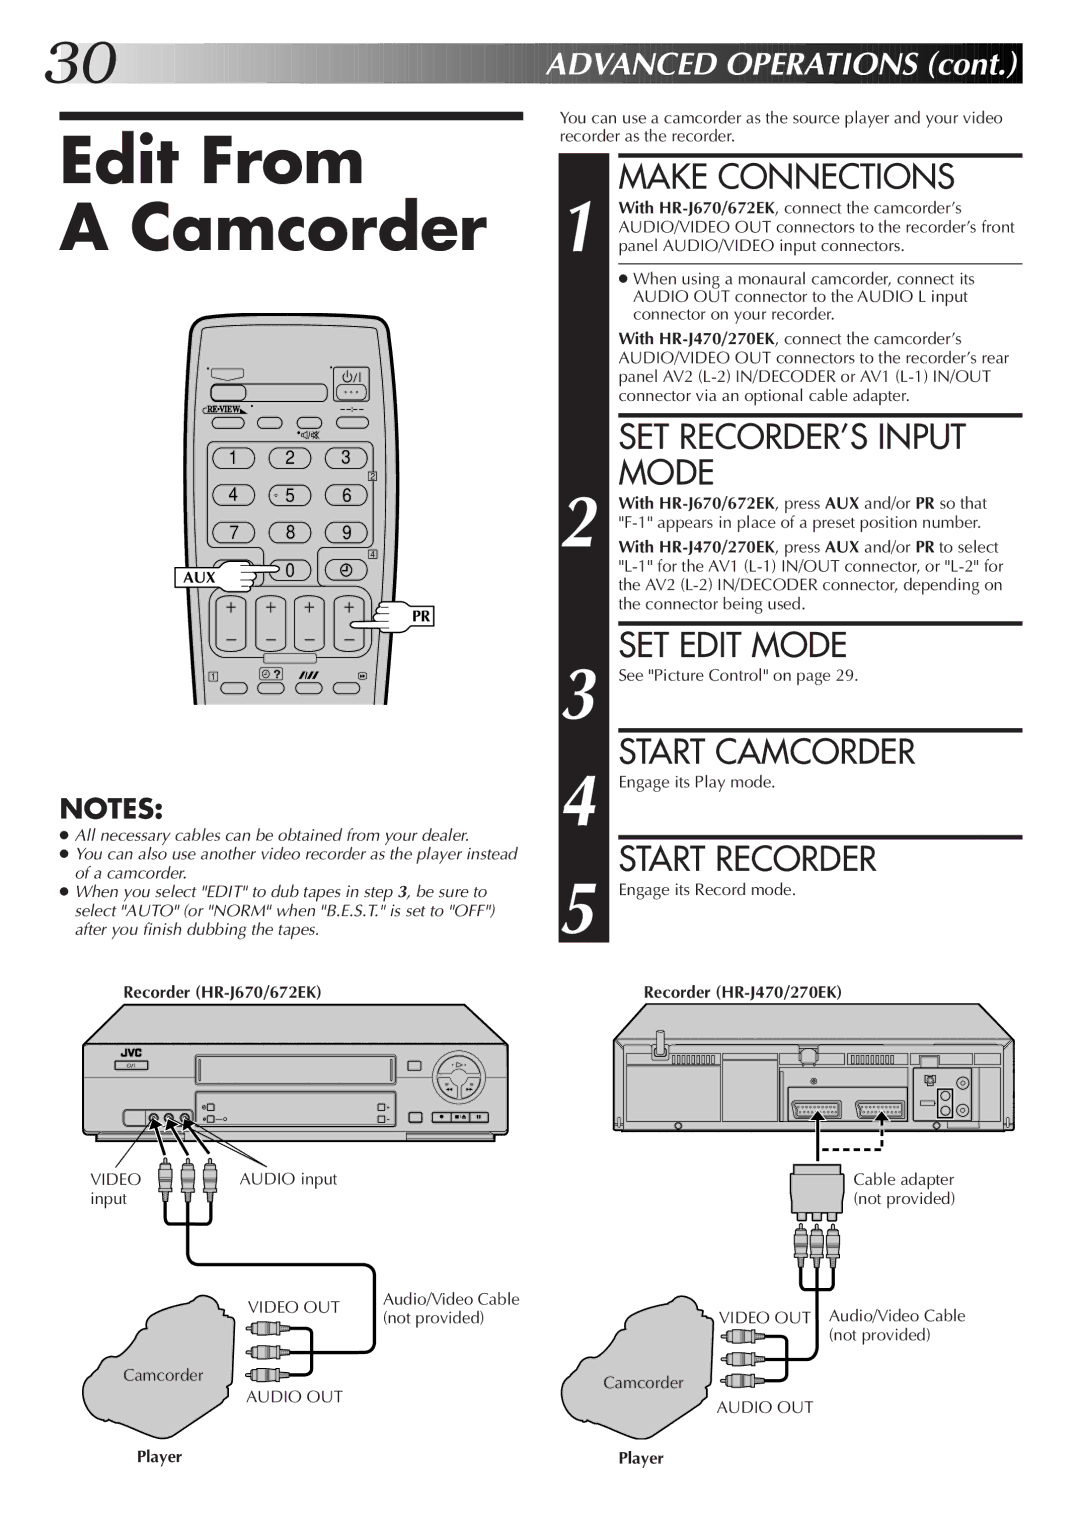
You can use a camcorder as the source player and your video recorder as the recorder.
MAKE CONNECTIONS
1 With
●When using a monaural camcorder, connect its AUDIO OUT connector to the AUDIO L input connector on your recorder.
With
| SET RECORDER’S INPUT |
2 | MODE |
With | |
With | |
| |
| the AV2 |
| the connector being used. |
3 | SET EDIT MODE |
See "Picture Control" on page 29. | |
4 | START CAMCORDER |
Engage its Play mode. | |
5 | START RECORDER |
Engage its Record mode. |
Recorder (HR-J470/270EK)
VIDEO | AUDIO input |
input |
|
VIDEO OUT | Audio/Video Cable | |
(not provided) | ||
|
Cable adapter (not provided)
VIDEO OUT Audio/Video Cable ![]()
![]()
![]() (not provided)
(not provided)
Camcorder | Camcorder |
AUDIO OUT
AUDIO OUT
Player | Player |