PLAY

REC

PAUSE

PLAY

1

PAUSE

REC

Playback

The VCR assesses the quality of the tape once you start playback.

Perform steps 1 and 2 on page 22 ("Simple Playback") before continuing.

1


START PLAYBACK


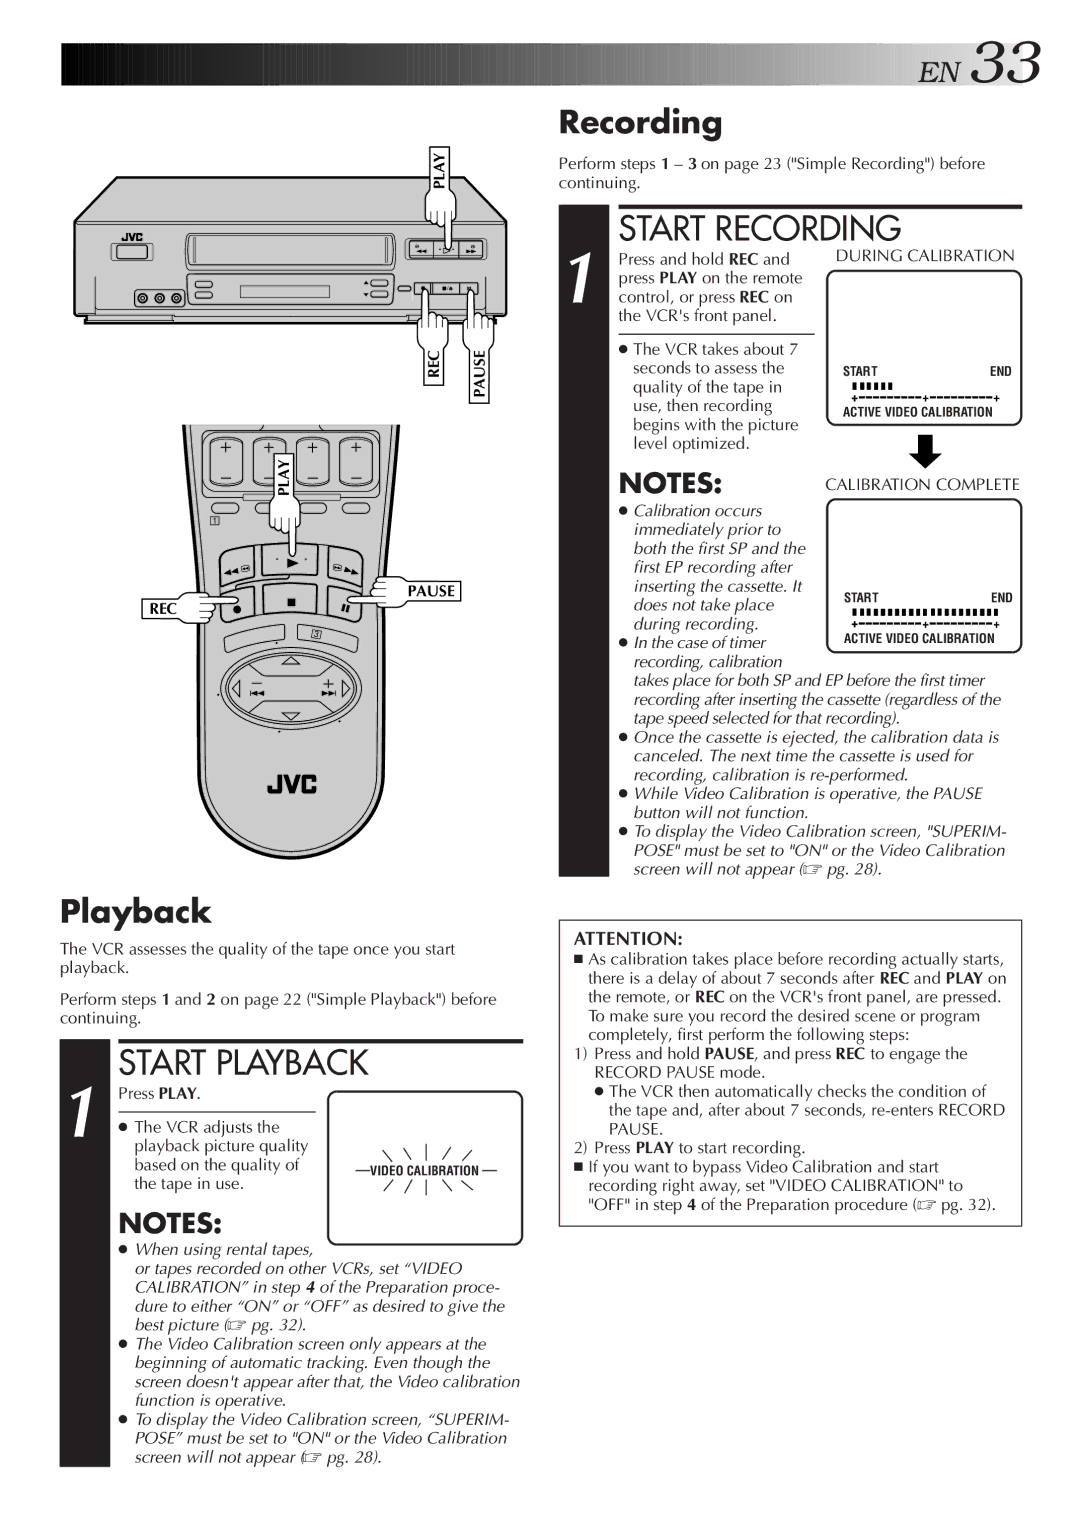
Press PLAY.


The VCR adjusts the


playback picture quality


based on the quality of

VIDEO CALIBRATION


the tape in use.


NOTES:


When using rental tapes,


or tapes recorded on other VCRs, set “VIDEO


CALIBRATION” in step 4 of the Preparation proce-


dure to either “ON” or “OFF” as desired to give the


best picture (pg. 32).


The Video Calibration screen only appears at the


beginning of automatic tracking. Even though the


screen doesn't appear after that, the Video calibration


function is operative.


To display the Video Calibration screen, “SUPERIM-


POSE” must be set to "ON" or the Video Calibration


screen will not appear (pg. 28).

EN33

Recording

Perform steps 1 3 on page 23 ("Simple Recording") before continuing.

START RECORDING

1 Press and hold REC and DURING CALIBRATION press PLAY on the remote

control, or press REC on the VCR's front panel.

The VCR takes about 7


seconds to assess the

START


END

quality of the tape in


+


+

+

use, then recording


ACTIVE VIDEO CALIBRATION

begins with the picture


level optimized.


NOTES:

CALIBRATION COMPLETE

Calibration occurs immediately prior to both the first SP and the first EP recording after inserting the cassette. It

does not take place

START


END


during recording.


+


+


+

In the case of timer

ACTIVE VIDEO CALIBRATION

recording, calibration


takes place for both SP and EP before the first timer recording after inserting the cassette (regardless of the tape speed selected for that recording).

Once the cassette is ejected, the calibration data is canceled. The next time the cassette is used for recording, calibration is re-performed.

While Video Calibration is operative, the PAUSE button will not function.

To display the Video Calibration screen, "SUPERIM- POSE" must be set to "ON" or the Video Calibration screen will not appear (pg. 28).

ATTENTION:

As calibration takes place before recording actually starts, there is a delay of about 7 seconds after REC and PLAY on the remote, or REC on the VCR's front panel, are pressed. To make sure you record the desired scene or program completely, first perform the following steps:

1)Press and hold PAUSE, and press REC to engage the RECORD PAUSE mode.

The VCR then automatically checks the condition of the tape and, after about 7 seconds, re-enters RECORD PAUSE.

2)Press PLAY to start recording.

If you want to bypass Video Calibration and start recording right away, set "VIDEO CALIBRATION" to "OFF" in step 4 of the Preparation procedure (pg. 32).

Page 33
Image 33
JVC HR-VP656U manual Playback, Recording

HR-VP656U specifications

The JVC HR-VP656U is a sophisticated VHS VCR that embodies both vintage technology and user-friendly features, making it a standout choice for enthusiasts of analog video recording. Notable for its practicality and functionality, the HR-VP656U is designed to appeal to a wide range of users, from casual viewers to those with a penchant for archiving home videos.

One of the most significant features of the HR-VP656U is its ability to handle a variety of tape formats, including standard VHS and S-VHS. This versatility allows users to play and record in different formats, making it compatible with an extensive library of existing tapes. The device also comes equipped with high-quality playback capabilities, ensuring that both audio and video quality are preserved during playback.

The HR-VP656U employs a unique VHS Hi-Fi audio system that significantly enhances the sound quality of recordings, providing sharp and clear audio that complements the visual experience. Additionally, the unit features a digital noise reduction system, which minimizes static and interference during playback, resulting in a more polished and enjoyable viewing experience.

Another hallmark of the JVC HR-VP656U is its user-friendly interface, which includes an easy-to-navigate on-screen menu system. Features like timer recording are also included, allowing users to schedule recordings with ease. The device supports a variety of recording speeds, giving users control over tape usage and recording length, which is particularly useful for those archiving longer events or shows.

The remote control functionality offers added convenience, enabling users to operate the VCR from a distance. This feature is ideal for those who prefer to sit back and enjoy their movies without the need to get up and manually operate the device.

The sleek, compact design of the HR-VP656U adds to its appeal, allowing it to fit seamlessly into any home entertainment setup. Its reliability and performance have made it a preferred choice for those seeking a dependable VHS recording solution as well as a solid option for nostalgia lovers wishing to relive the glory days of analog video. Overall, the JVC HR-VP656U stands as a notable example of the classic VHS technology, embodying a balance of performance, quality, and user-centric design.