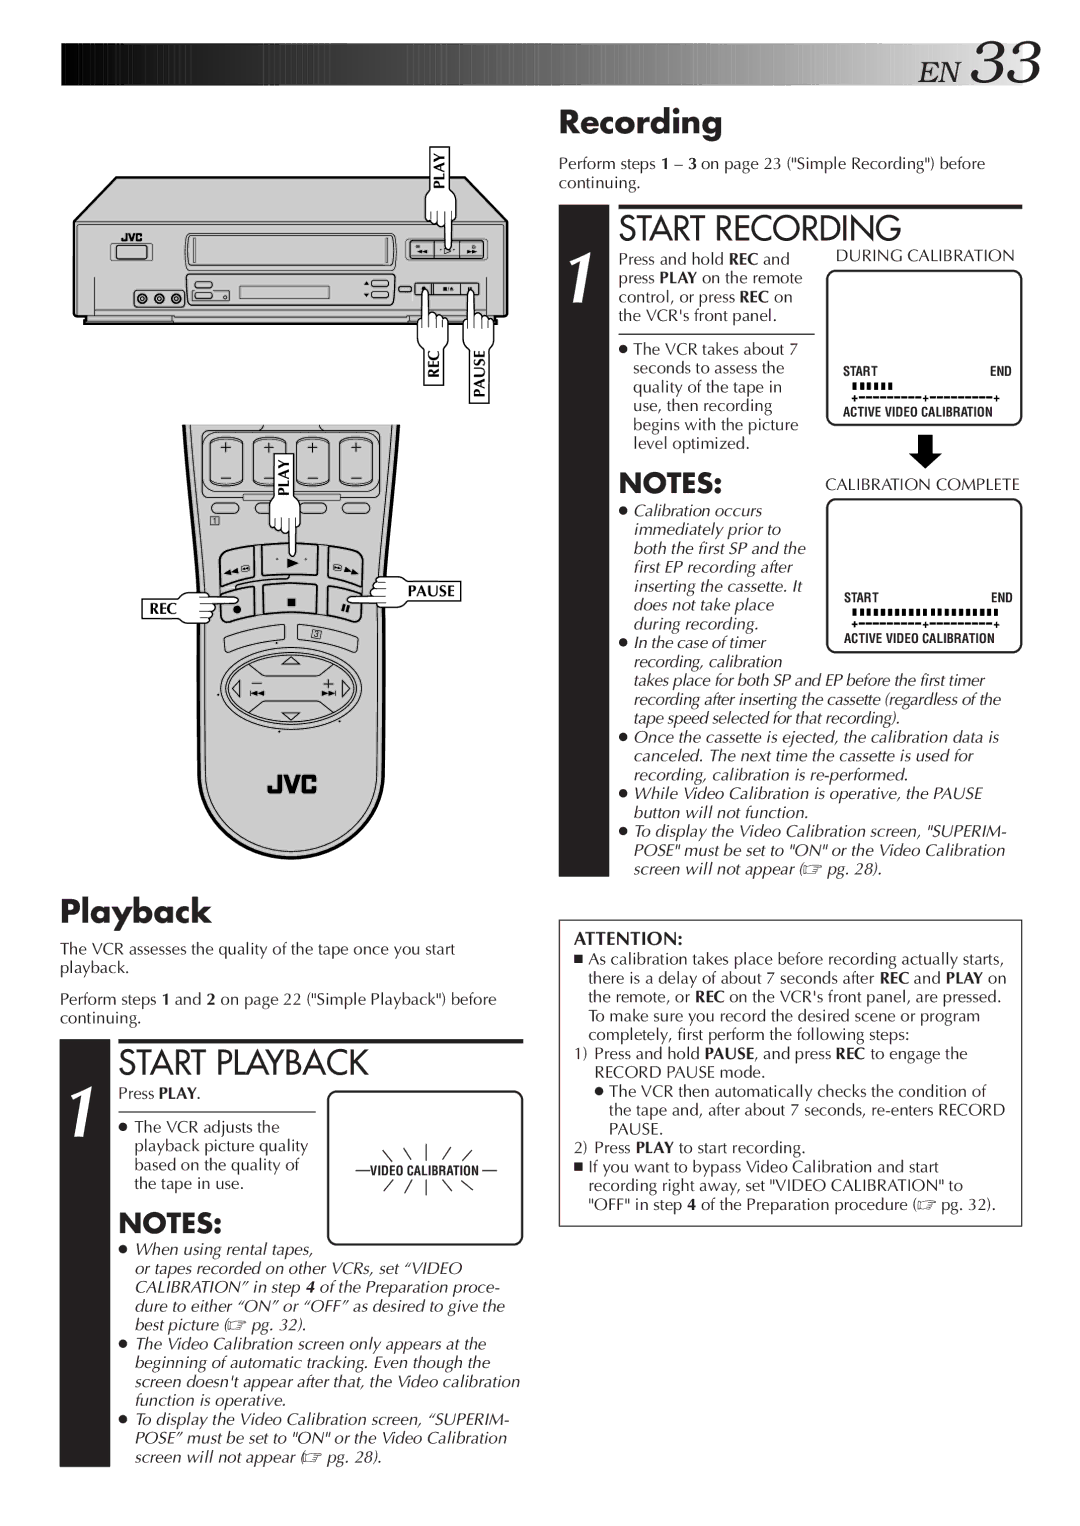
PLAY
REC | PAUSE |
PLAY![]()
![]()
1
PAUSE
REC
Playback
The VCR assesses the quality of the tape once you start playback.
Perform steps 1 and 2 on page 22 ("Simple Playback") before continuing.
1 |
| START PLAYBACK |
| |
| Press PLAY. |
| ||
|
|
|
| |
| ● The VCR adjusts the |
| ||
| playback picture quality |
| ||
|
| based on the quality of | VIDEO CALIBRATION | |
|
| the tape in use. | ||
|
|
| ||
|
| NOTES: |
| |
|
| ● When using rental tapes, |
| |
|
| or tapes recorded on other VCRs, set “VIDEO | ||
|
| CALIBRATION” in step 4 of the Preparation proce- | ||
|
| dure to either “ON” or “OFF” as desired to give the | ||
|
| best picture (☞ pg. 32). |
| |
|
| ● The Video Calibration screen only appears at the | ||
|
| beginning of automatic tracking. Even though the | ||
|
| screen doesn't appear after that, the Video calibration | ||
|
| function is operative. |
| |
|
| ● To display the Video Calibration screen, “SUPERIM- | ||
|
| POSE” must be set to "ON" or the Video Calibration | ||
|
| screen will not appear (☞ pg. 28). | ||
![]()
![]()
![]()
![]()
![]()
![]()
![]()
![]()
![]()
![]()
![]()
![]()
![]()
![]()
![]()
![]()
![]()
![]()
![]()
![]()
![]()
![]()
![]() E
E![]() N
N![]()
![]() 33
33![]()
Recording
Perform steps 1 – 3 on page 23 ("Simple Recording") before continuing.
START RECORDING
1 Press and hold REC and DURING CALIBRATION press PLAY on the remote
control, or press REC on the VCR's front panel.
● The VCR takes about 7 |
|
|
|
|
|
|
|
| |
seconds to assess the | START |
|
|
| END | ||||
quality of the tape in |
|
|
|
|
|
|
|
| |
|
|
|
|
|
|
|
| ||
+ |
|
| + | + | |||||
use, then recording |
|
| |||||||
ACTIVE VIDEO CALIBRATION | |||||||||
begins with the picture | |||||||||
|
|
|
|
|
|
|
| ||
level optimized. |
|
|
|
|
|
|
|
| |
NOTES: | CALIBRATION COMPLETE | ||||||||
●Calibration occurs immediately prior to both the first SP and the first EP recording after inserting the cassette. It
does not take place | START |
|
|
|
|
|
|
|
|
|
|
|
|
|
|
| END | ||||||
|
|
|
|
|
|
|
|
|
|
|
|
|
|
|
|
|
|
|
|
|
|
| |
during recording. |
| + |
|
|
|
|
|
|
|
|
|
| + |
|
|
|
|
|
|
|
|
| + |
● In the case of timer | ACTIVE VIDEO CALIBRATION | ||||||||||||||||||||||
recording, calibration |
|
|
|
|
|
|
|
|
|
|
|
|
|
|
|
|
|
|
|
|
|
|
|
takes place for both SP and EP before the first timer recording after inserting the cassette (regardless of the tape speed selected for that recording).
●Once the cassette is ejected, the calibration data is canceled. The next time the cassette is used for recording, calibration is
●While Video Calibration is operative, the PAUSE button will not function.
●To display the Video Calibration screen, "SUPERIM- POSE" must be set to "ON" or the Video Calibration screen will not appear (☞ pg. 28).
ATTENTION:
■As calibration takes place before recording actually starts, there is a delay of about 7 seconds after REC and PLAY on the remote, or REC on the VCR's front panel, are pressed. To make sure you record the desired scene or program completely, first perform the following steps:
1)Press and hold PAUSE, and press REC to engage the RECORD PAUSE mode.
●The VCR then automatically checks the condition of the tape and, after about 7 seconds,
2)Press PLAY to start recording.
■If you want to bypass Video Calibration and start recording right away, set "VIDEO CALIBRATION" to "OFF" in step 4 of the Preparation procedure (☞ pg. 32).
