KD-S12
Installation/Connection Manual
Manual de instalación/conexión
0705DTSMDTJEIN | |
[J] | EN, SP |
ENGLISH
You need the installation kits which corresponds to your car. | Check the battery system in your car. | |||||||||
• Mark all the check boxes ( |
| ) to make sure you have follow the instructions and the listed |
|
|
|
|
|
|
|
|
|
|
|
|
|
|
|
|
| ||
parts. |
|
|
|
|
|
|
|
|
| 12 V DC, NEGATIVE ground |
|
|
|
|
|
|
|
|
| ||
|
|
|
|
|
|
|
|
|
| |
|
|
|
|
|
|
|
|
|
|
|
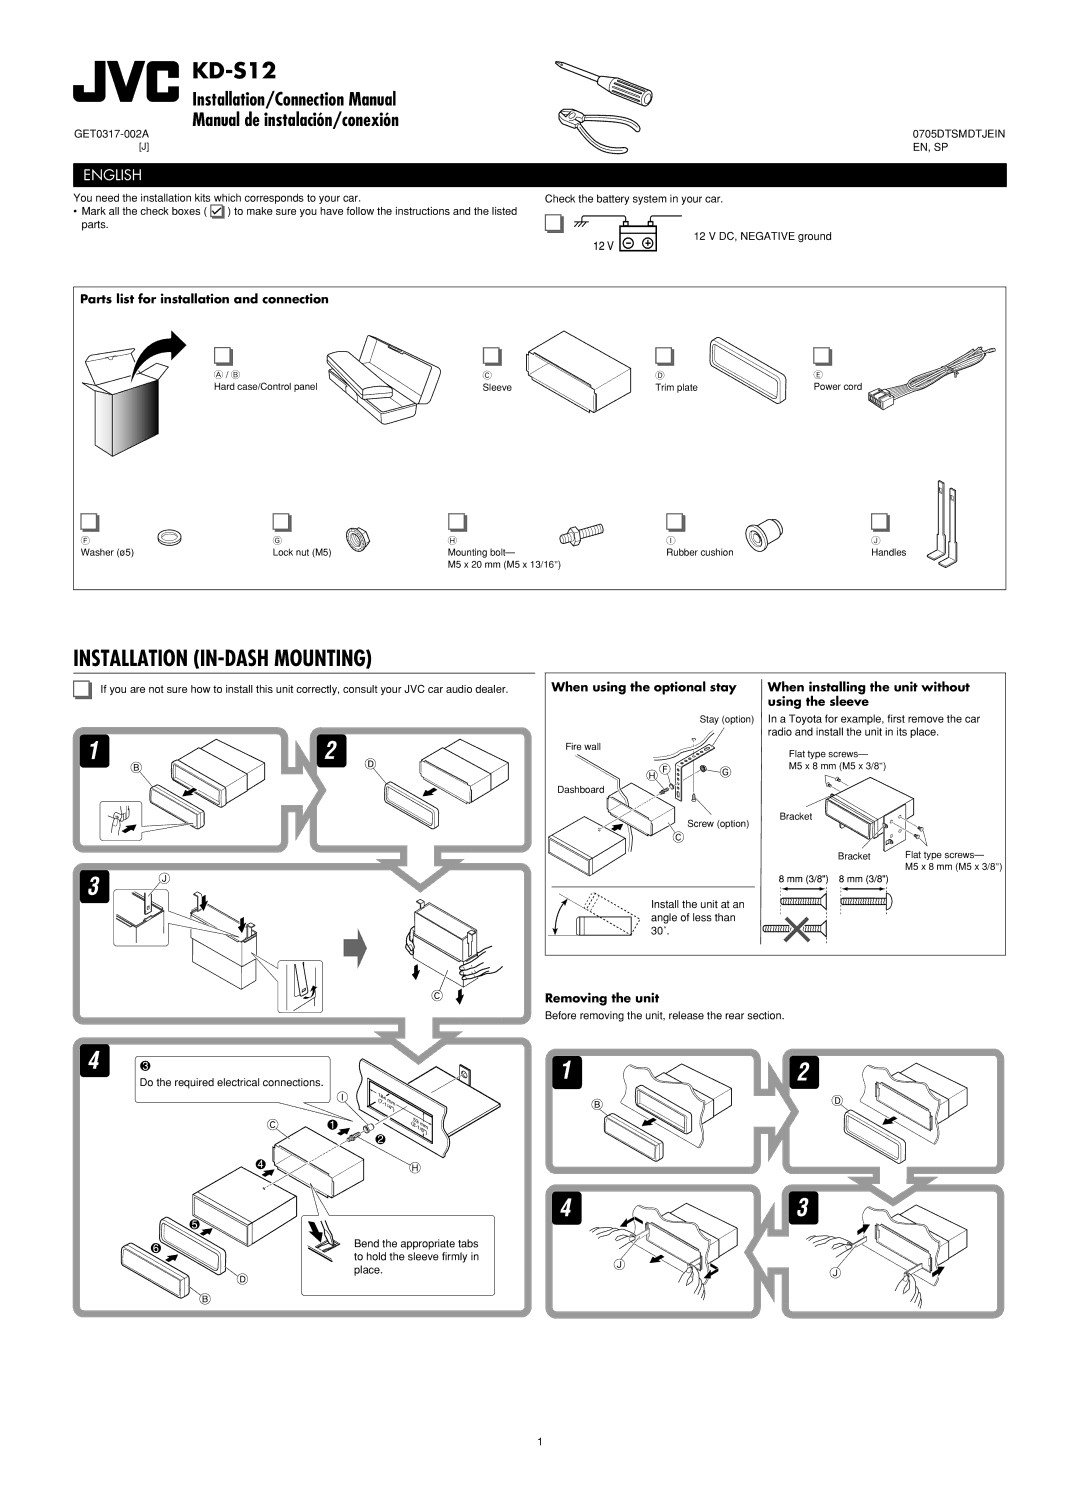
Parts list for installation and connection
A / B | C | D | E |
Hard case/Control panel | Sleeve | Trim plate | Power cord |
F | G | H | I | J |
Washer (ø5) | Lock nut (M5) | Mounting bolt— | Rubber cushion | Handles |
|
| M5 x 20 mm (M5 x 13/16") |
|
|
INSTALLATION (IN-DASH MOUNTING)
If you are not sure how to install this unit correctly, consult your JVC car audio dealer.
Do the required electrical connections.
When using the optional stay | When installing the unit without | |
| using the sleeve |
|
Stay (option) In a Toyota for example, first remove the car | ||
| radio and install the unit in its place. | |
Fire wall | Flat type screws— |
|
|
| |
| M5 x 8 mm (M5 x 3/8") |
|
Dashboard |
|
|
Screw (option) | Bracket |
|
|
| |
| Bracket | Flat type screws— |
|
| M5 x 8 mm (M5 x 3/8") |
Install the unit at an angle of less than 30˚.
Removing the unit
Before removing the unit, release the rear section.
Bend the appropriate tabs to hold the sleeve firmly in place.
1