Setting up your TV
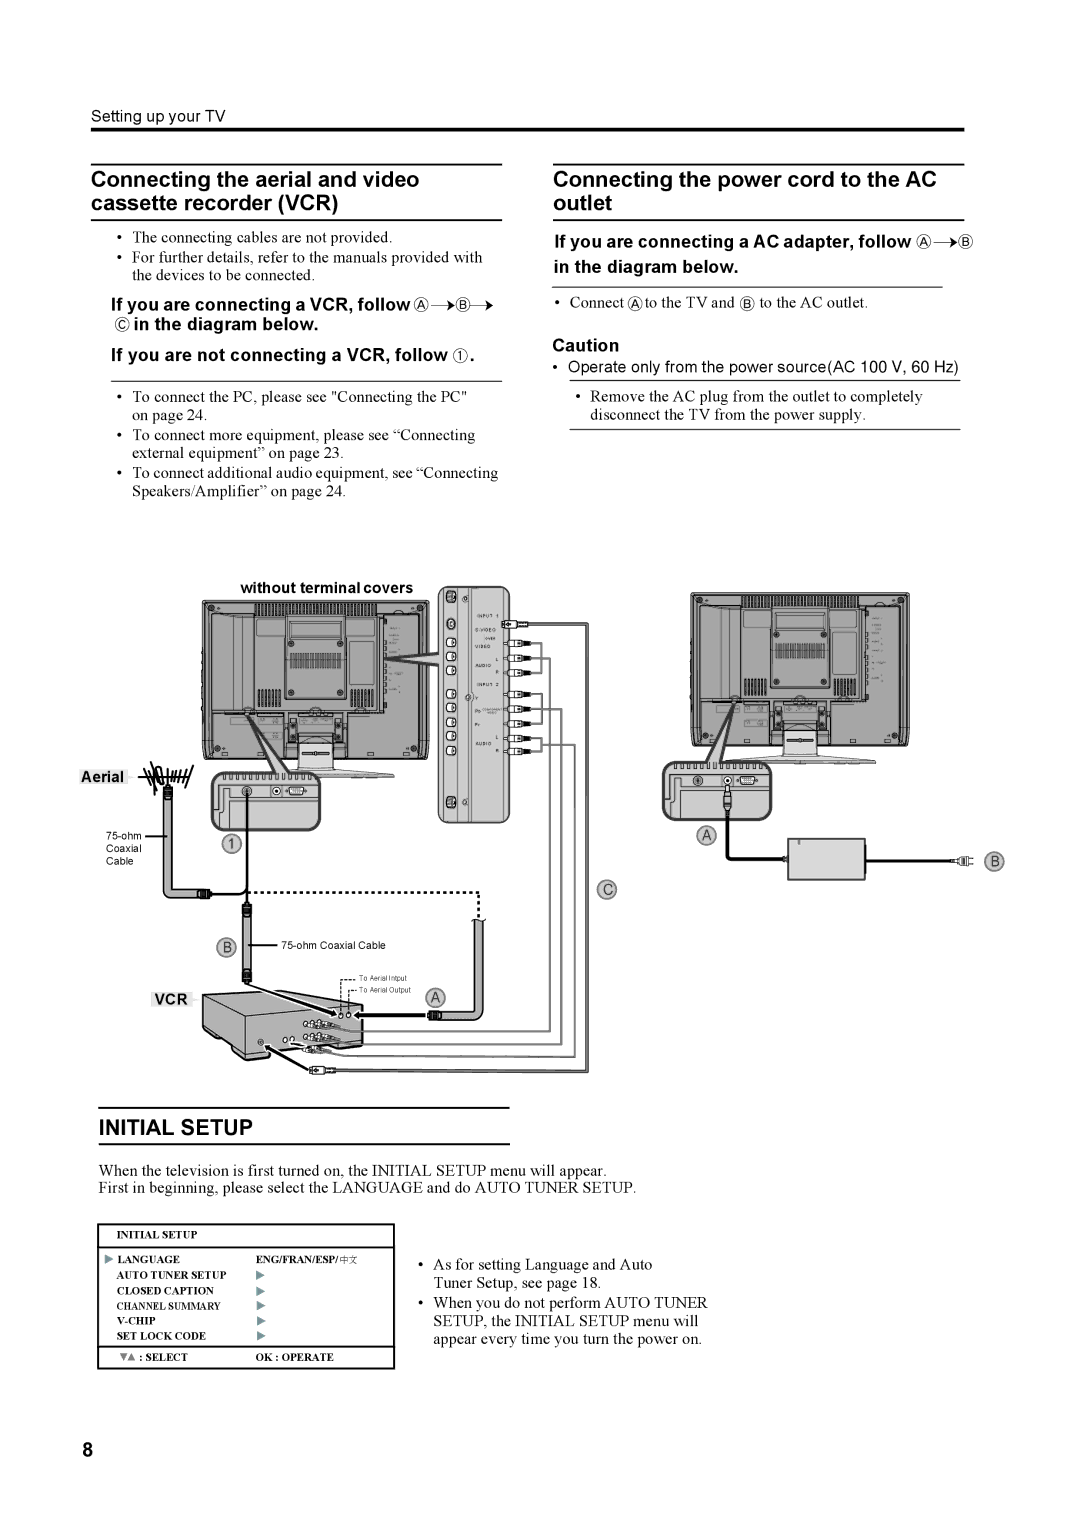
Connecting the aerial and video cassette recorder (VCR)
•The connecting cables are not provided.
•For further details, refer to the manuals provided with the devices to be connected.
If you are connecting a VCR, follow ![]()
![]()
![]()
![]()
![]() in the diagram below.
in the diagram below.
If you are not connecting a VCR, follow ![]() .
.
•To connect the PC, please see "Connecting the PC" on page 24.
•To connect more equipment, please see “Connecting external equipment” on page 23.
•To connect additional audio equipment, see “Connecting Speakers/Amplifier” on page 24.
Connecting the power cord to the AC outlet
If you are connecting a AC adapter, follow ![]()
![]()
![]() in the diagram below.
in the diagram below.
• Connect ![]() to the TV and
to the TV and ![]() to the AC outlet.
to the AC outlet.
Caution
•Operate only from the power source(AC 100 V, 60 Hz)
•Remove the AC plug from the outlet to completely disconnect the TV from the power supply.
without terminal covers
INPUT 1
VIDEO
L
AUDIO
R
INPUT 2
Y
Pb
Pr
L
AUDIO
R
INPUT 1
OVER
VIDEO
L
AUDIO
R
INPUT 2
Y
Pb COMPONENT ![]()
VIDEO
Pr
L
AUDIO
INPUT 1
VIDEO
L
AUDIO
R
INPUT 2
Y
Pb
Pr
L
AUDIO
R
R
Aerial
1 | A | |
Coaxial |
|
Cable
C
B
| To Aerial Intput |
|
VCR | To Aerial Output | A |
|
B
INITIAL SETUP
When the television is first turned on, the INITIAL SETUP menu will appear. First in beginning, please select the LANGUAGE and do AUTO TUNER SETUP.
INITIAL SETUP
LANGUAGE | ENG/FRAN/ESP/ 中文 |
AUTO TUNER SETUP |
|
CLOSED CAPTION |
|
CHANNEL SUMMARY |
|
| |
SET LOCK CODE |
|
|
|
: SELECT | OK : OPERATE |
|
|
•As for setting Language and Auto Tuner Setup, see page 18.
•When you do not perform AUTO TUNER SETUP, the INITIAL SETUP menu will appear every time you turn the power on.
8