BEAT CUT

Listening to FM and AM Broadcasts


Continued


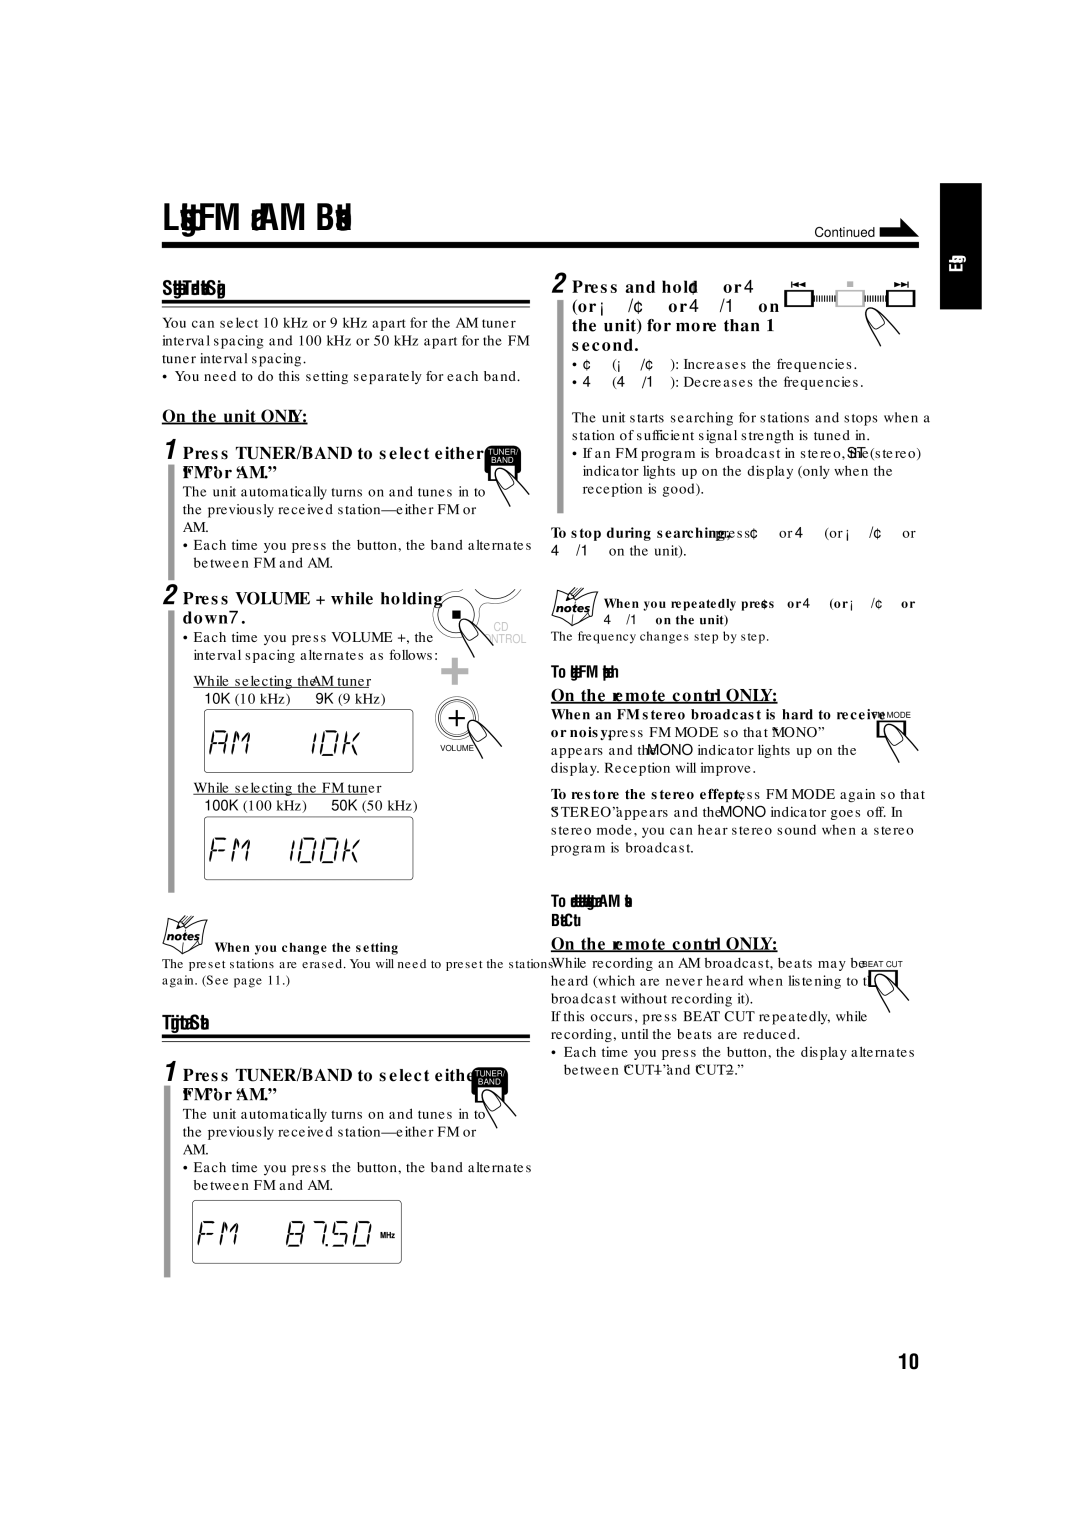
Setting the Tuner Interval Spacing


2 Press and hold ¢ or 4


(or ¡/¢ or 4/1 on


You can select 10 kHz or 9 kHz apart for the AM tuner


the unit) for more than 1


interval spacing and 100 kHz or 50 kHz apart for the FM


second.


tuner interval spacing.


¢ (¡/¢): Increases the frequencies.

• You need to do this setting separately for each band.


4 (4/1): Decreases the frequencies.


On the unit ONLY:


The unit starts searching for stations and stops when a

1 Press TUNER/BAND to select either


station of sufficient signal strength is tuned in.


BAND


• If an FM program is broadcast in stereo, the ST (stereo)


TUNER/


“FM” or “AM.”


indicator lights up on the display (only when the


The unit automatically turns on and tunes in to


reception is good).


the previously received station—either FM or


AM.


To stop during searching, press ¢ or 4 (or ¡/¢ or


• Each time you press the button, the band alternates


4/1 on the unit).


between FM and AM.


2

Press VOLUME + while holding


When you repeatedly press ¢ or 4 (or ¡/¢ or


down 7.


CD


4/1 on the unit)


• Each time you press VOLUME +, the


The frequency changes step by step.


CONTROL


interval spacing alternates as follows:


To change the FM reception mode


While selecting the AM tuner


On the remote control ONLY:


10K (10 kHz) Ô 9K (9 kHz)


When an FM stereo broadcast is hard to receive FM MODE


or noisy, press FM MODE so that “MONO”


VOLUME


appears and the MONO indicator lights up on the


display. Reception will improve.


While selecting the FM tuner


To restore the stereo effect, press FM MODE again so that


100K (100 kHz) Ô 50K (50 kHz)


“STEREO” appears and the MONO indicator goes off. In


stereo mode, you can hear stereo sound when a stereo


program is broadcast.


English

When you change the setting

The preset stations are erased. You will need to preset the stations again. (See page 11.)

Tuning in to a Station

1 Press TUNER/BAND to select either TUNER/

BAND

“FM” or “AM.”

The unit automatically turns on and tunes in to the previously received station—either FM or AM.

Each time you press the button, the band alternates between FM and AM.

To reduce the beat when listening to an AM station— Beat Cut

On the remote control ONLY:

While recording an AM broadcast, beats may be heard (which are never heard when listening to the broadcast without recording it).

If this occurs, press BEAT CUT repeatedly, while recording, until the beats are reduced.

Each time you press the button, the display alternates between “CUT–1” and “CUT–2.”

10

Page 13
Image 13
JVC LVT1356-005A manual Listening to FM and AM Broadcasts, Setting the Tuner Interval Spacing, Tuning in to a Station

LVT1356-005A specifications

The JVC LVT1356-005A is an exceptional audio accessory known for its remarkable sound quality and reliability. JVC, a company with a long-standing reputation in the electronics industry, has equipped this model with a variety of features designed to enhance the user experience.

One of the standout characteristics of the LVT1356-005A is its sleek and modern design, which complements a wide range of audio systems. The unit is designed for seamless integration, making it compatible with various JVC products as well as other brands. This versatility allows for easy setup and use in different environments, whether at home or in a professional setting.

The LVT1356-005A benefits from advanced sound technologies, particularly in terms of audio clarity. It utilizes high-quality materials in both the speakers and internal components, which contribute to a balanced and immersive sound profile. This model is engineered to reproduce a wide frequency range, ensuring that listeners experience music as it was intended by the artist.

Connectivity is another important aspect of the JVC LVT1356-005A. It offers multiple input options, allowing users to connect to various devices without hassle. This makes it a convenient choice for those who enjoy playing music from smartphones, tablets, or computers. Additionally, the model's compatibility with different audio formats enhances its appeal, making it suitable for versatile multimedia applications.

Durability is a key consideration in the design of the LVT1356-005A. Constructed with robust materials, it is built to withstand regular use, ensuring longevity. This reliability is particularly beneficial for professional users who require equipment that can endure the rigors of frequent transportation and setup.

The ease of use is further enhanced by user-friendly controls, which allow for quick adjustments to volume and settings. The intuitive layout ensures that even those new to audio equipment can operate the LVT1356-005A without confusion.

In summary, the JVC LVT1356-005A combines modern design, exceptional sound quality, versatile connectivity, and durability. These features make it an ideal choice for both casual listeners and audio professionals seeking reliable performance in their audio equipment.