ENGLISH
‰∑¬
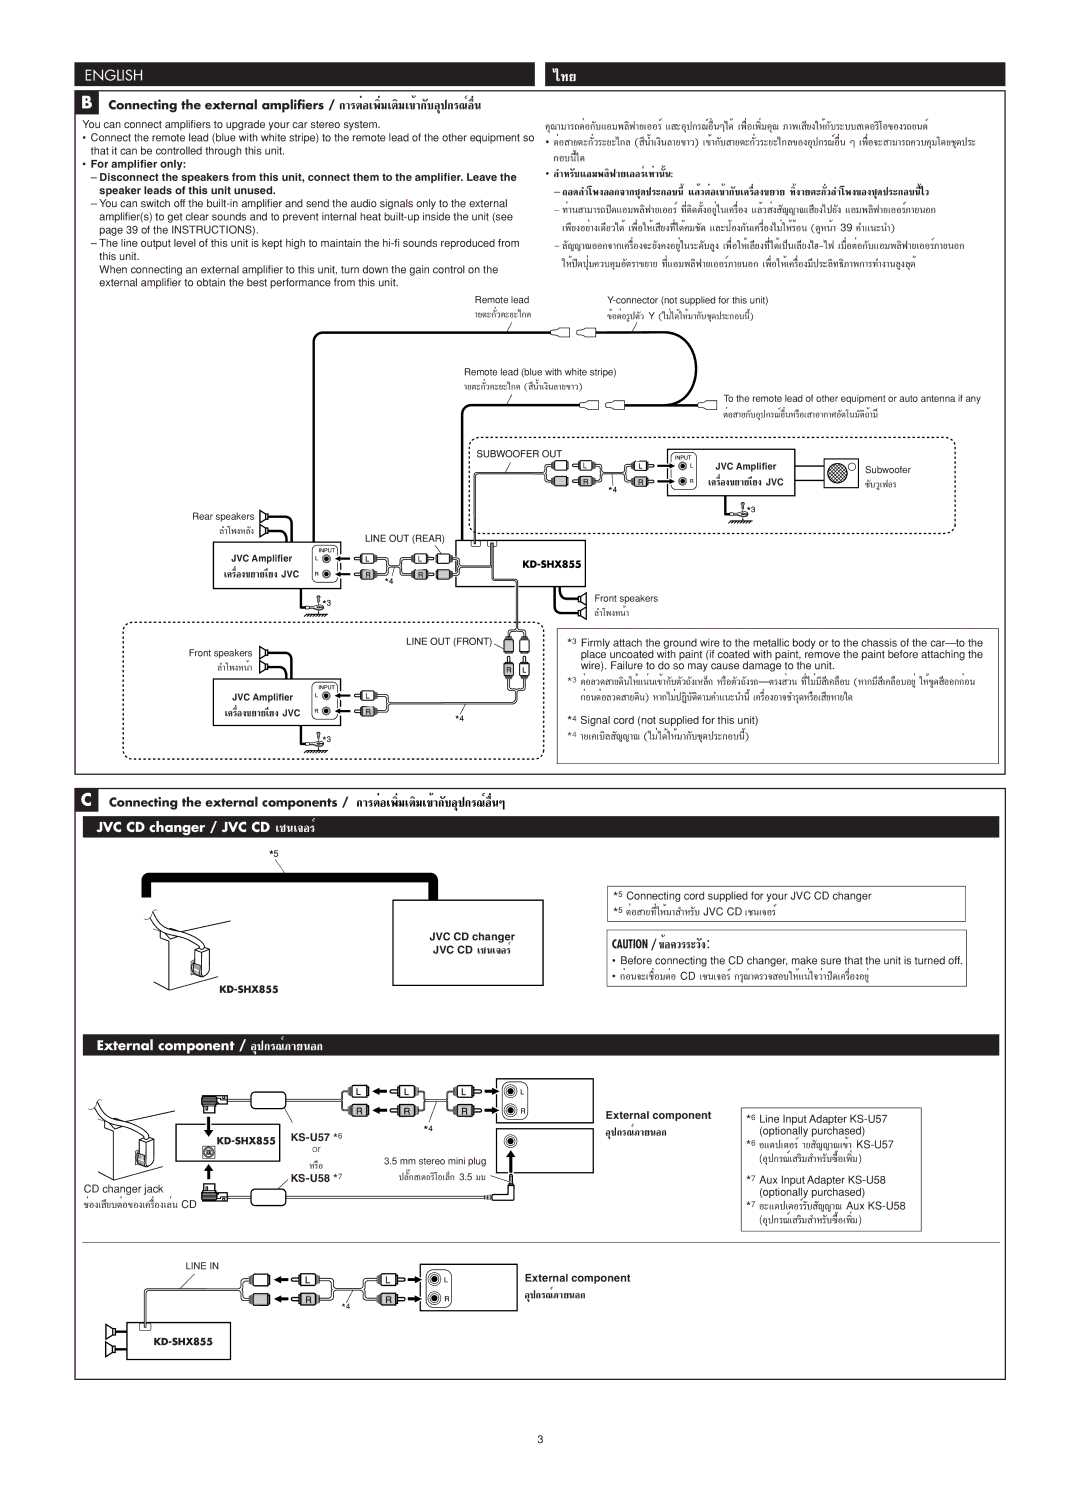
BConnecting the external amplifiers /
You can connect amplifiers to upgrade your car stereo system. | ||||
• Connect the remote lead (blue with white stripe) to the remote lead of the other equipment so | • µËÕ | |||
that it can be controlled through this unit. | °Õ∫π’ȉ¥ |
|
| |
• For amplifier only: |
|
| ||
• |
|
| ||
– Disconnect the speakers from this unit, connect them to the amplifier. Leave the |
|
| ||
speaker leads of this unit unused. | – | |||
– You can switch off the | – ∑Ë“π “¡“√∂ª‘¥·Õ¡æ≈‘ø“¬‡ÕÕ√Ï | |||
amplifier(s) to get clear sounds and to prevent internal heat | ||||
‡æ’¬ßլ˓߇¥’¬«‰¥È ‡æ◊ËÕ„Àȇ |
| |||
page 39 of the INSTRUCTIONS). |
| |||
– The line output level of this unit is kept high to maintain the | – | |||
this unit. | ¥ | |||
When connecting an external amplifier to this unit, turn down the gain control on the | ||||
external amplifier to obtain the best performance from this unit. |
|
|
| |
Remote lead |
|
| ||
Y |
|
| ||
|
|
| ||
Remote lead (blue with white stripe) |
|
| ||
|
| |||
| To the remote lead of other equipment or auto antenna if any |
| ||
|
| |||
| JVC Amplifier | Subwoofer |
| |
| ‡§√◊ËÕߢ¬“¬‡’¬ßJVC |
| ||
|
| |||
Rear speakers |
|
|
| |
|
|
| ||
JVC Amplifier |
|
|
| |
‡§√◊ËÕߢ¬“¬‡’¬ßJVC |
|
|
| |
| Front speakers |
|
| |
| ≈”‚æßÀπÈ“ |
|
| |
Front speakers | *3 Firmly attach the ground wire to the metallic body or to the chassis of the |
| ||
place uncoated with paint (if coated with paint, remove the paint before attaching the |
| |||
≈”‚æßÀπÈ“ | wire). Failure to do so may cause damage to the unit. |
|
| |
| *3 |
| ||
JVC Amplifier | °ËÕπµËÕ≈«¥“¬¥‘π) |
| ||
‡§√◊ËÕߢ¬“¬‡’¬ßJVC | *4 Signal cord (not supplied for this unit) |
|
| |
| *4 |
|
| |
CConnecting the external components /
JVC CD changer / JVC CD ‡™π‡®Õ√Ï
JVC CD changer
JVC CD ‡™π‡®Õ√Ï
*5 Connecting cord supplied for your JVC CD changer *5 µËÕ “¬∑’Ë„ÀÈ¡“
CAUTION /
•Before connecting the CD changer, make sure that the unit is turned off.
•
External component / Õÿª°√≥Ï¿“¬πÕ°
| *6 |
| |
or |
|
| |
À√◊Õ |
| 3.5 mm stereo mini plug | |
*7 | |||
| |||
CD changer jack |
|
|
™ËÕ߇ ’¬∫µËÕ¢Õ߇§√◊ËÕ߇≈ËπCD
External component
Õÿª°√≥Ï¿“¬πÕ°
*6 Line Input Adapter
*6 Õ·¥ª‡µÕ√Ï “¬
*7 Aux Input Adapter
*7
LINE IN
External component
Õÿª°√≥Ï¿“¬πÕ°
3