18

 EN
EN


 RECORDING
 Basic
Basic
 Recording


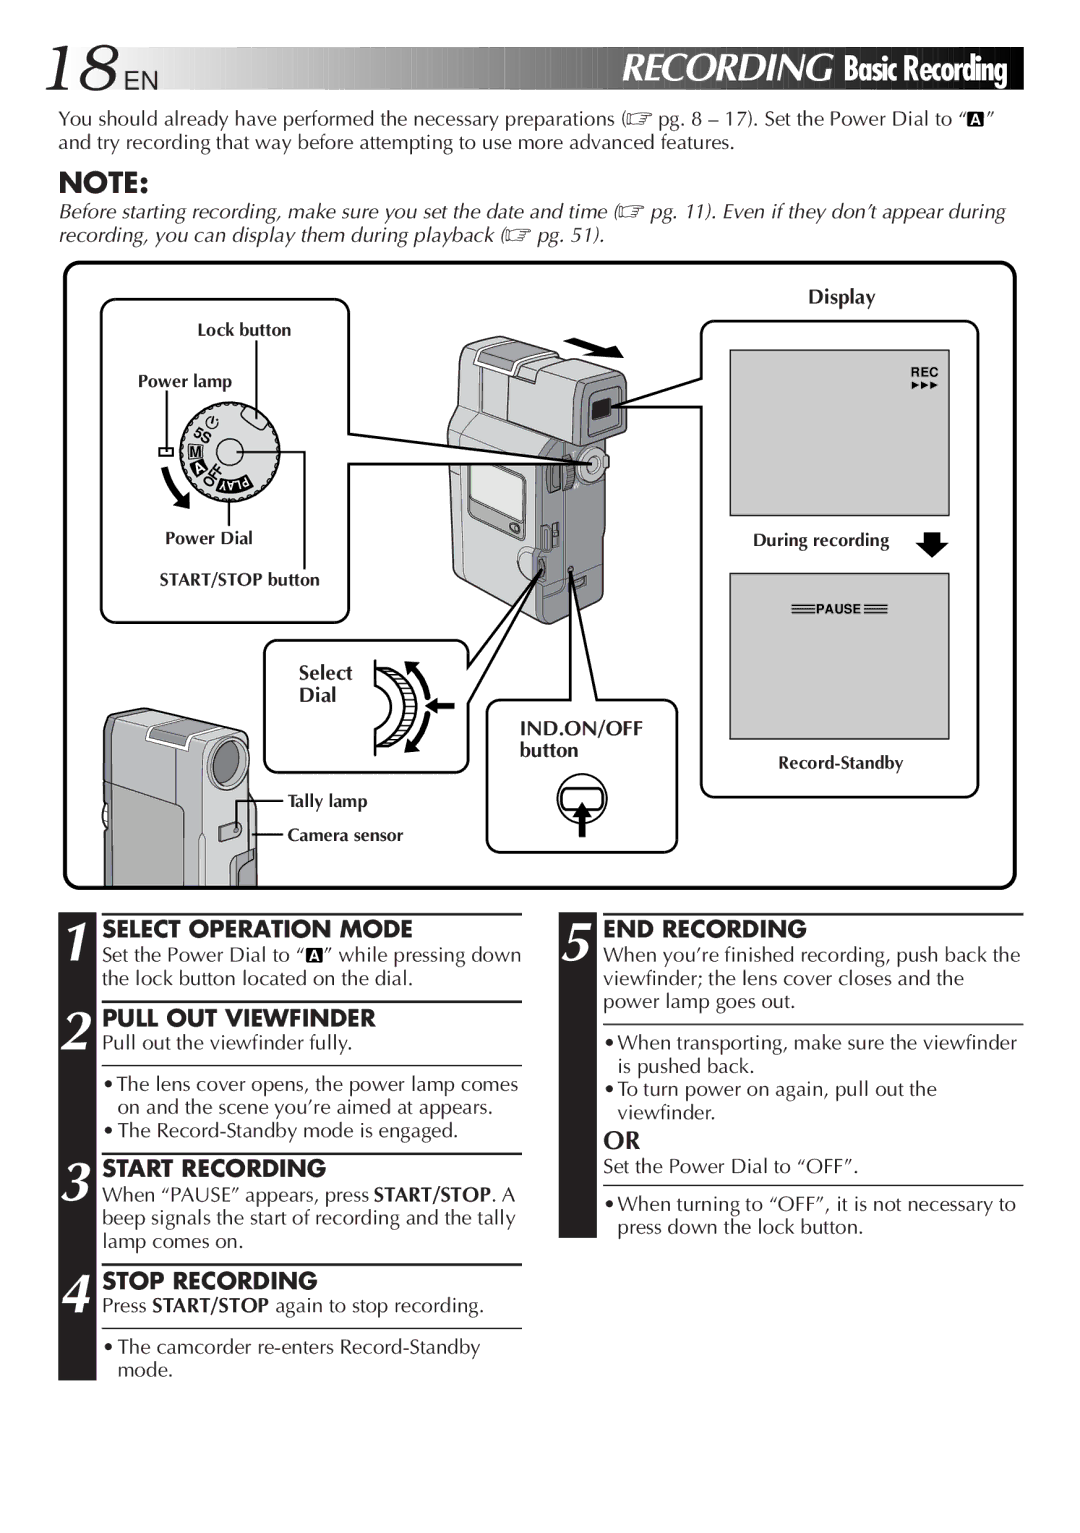
You should already have performed the necessary preparations (☞ pg. 8 – 17). Set the Power Dial to “ and try recording that way before attempting to use more advanced features.
A
”
NOTE:
Before starting recording, make sure you set the date and time (☞ pg. 11). Even if they don’t appear during recording, you can display them during playback (☞ pg. 51).
Lock button
Power lamp
5S |
| |
M | OFF Y |
|
A | P | |
|
| |
| AL | |
Power Dial
START/STOP button
Select
Dial
IND.ON/OFF button
Tally lamp
![]()
![]() Camera sensor
Camera sensor
Display
REC
PAUSE 444
During recording
![]() PAUSE
PAUSE ![]()
1 SELECT OPERATION MODE
Set the Power Dial to “ A ” while pressing down the lock button located on the dial.
2 PULL OUT VIEWFINDER Pull out the viewfinder fully.
•The lens cover opens, the power lamp comes on and the scene you’re aimed at appears.
• The
3 START RECORDING
When “PAUSE” appears, press START/STOP. A beep signals the start of recording and the tally lamp comes on.
4 STOP RECORDING
Press START/STOP again to stop recording.
•The camcorder
5 END RECORDING
When you’re finished recording, push back the viewfinder; the lens cover closes and the power lamp goes out.
•When transporting, make sure the viewfinder is pushed back.
•To turn power on again, pull out the viewfinder.
OR
Set the Power Dial to “OFF”.
•When turning to “OFF”, it is not necessary to press down the lock button.
