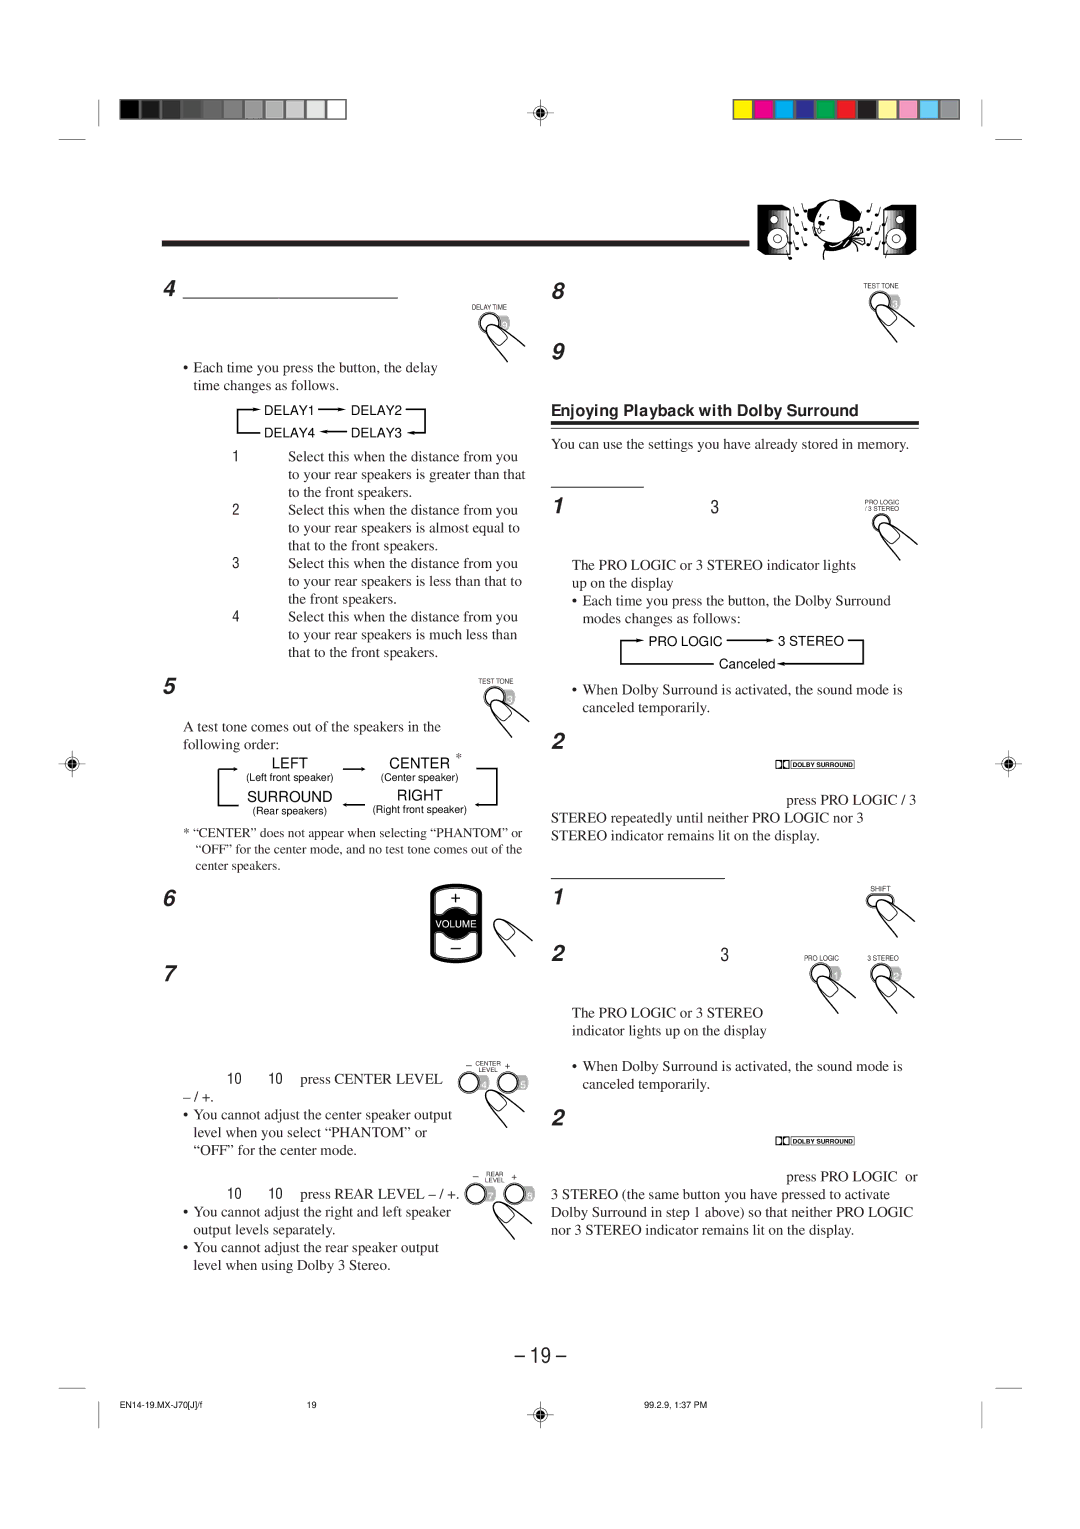
4 ONLY FOR “PR O LOGIC”

Press DELAY TIME repeatedly to

DELAY TIME

select the proper delay time of the


rear speaker output.


Each time you press the button, the delay time changes as follows.

DELAY1 DELAY2

DELAY4 DELAY3

DELAY1 Select this when the distance from you to your rear speakers is greater than that to the front speakers.

DELAY2 Select this when the distance from you to your rear speakers is almost equal to that to the front speakers.

DELAY3 Select this when the distance from you to your rear speakers is less than that to the front speakers.

DELAY4 Select this when the distance from you to your rear speakers is much less than that to the front speakers.

5 Press TEST TONE to check the

TEST TONE


speaker output balance.


A test tone comes out of the speakers in the


following order:

CENTER *


LEFT


(Left front speaker)

(Center speaker)


SURROUND

RIGHT


(Rear speakers)


(Right front speaker)


*“CENTER” does not appear when selecting “PHANTOM” or “OFF” for the center mode, and no test tone comes out of the center speakers.

6 Press VOLUME + / – to adjust + the test tone volume to a proper

level.

7 If necessary, adjust the speaker output balance so that the output level from center and rear speakers is almost equal to that from the front speakers:

To adjust the center speaker output level

CENTER

+

(from –10 to +10),press CENTER LEVEL

LEVEL


– / +.


• You cannot adjust the center speaker output


level when you select “PHANTOM” or


“OFF” for the center mode.


To adjust the rear speaker output level

LEVELREAR

+

(from –10 to +10),press REAR LEVEL – / +.

• You cannot adjust the right and left speaker output levels separately.

• You cannot adjust the rear speaker output level when using Dolby 3 Stereo.

8

Press TEST TONE again to stop the

TEST TONE


test tone.


9

Release SHIFT.


Enjoying Playback with Dolby Surround

You can use the settings you have already stored in memory.

On the unit:

1

Press PRO LOGIC / 3 STEREO to

PRO LOGIC

/ 3 STEREO


select the Dolby Surround mode you want.

The PRO LOGIC or 3 STEREO indicator lights up on the display

• Each time you press the button, the Dolby Surround modes changes as follows:

PRO LOGIC 3 STEREO

Canceled

When Dolby Surround is activated, the sound mode is canceled temporarily.

2 Select and play a sound source encoded with Dolby Surround (with the DOLBY SURROUND mark).

To cancel the Dolby Surround mode, press PRO LOGIC / 3

STEREO repeatedly until neither PRO LOGIC nor 3 STEREO indicator remains lit on the display.

On the remote control:

1


SHIFT

Press and hold SHIFT until the


following procedure is finished.

2

Press PRO LOGIC or 3

PRO LOGIC 3 STEREO


STEREO whichever you


want to use.


The PRO LOGIC or 3 STEREO indicator lights up on the display

When Dolby Surround is activated, the sound mode is canceled temporarily.

2 Select and play a sound source encoded with Dolby Surround (with the DOLBY SURROUND mark).

To cancel the Dolby Surround mode, press PRO LOGIC or 3 STEREO (the same button you have pressed to activate Dolby Surround in step 1 above) so that neither PRO LOGIC nor 3 STEREO indicator remains lit on the display.

– 19 –

EN14-19.MX-J70[J]/f

19

99.2.9, 1:37 PM

Page 22
Image 22
JVC Model MX-J70J manual Enjoying Playback with Dolby Surround

Model MX-J70J specifications

The JVC Model MX-J70J is a remarkable audio system that embodies the brand’s commitment to quality sound and innovative features. Targeted at music lovers, this model integrates a variety of technologies to enhance the listening experience, making it a sought-after choice for both casual listeners and audiophiles.

One of the standout features of the MX-J70J is its powerful sound output. Equipped with a high-output amplifier, this audio system delivers clear and robust sound across various genres of music. The dual 3-way speaker design ensures that the highs, mids, and lows are well represented, creating a balanced sound that fills any room. Users can enjoy richer bass through the built-in subwoofer, perfect for those who love deep, thumping beats.

Another significant aspect of the MX-J70J is its versatility. It comes with multiple playback options, including cassette, CD, and FM/AM radio. The dual cassette decks allow for easy recording and playback, catering to nostalgic users who still appreciate the charm of cassette tapes. Additionally, the CD player supports various formats, giving users flexibility in how they enjoy their music.

The system is also designed with modern connectivity in mind. USB ports allow users to connect flash drives containing their favorite tracks, while the 3.5mm audio input enables connection to external devices like smartphones and tablets. This connectivity expands the possibilities for music playback, making it easy to enjoy a personal library or streaming services.

In terms of user control, the JVC MX-J70J features an intuitive interface with an easy-to-read display. The remote control adds convenience, allowing users to manage playback from across the room. The system also includes a graphic equalizer with preset modes, enabling users to customize sound settings to suit their preferences and the acoustics of the room.

The build and design of the MX-J70J do not go unnoticed. With its sleek and modern appearance, it effortlessly complements various home decor styles. The robust construction promises durability, ensuring that users can enjoy high-quality sound for years to come.

Overall, the JVC Model MX-J70J is a well-rounded audio system that offers a blend of traditional and modern features. From its impressive sound quality to its versatile playback options and user-friendly design, it stands out as a solid choice for anyone in search of a reliable music system. Whether used for casual listening or for hosting gatherings, the MX-J70J delivers an immersive auditory experience.