CAUTION: Make all connections before plugging the Unit into an AC power outlet.
Connecting the Speakers
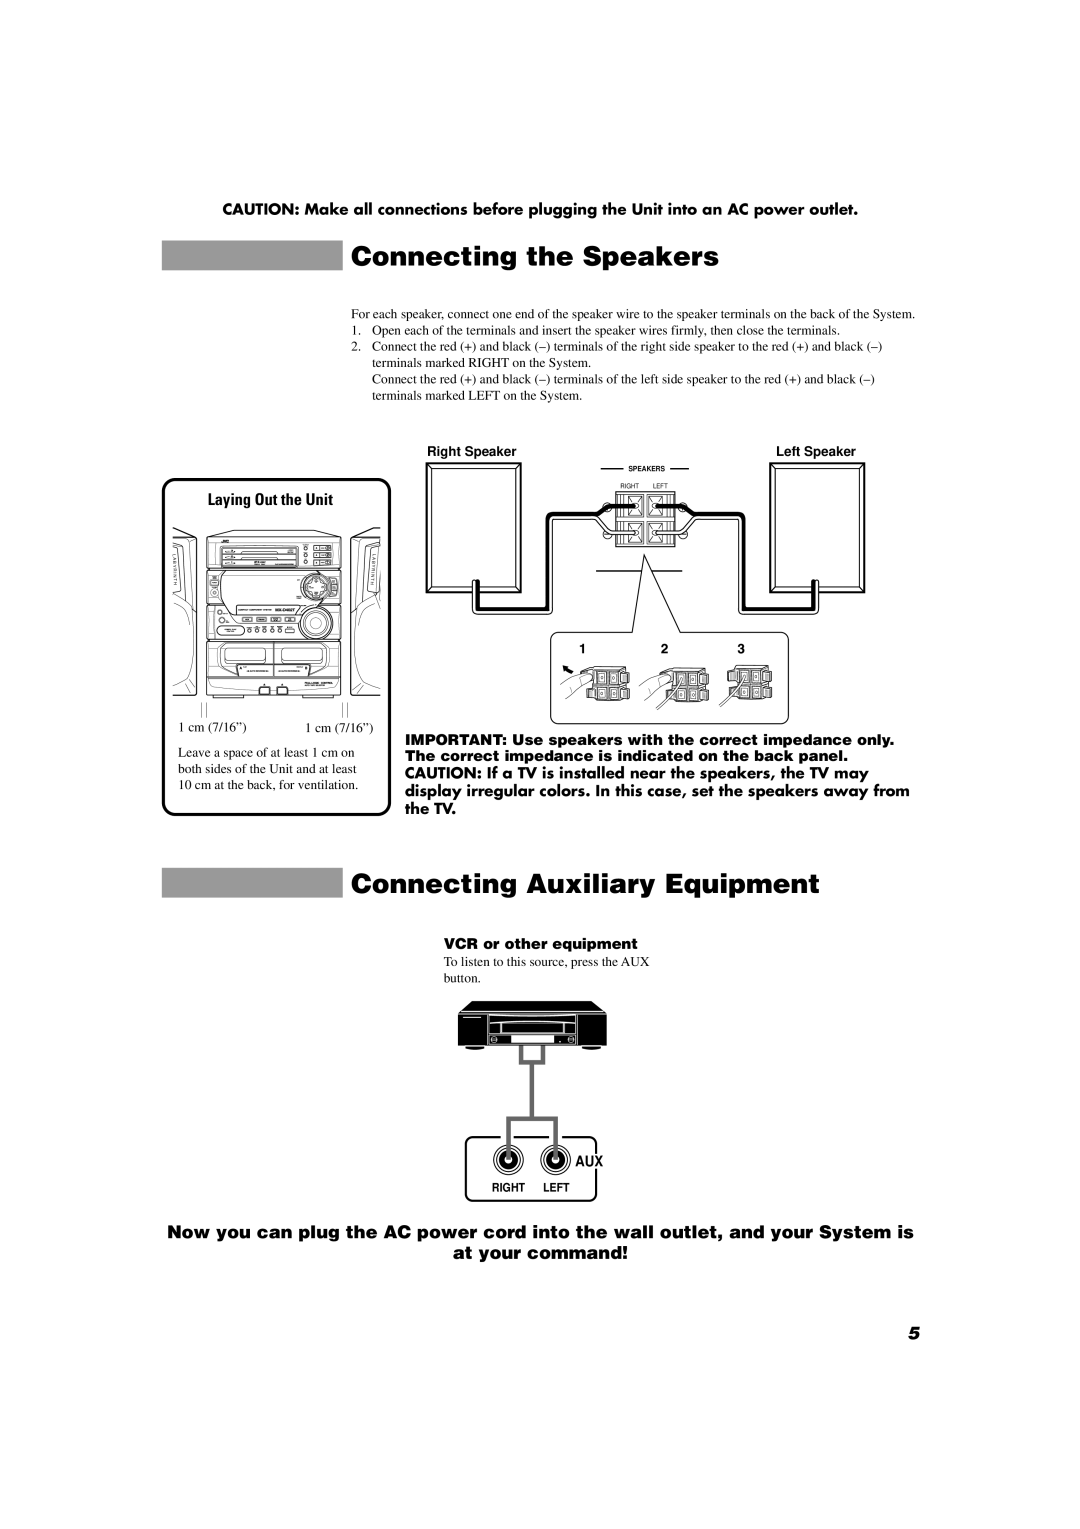
For each speaker, connect one end of the speaker wire to the speaker terminals on the back of the System.
1.Open each of the terminals and insert the speaker wires firmly, then close the terminals.
2.Connect the red (+) and black
Connect the red (+) and black
| Laying Out the Unit |
L | L |
A | A |
B | B |
Y | Y |
R | R |
I | I |
N | N |
T | T |
H | H |
1 cm (7/16”) | 1 cm (7/16”) |
Leave a space of at least 1 cm on both sides of the Unit and at least 10 cm at the back, for ventilation.
Right Speaker | Left Speaker |
SPEAKERS | |
RIGHT | LEFT |
+ | + |
– | – |
IMPORTANT: Use speakers with the correct impedance only. The correct impedance is indicated on the back panel.
CAUTION: If a TV is installed near the speakers, the TV may display irregular colors. In this case, set the speakers away from the TV.
Connecting Auxiliary Equipment
VCR or other equipment
To listen to this source, press the AUX button.
![]() AUX
AUX
RIGHT LEFT
Now you can plug the AC power cord into the wall outlet, and your System is
at your command!
5