Presetting stations
You can preset up to 30 FM stations and 15 AM (MW/LW) stations.
Note: Preset numbers may have been set to factory test frequencies prior to shipment. This is not a malfunction. You can preset the stations you want into memory by following one of the presetting methods below:
Using the remote control only
There is a time limit in doing the following steps. If the setting is canceled before you finish, start again from step 3. .
■1. Select a band (either AM or FM) by pressing TUNER BAND.
■2. Press 4 or ¢ to tune in to a station. ■3. Press SET.
The preset station number starts flashing.
■4. Press the number buttons to select the preset number you want.
■5. Press SET.
“STORED” appears on the display and the station is stored.
■6. Repeat above steps 1. to 5. for each station you want to store into memory with a preset number.
To change the preset stations, repeat the same steps as
above to overwrite a new station.
CAUTION: To prevent the preset stations from being erased because of a power failure, etc., install memory backup batteries in the system. (See pages 5 and 6.)
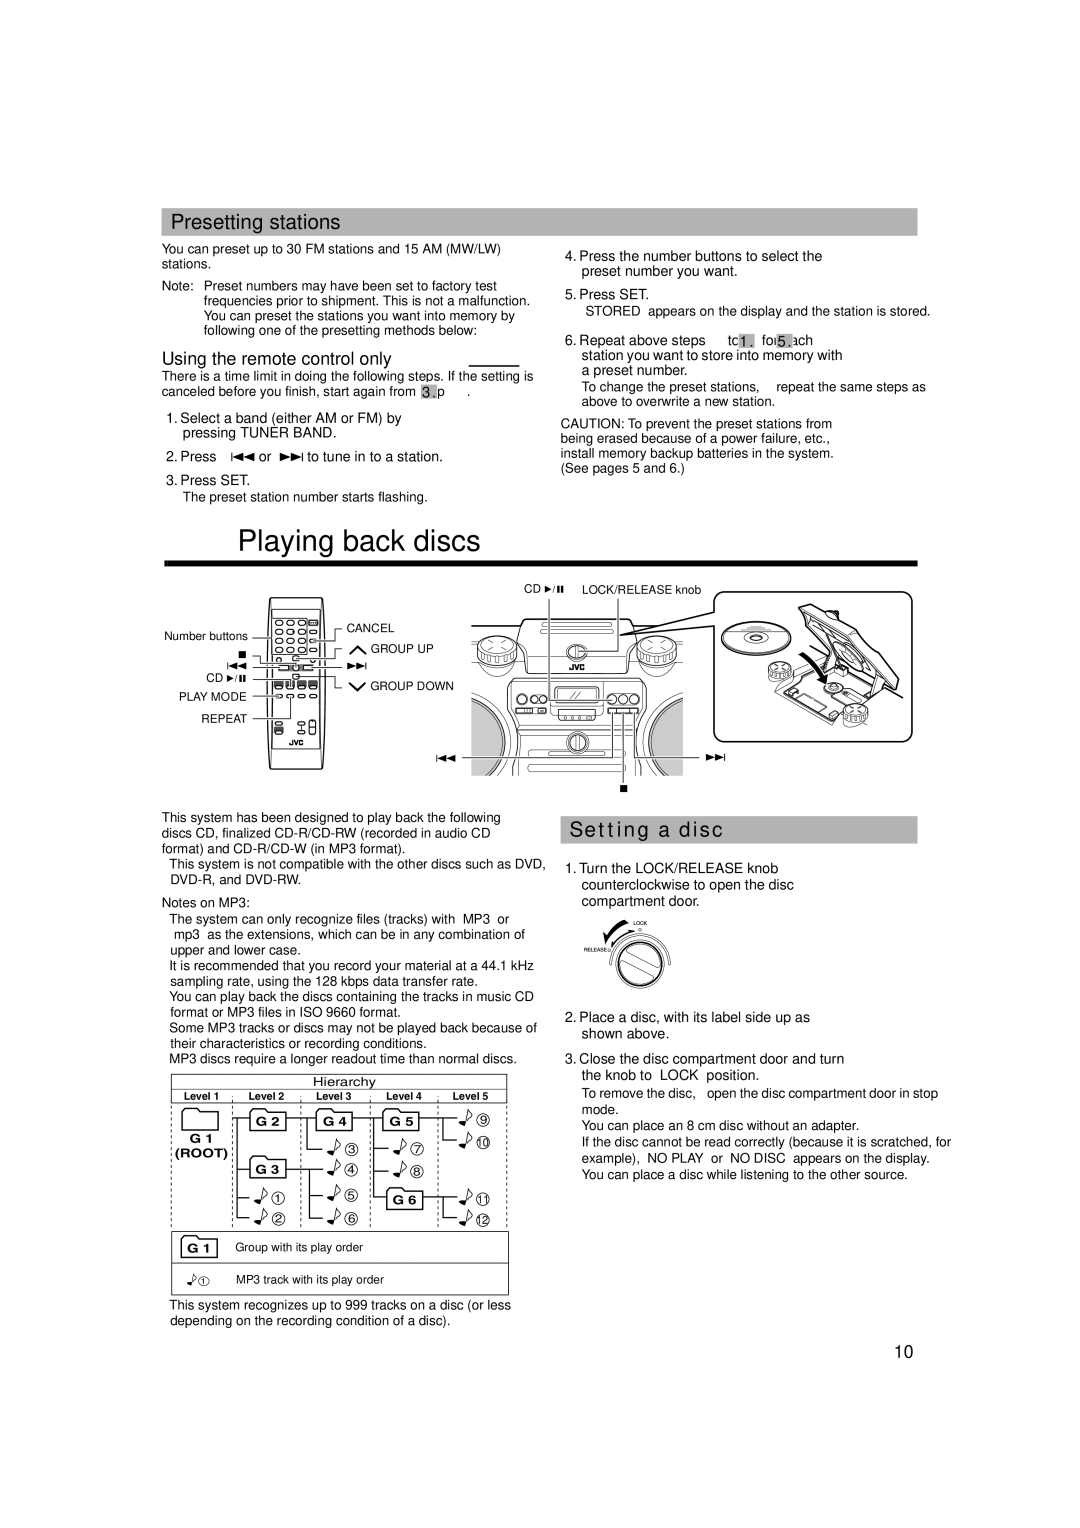
■Playing back discs
|
| CD 6 LOCK/RELEASE knob |
Number buttons | CANCEL |
|
GROUP UP |
| |
7 |
| |
|
| |
4 | ¢ |
|
CD 6 | GROUP DOWN |
|
PLAY MODE |
| |
|
| |
REPEAT |
|
|
| 4 | ¢ |
|
| 7 |
This system has been designed to play back the following
•This system is not compatible with the other discs such as DVD,
Notes on MP3:
•The system can only recognize files (tracks) with “MP3” or “mp3” as the extensions, which can be in any combination of upper and lower case.
•It is recommended that you record your material at a 44.1 kHz sampling rate, using the 128 kbps data transfer rate.
•You can play back the discs containing the tracks in music CD format or MP3 files in ISO 9660 format.
•Some MP3 tracks or discs may not be played back because of their characteristics or recording conditions.
•MP3 discs require a longer readout time than normal discs.
|
| Hierarchy |
|
|
Level 1 | Level 2 | Level 3 | Level 4 | Level 5 |
| G 2 | G 4 | G 5 | 9 |
G 1 |
| 3 | 7 | 10 |
(ROOT) |
| |||
|
| |||
| G 3 | 4 | 8 |
|
| 1 | 5 | G 6 | 11 |
| 2 | 6 |
| 12 |
Setting a disc
■1. Turn the LOCK/RELEASE knob counterclockwise to open the disc compartment door.
■2. Place a disc, with its label side up as shown above.
■3. Close the disc compartment door and turn the knob to “LOCK” position.
To remove the disc, open the disc compartment door in stop mode.
■You can place an 8 cm disc without an adapter.
■If the disc cannot be read correctly (because it is scratched, for example), “NO PLAY” or “NO DISC” appears on the display.
■You can place a disc while listening to the other source.
G 1 | Group with its play order |
![]() 1 MP3 track with its play order
1 MP3 track with its play order
•This system recognizes up to 999 tracks on a disc (or less depending on the recording condition of a disc).
10