
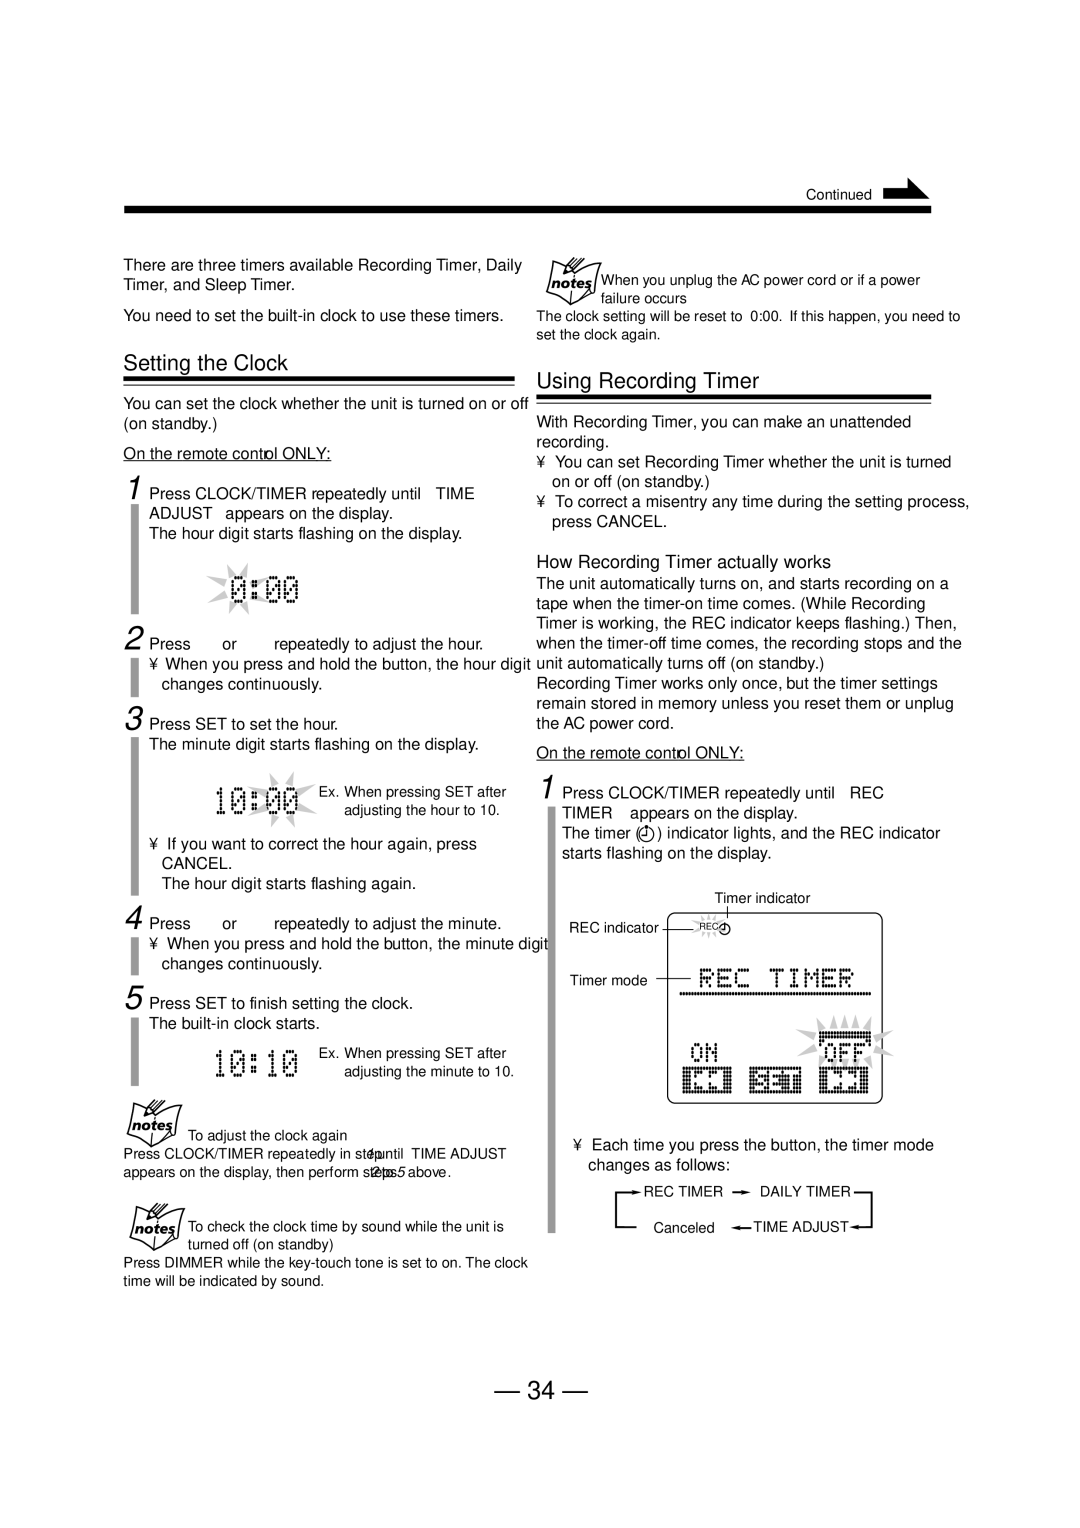
UX-A52R specifications
The JVC UX-A52R is a compact micro stereo system designed for music enthusiasts seeking quality sound in a space-efficient package. This model stands out for its blend of vintage design and modern technology, making it an appealing choice for various users, from casual listeners to dedicated audiophiles.One of the standout features of the UX-A52R is its powerful audio output. With an impressive 60 watts of RMS power, the system delivers clear and dynamic sound, ensuring that even the most intricate musical details are preserved. The system features a dual speaker configuration, which enhances the stereo imaging and provides a richer listening experience. The speakers are designed to minimize distortion, allowing for consistent sound quality across various genres.
The UX-A52R is equipped with a CD player that supports various disc formats, including CD-RW, allowing users to enjoy their favorite albums. Additionally, it includes an FM/AM tuner with 30 preset stations, providing easy access to both local and national radio stations.
In terms of modern functionality, the JVC UX-A52R features an auxiliary input, enabling users to connect external devices such as smartphones or tablets. This versatility extends the system's capabilities, making it suitable for streaming music directly from digital devices. Moreover, the unit includes a headphone jack for private listening, enhancing its utility for personal use.
Another noteworthy characteristic of the JVC UX-A52R is its user-friendly design. The front panel features a bright, easy-to-read LCD display that shows track information and station frequencies, improving navigation through settings and selections. The included remote control offers added convenience, allowing users to adjust volume, skip tracks, and change inputs without getting up from their seat.
The design of the UX-A52R is also appealing, with a sleek, modern aesthetic that complements any home decor. The system is compact enough to fit comfortably on a shelf or desktop, making it an excellent choice for smaller spaces.
In summary, the JVC UX-A52R is an impressive micro stereo system that combines excellent sound quality, modern connectivity options, and a user-friendly interface. Its powerful audio output and versatile features make it an ideal choice for anyone seeking a quality music experience in a compact form factor. Whether you're enjoying your favorite CDs or streaming music from your device, the UX-A52R delivers a satisfying auditory experience.