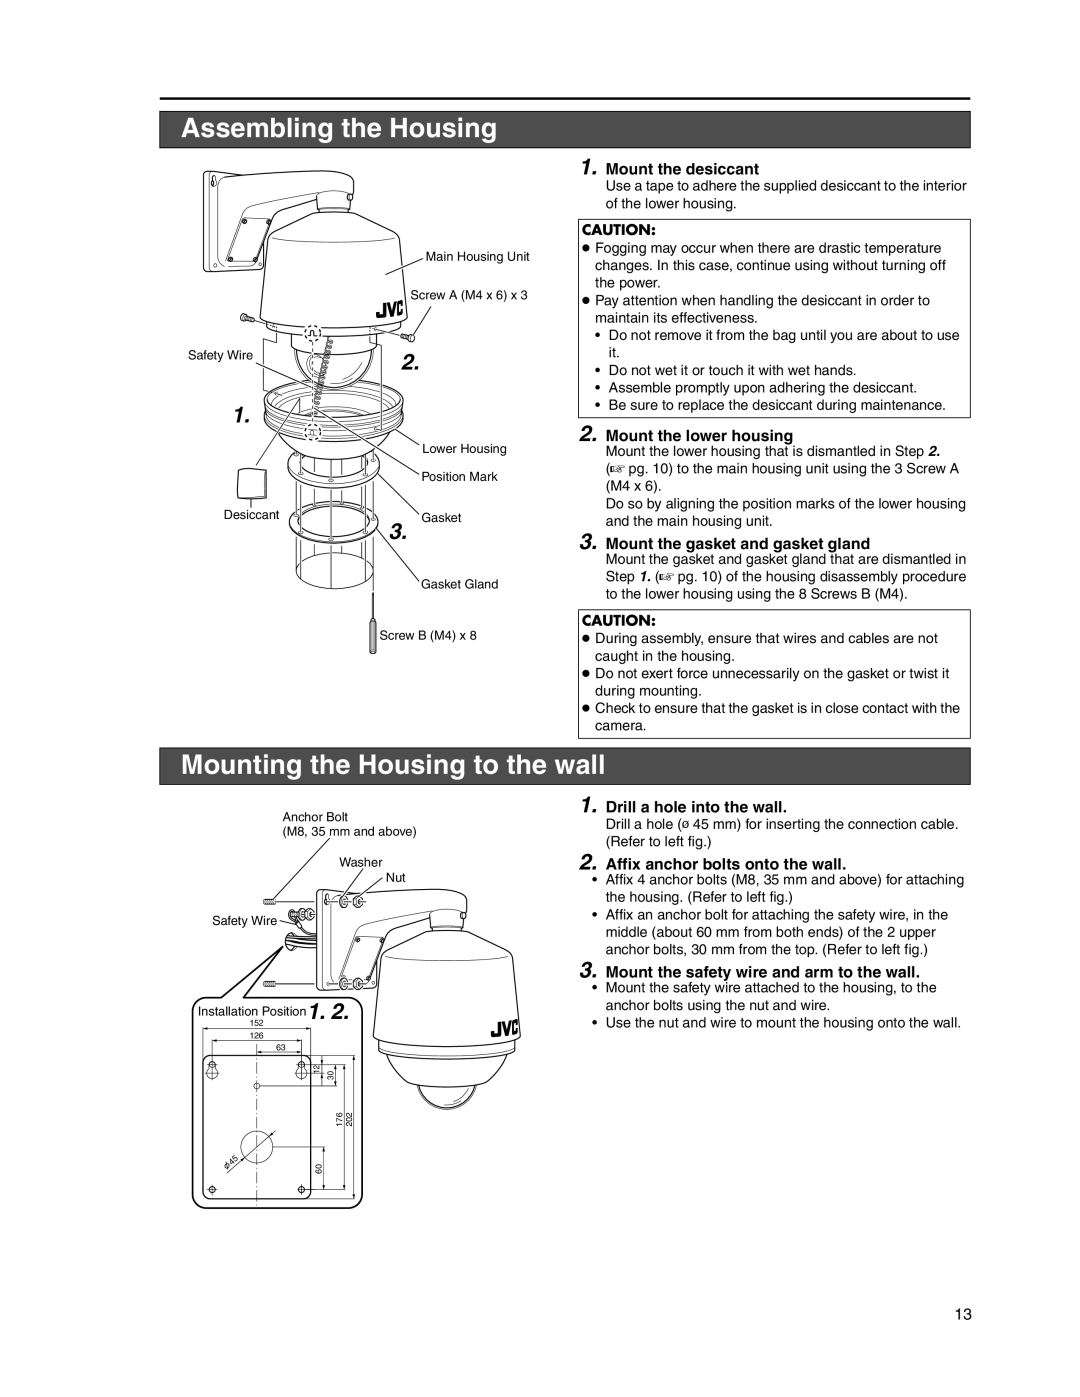
Assembling the Housing
Main Housing Unit
Screw A (M4 x 6) x 3
Safety Wire | 2. |
|
|
| |
1. |
|
|
|
| Lower Housing |
|
| Position Mark |
Desiccant | 3. | Gasket |
| ||
|
| Gasket Gland |
| Screw B (M4) x 8 | |
1. Mount the desiccant
Use a tape to adhere the supplied desiccant to the interior of the lower housing.
CAUTION:
●Fogging may occur when there are drastic temperature changes. In this case, continue using without turning off the power.
●Pay attention when handling the desiccant in order to maintain its effectiveness.
•Do not remove it from the bag until you are about to use it.
•Do not wet it or touch it with wet hands.
•Assemble promptly upon adhering the desiccant.
•Be sure to replace the desiccant during maintenance.
2. Mount the lower housing
Mount the lower housing that is dismantled in Step 2.
(A pg. 10) to the main housing unit using the 3 Screw A (M4 x 6).
Do so by aligning the position marks of the lower housing and the main housing unit.
3. Mount the gasket and gasket gland
Mount the gasket and gasket gland that are dismantled in Step 1. (A pg. 10) of the housing disassembly procedure to the lower housing using the 8 Screws B (M4).
CAUTION:
●During assembly, ensure that wires and cables are not caught in the housing.
●Do not exert force unnecessarily on the gasket or twist it during mounting.
●Check to ensure that the gasket is in close contact with the camera.
Mounting the Housing to the wall
Anchor Bolt
(M8, 35 mm and above)
Washer
![]() Nut
Nut
Safety Wire
Installation Position1. 2.
152
126
63
|
|
|
|
|
|
| 12 | 30 |
|
|
|
| ||
|
|
|
|
|
1. Drill a hole into the wall.
Drill a hole (R 45 mm) for inserting the connection cable. (Refer to left fig.)
2. Affix anchor bolts onto the wall.
•Affix 4 anchor bolts (M8, 35 mm and above) for attaching the housing. (Refer to left fig.)
•Affix an anchor bolt for attaching the safety wire, in the middle (about 60 mm from both ends) of the 2 upper anchor bolts, 30 mm from the top. (Refer to left fig.)
3. Mount the safety wire and arm to the wall.
•Mount the safety wire attached to the housing, to the anchor bolts using the nut and wire.
•Use the nut and wire to mount the housing onto the wall.
176 202
60
13