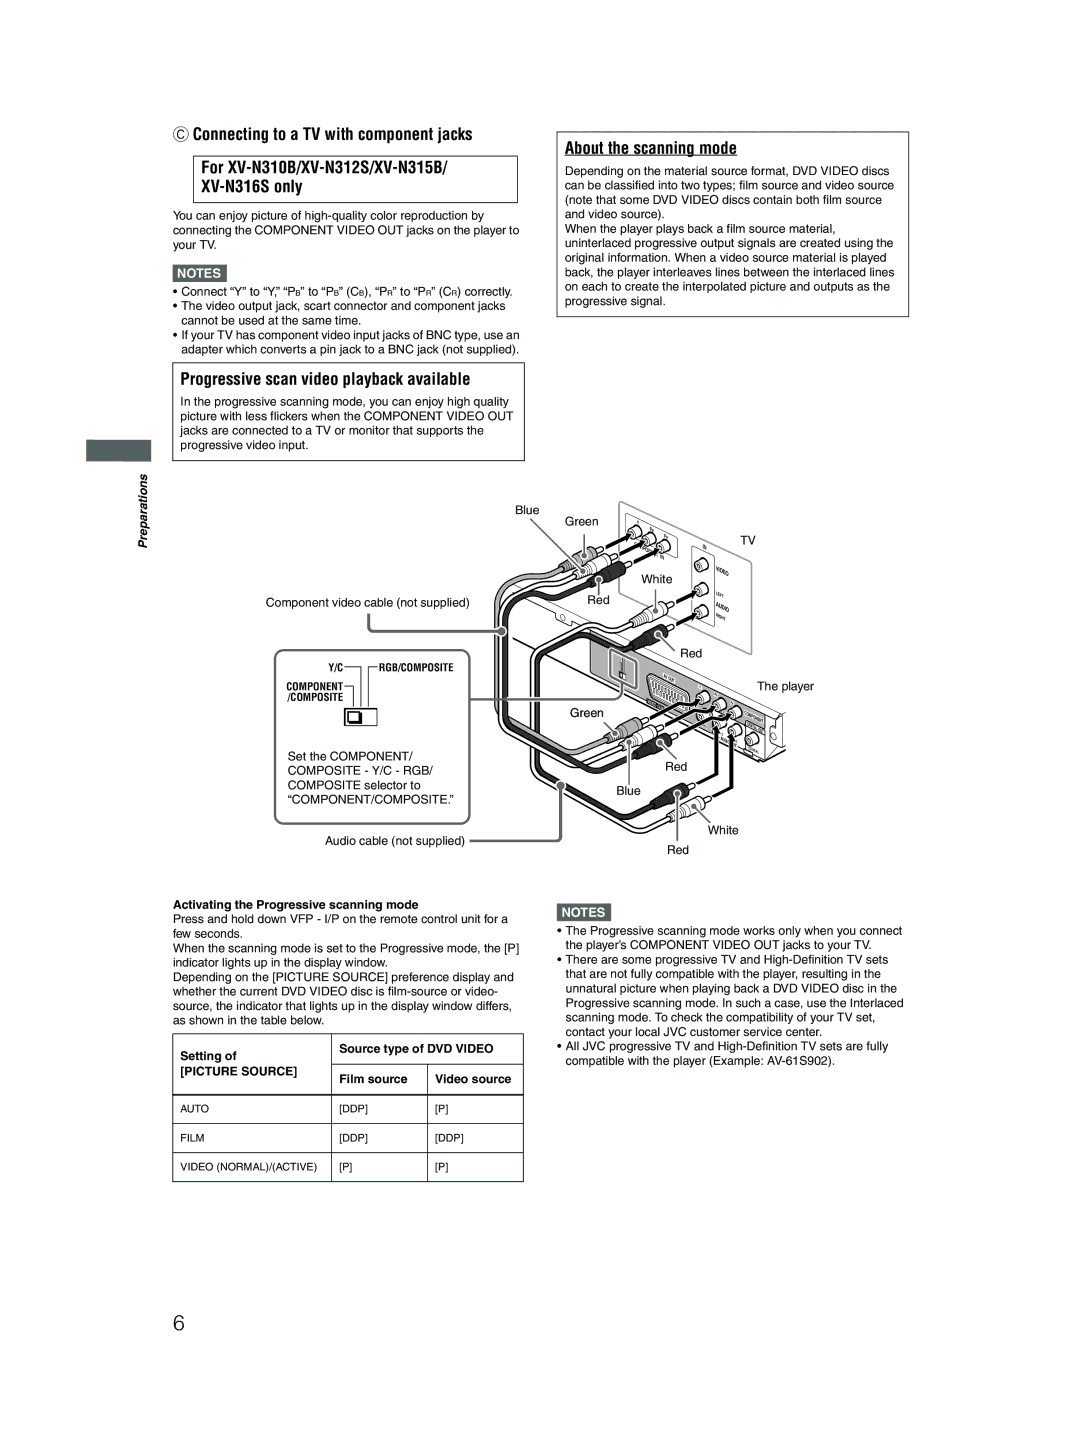
CConnecting to a TV with component jacks
For
You can enjoy picture of
NOTES![]()
•Connect “Y” to “Y,” “PB” to “PB” (CB), “PR” to “PR” (CR) correctly.
•The video output jack, scart connector and component jacks cannot be used at the same time.
•If your TV has component video input jacks of BNC type, use an adapter which converts a pin jack to a BNC jack (not supplied).
About the scanning mode
Depending on the material source format, DVD VIDEO discs can be classified into two types; film source and video source (note that some DVD VIDEO discs contain both film source and video source).
When the player plays back a film source material, uninterlaced progressive output signals are created using the original information. When a video source material is played back, the player interleaves lines between the interlaced lines on each to create the interpolated picture and outputs as the progressive signal.
Progressive scan video playback available
In the progressive scanning mode, you can enjoy high quality picture with less flickers when the COMPONENT VIDEO OUT jacks are connected to a TV or monitor that supports the progressive video input.
Preparations
Blue
Component video cable (not supplied)
Y/C |
|
|
|
| RGB/COMPOSITE |
|
|
|
| ||
COMPONENT |
|
|
|
|
|
/COMPOSITE |
|
|
|
| |
|
|
|
|
|
|
|
|
|
|
|
|
Set the COMPONENT/ COMPOSITE - Y/C - RGB/ COMPOSITE selector to
“COMPONENT/COMPOSITE.”
Audio cable (not supplied)
Activating the Progressive scanning mode
Press and hold down VFP - I/P on the remote control unit for a few seconds.
When the scanning mode is set to the Progressive mode, the [P] indicator lights up in the display window.
Depending on the [PICTURE SOURCE] preference display and whether the current DVD VIDEO disc is
Setting of | Source type of DVD VIDEO | |
|
| |
[PICTURE SOURCE] | Film source | Video source |
| ||
|
|
|
AUTO | [DDP] | [P] |
|
|
|
FILM | [DDP] | [DDP] |
|
|
|
VIDEO (NORMAL)/(ACTIVE) | [P] | [P] |
|
|
|
Green | Y |
|
|
|
|
|
|
| PB |
|
|
|
|
|
|
| PR |
|
|
|
| TV |
|
|
|
|
| IN |
|
| |
|
|
|
|
|
|
| |
| IN |
|
|
|
|
|
|
| White |
|
| VIDEO |
|
| |
|
|
|
|
|
| ||
|
|
|
|
| LE |
|
|
Red |
|
|
|
| FT |
|
|
|
|
|
| AUD |
|
| |
|
|
|
|
|
|
| |
|
|
|
|
| IO |
|
|
|
|
|
|
| R |
|
|
|
|
|
|
| IG |
|
|
|
|
|
|
| HT |
|
|
|
|
| Red |
|
|
|
|
| AV | OUT |
|
|
| The player | |
|
|
|
|
| |||
|
|
| Y |
|
| ||
| VIDEO |
|
|
| PB |
|
|
|
|
|
|
| PR |
| |
Green |
|
|
|
|
| COMPONENT | |
|
|
|
|
|
| ||
|
|
|
| O |
| DIGITAL | OUT |
|
|
|
|
| T |
| |
|
|
|
|
|
|
| |
|
|
|
|
| AUDIO |
|
|
|
|
|
|
|
| C |
|
|
|
|
|
|
| OAX |
|
|
|
|
|
|
| IAL | |
Red
Blue
White
Red
NOTES![]()
•The Progressive scanning mode works only when you connect the player’s COMPONENT VIDEO OUT jacks to your TV.
•There are some progressive TV and
•All JVC progressive TV and
compatible with the player (Example:
6