Getting started
Getting started
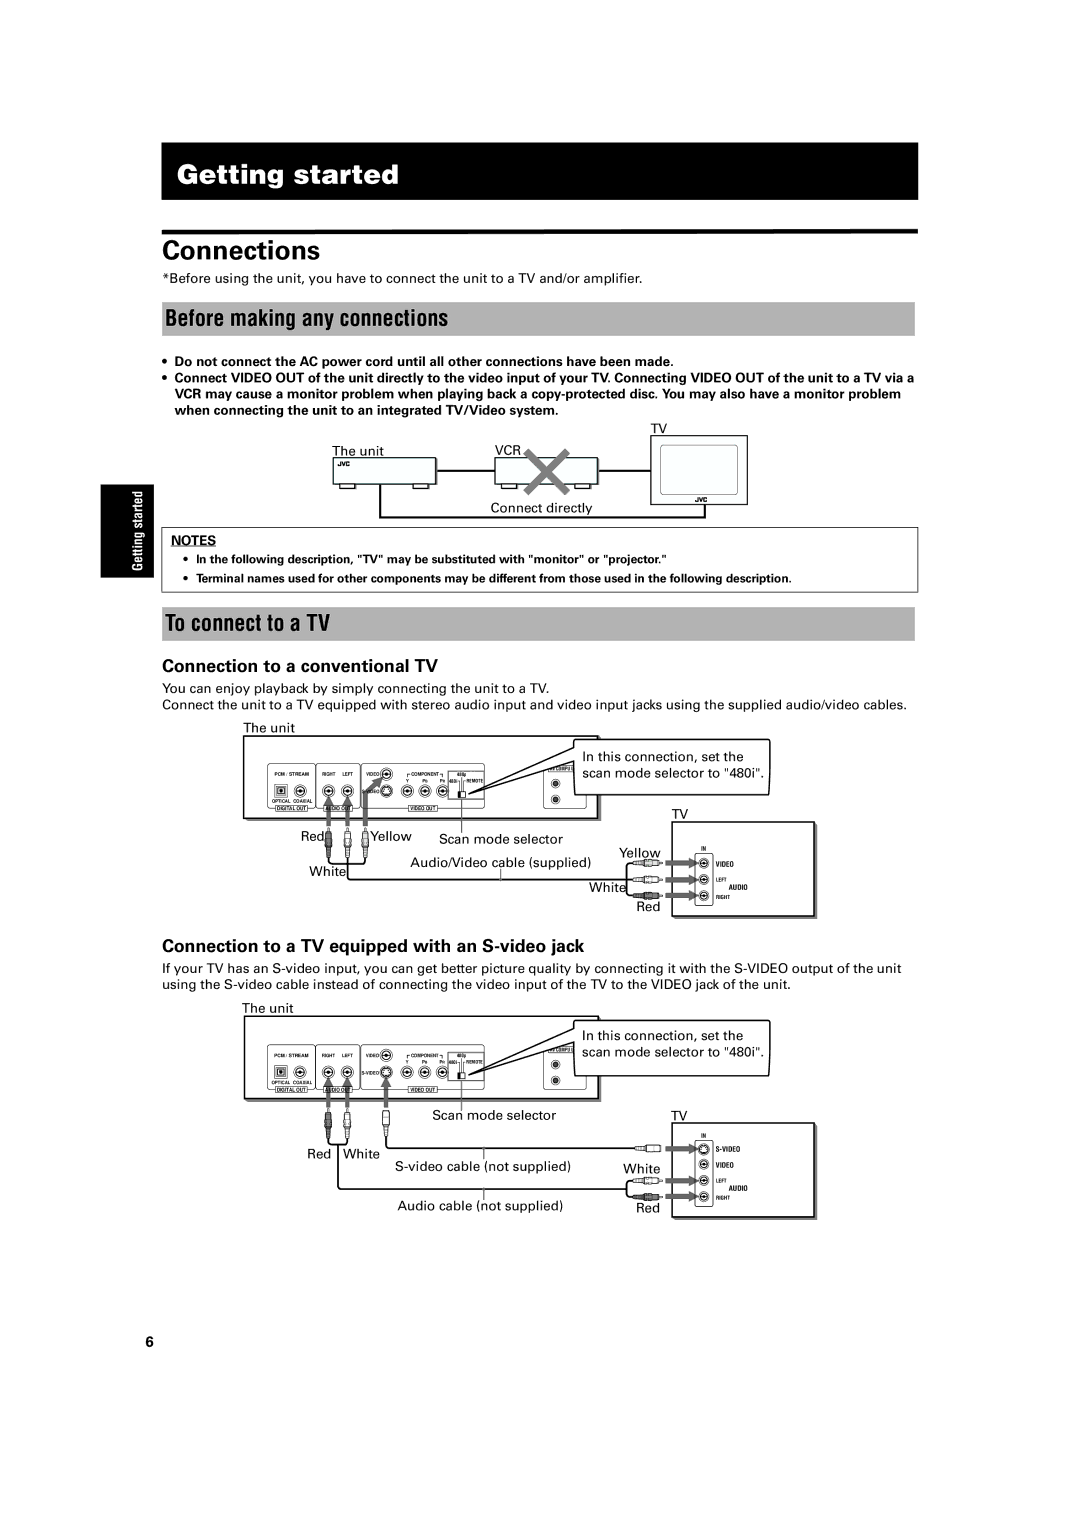
Connections
*Before using the unit, you have to connect the unit to a TV and/or amplifier.
Before making any connections
•Do not connect the AC power cord until all other connections have been made.
•Connect VIDEO OUT of the unit directly to the video input of your TV. Connecting VIDEO OUT of the unit to a TV via a VCR may cause a monitor problem when playing back a
| TV |
The unit | VCR |
| Connect directly |
NOTES
•In the following description, "TV" may be substituted with "monitor" or "projector."
•Terminal names used for other components may be different from those used in the following description.
To connect to a TV
Connection to a conventional TV
You can enjoy playback by simply connecting the unit to a TV.
Connect the unit to a TV equipped with stereo audio input and video input jacks using the supplied audio/video cables.
The unit
|
|
|
|
| In this connection, set the | |
|
|
|
|
| AV COMPU LINK |
|
PCM / STREAM | RIGHT LEFT | VIDEO | COMPONENT | 480p | scan mode selector to "480i". | |
|
| Y | PB | PR 480i REMOTE |
|
|
|
|
|
|
|
| |
OPTICAL COAXIAL |
|
|
|
|
| |
DIGITAL OUT | AUDIO OUT |
| VIDEO OUT |
|
| TV |
|
|
|
|
|
| |
Red | Yellow | Scan mode selector |
| |||
|
|
|
|
| Yellow | IN |
|
|
|
|
|
| |
| White |
| Audio/Video cable (supplied) | VIDEO | ||
|
|
|
|
| LEFT | |
|
|
|
|
| White | |
|
|
|
|
| AUDIO | |
|
|
|
|
| Red | RIGHT |
|
|
|
|
|
| |
Connection to a TV equipped with an S-video jack
If your TV has an
The unit
|
|
|
|
|
| In this connection, set the | |
PCM / STREAM | RIGHT | LEFT VIDEO | COMPONENT | 480p | AV COMPU LINK scan mode selector to "480i". | ||
|
| Y | PB | PR 480i | REMOTE |
|
|
|
|
|
|
|
|
| |
OPTICAL COAXIAL |
|
|
|
|
|
|
|
DIGITAL OUT | AUDIO OUT | VIDEO OUT |
|
|
|
| |
|
|
| Scan mode selector |
| TV | ||
|
|
|
|
|
|
| IN |
Red | White |
|
|
|
| ||
|
|
| White |
| |||
|
| VIDEO | |||||
|
|
|
|
|
|
| |
|
|
|
|
|
|
| LEFT |
|
|
|
|
|
|
| AUDIO |
|
| Audio cable (not supplied) | Red | RIGHT | |||
|
|
| |||||
6