Manuals
/
Keating Of Chicago
/
Kitchen Appliance
/
Pasta Maker
Keating Of Chicago
Gas Custom Pasta System
manual
Iv Maintenance, Warranty Repairs, Digital Timers
Models:
Gas Custom Pasta System
1
12
26
26
Download
26 pages
36.18 Kb
9
10
11
12
13
14
15
16
Specification
Install
Preventive Maintenance Chart
Electronic Timers
Warranty
Problem
Standard Accessories
Gas Pasta System Assembly
Gas Leak Testing
Replacement Of A And B Boards
Page 12
Image 12
Page 11
Page 13
Page 12
Image 12
Page 11
Page 13
Contents
KEEP THIS MANUAL FOR TRAINING NEW PERSONNEL
1-800-KEATING
Gas Pasta 0107 9/07
POST THIS LABEL IN A PROMINENT LOCATION ON YOUR UNIT
TABLE OF CONTENTS
SECTION II INSTALLATION
SECTION IV MAINTENANCE
SECTION V SERVICE DIAGNOSIS
I INTRODUCTION
STANDARD FEATURES
STANDARD ACCESSORIES
SAFETY PRECAUTIONS
CLEARANCES
II INSTALLATION
INSTALLATION
POSITIONING CLEARANCES
DAMAGE DURING SHIPMENT
SPECIFICATIONS
RESTRAINING DEVICES
GAS CONNECTION
HAVE YOUR PLUMBER OR GAS COMPANY CHECK FOR LEAKS
GAS LEAK TESTING
ELECTRICAL CONNECTION
CHECK GAS SUPPLY PRESSURE
SPECIAL NOTICES
III OPERATING
CALIBRATION
WATER AND DRAIN CONNECTIONS
FILLING
INDICATING LIGHTS
COOKING
SHUTDOWN
DRAINING
CLEANING
ELECTRONIC TIMERS
Disconnect electric power source before cleaning
A. Timer Operation
IV MAINTENANCE
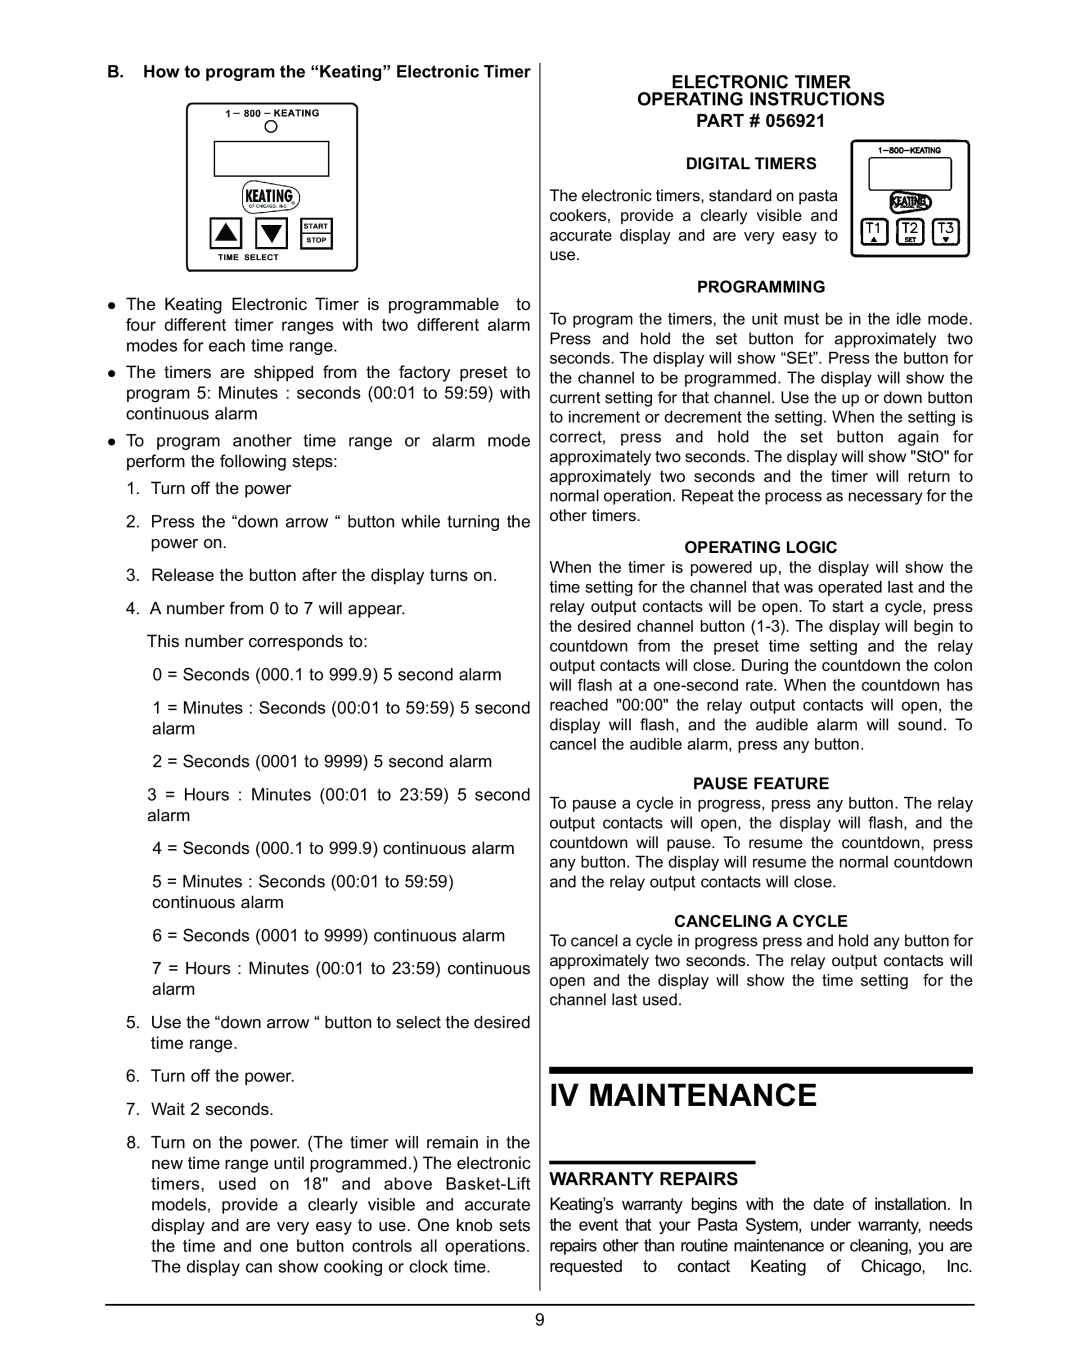
ELECTRONIC TIMER OPERATING INSTRUCTIONS PART #
WARRANTY REPAIRS
B. How to program the “Keating” Electronic Timer
PREVENTIVE MAINTENANCE
PREVENTIVE MAINTENANCE CHART
B. The Water Auto-Fill and Low Water Safety Shut- Off Systems
LIMITED CALIBRATION
Using a worn brush could damage the sensors
PROBLEM
SOLUTION
PROBABLE CAUSE
PROBLEM
SOLUTIONS Follow Sequentially
REPLACEMENT OF A AND B BOARDS
V SERVICE DIAGNOSIS
CUSTOM PASTA SYSTEM CONTROL PANEL WITH DIGITAL TIMERS
MANUAL FILL CUSTOM PASTA SYSTEM CONTROL PANEL WITH DIGITAL TIMERS
GAS PASTA SYSTEM ASSEMBLY
MODELS
PART#
GAS PASTA SYSTEM ASSEMBLY
PASTA SYSTEM WIRING DIAGRAM
GAS PASTA SYSTEM WITH BASKET-LIFT WIRING DIAGRAM
WARRANTY
The Customer must provide proof of purchase from Keating
KEATING
SERVICE INFORMATION
If you have a service related question call 1-800-KEATING
Have your serial and model number available when ordering parts
“Serving Those Who Serve The Very Best”
Top
Page
Image
Contents