Installation Instructions (cont'd)
Venting (cont'd)
CEMENTING PVC, ABS OR CPVC PIPE AND FITTINGS
Read and observe all safety information printed on primer, cleaner, and cement containers.
•, DANGER
Primer, cleaner, and cements are extremely flammable. They are harmful or fatal if swallowed. The vapors are harmful. They may irritate eyes and skin and can be absorbedthrough the skin.
_, PRECAUTIONS
Always store primers, cleaner, and cements in cool, dry, well ventilated places. Do not store them near heat, sparks, or flames. Keep containers closed. Use them in well ventilated areas. Wear impervious clothing while handling. Do not smoke, eat, or drink while handling. Wash thoroughly after handling and before eating. Wear eye protection when handling. If swallowed, drink water, do not induce vomiting, and call a physician or poison control center immediate_ If inhaled, get fresh air and seek medical attention if ill feelings persist. In case of eye
and skin contact, immediately flush with plenty of water for 15 minutes and seek medical attention if irritation
persists.KEEP OUT OR REACH OF CHILDREN.
MI primers, cleaners, and cements must meet all local codes and
applicable standards of the American Society For Testing Materials Standards.
Before using primers, cleaners, and cements, stir or shake, mak- ing sure contents are liquid. Do not use if found to be lumpy or
l. Cut pipe ends squarely removing all burrs and dirt.
2.Dry fit pipe and fittings to be connected for proper fit.
3.Clean pipe and fitting with a primer/cleaner.
4.Apply a thin coat of cement to fitting, avoiding puddling inside.
5.Apply a liberal coat of cement to pipe leaving no voids.
6.QUICKLY assemble parts while cement is flui!! If you wait too long,
7.Push pipe completely into socket of fltting, turning as it goes until it bottoms.
8.Hold pipe and fitting together for 30 seconds. Then carefully clean off excess with a cloth. Allow connections a sufficient
time to cure before disturbing.
9.Remember that vent pipes must be adequately and securely supported.
APPROXIMATE SETTING TIME FOR 2_" TO 4" PIPE JOINTS
|
|
| MOVEMENT | COMPLETE |
|
|
| OF JOINT | SET |
90°F | to 150°F | 7_hr. | 8 hrs. | |
50°F | to | 90°F | I hr. | 15 hrs. |
0°F to | 50°F | 17_hr. | 18 hrs. | |
CUTTING OPENING THROUGH AN OUTSIDE
WALL AND COLLAR INSTALLATION
After reading the manual and you have determined the location of the opening in the wall, (using the drawing below), cut a 3B" hole through an exterior wall.
NOTE: When determining location of the opening in the outside wall allow for the %" rise per foot that has taken
place in the horizontal run.
of |
|
|
I I" MIN. | _ | MIlL RISE//' |
__ _.___ | _ | PERFOOT |
40 GAL.- 60"
50 GAL.- 59V2"
tr_
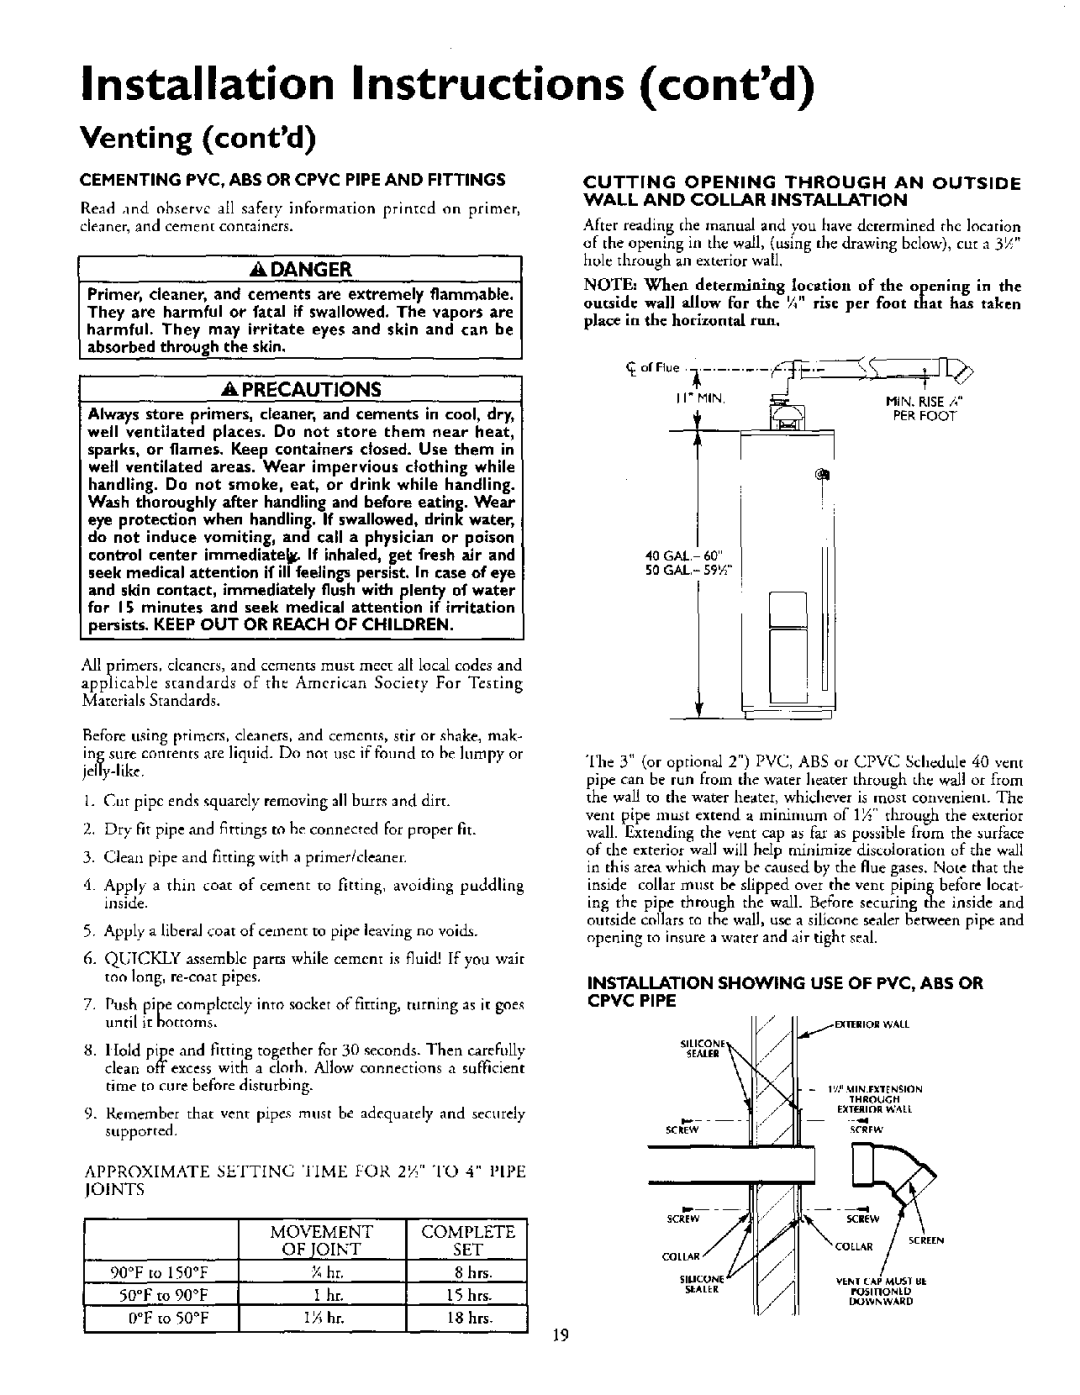
The 3" (or optional 2") PVC, ABS or CPVC Schedule 40 vent pipe can be run from the water heater through the wall or from the wall to the water heater, whichever is most convenient. The vent pipe must extend a minimum of 17.," through the exterior wall. Extending the vent cap as far as possible from the surface of the exterior wall will help minimize discoloration of the wall in this area which may be caused by the flue gases. Note that the inside collar must be slipped over the vent piping before locat- ing the pipe through the wall. Before securing the inside and outside collars to the wall, use a silicone sealer between pipe and opening to insure a water and air tight seal.
INSTALLATION SHOWING USE OF PVC, ABS OR
CPVC PIPE
J | / | EXTERIOR WALL |
SEALER |
|
|
SILICONE_ |
|
|
|
| 1%" MIN.EXTENSION |
, |
| THROUGH |
| / | EXTERIOR WALL |
SCREW | SCREW |
/ | _CO | N |
A |
| VENT CAP MUST BE |
SEALER |
| pOSITIONED |
DOWNWARD
19