SECTION3 | STEP BY STE P G UIDES TO INSTALL |
E. PRESSURE TEST / CHECK FOR LEAKS | |
[] CAUTION: | HOUSE MAIN WATER |
| SHUTOFF VALVES |
To avoid water or air pressure damage to soft- ener inner parts, and to flush pipe chips or other residue from the water pipes, be sure to
do the following steps exactly as instructed.
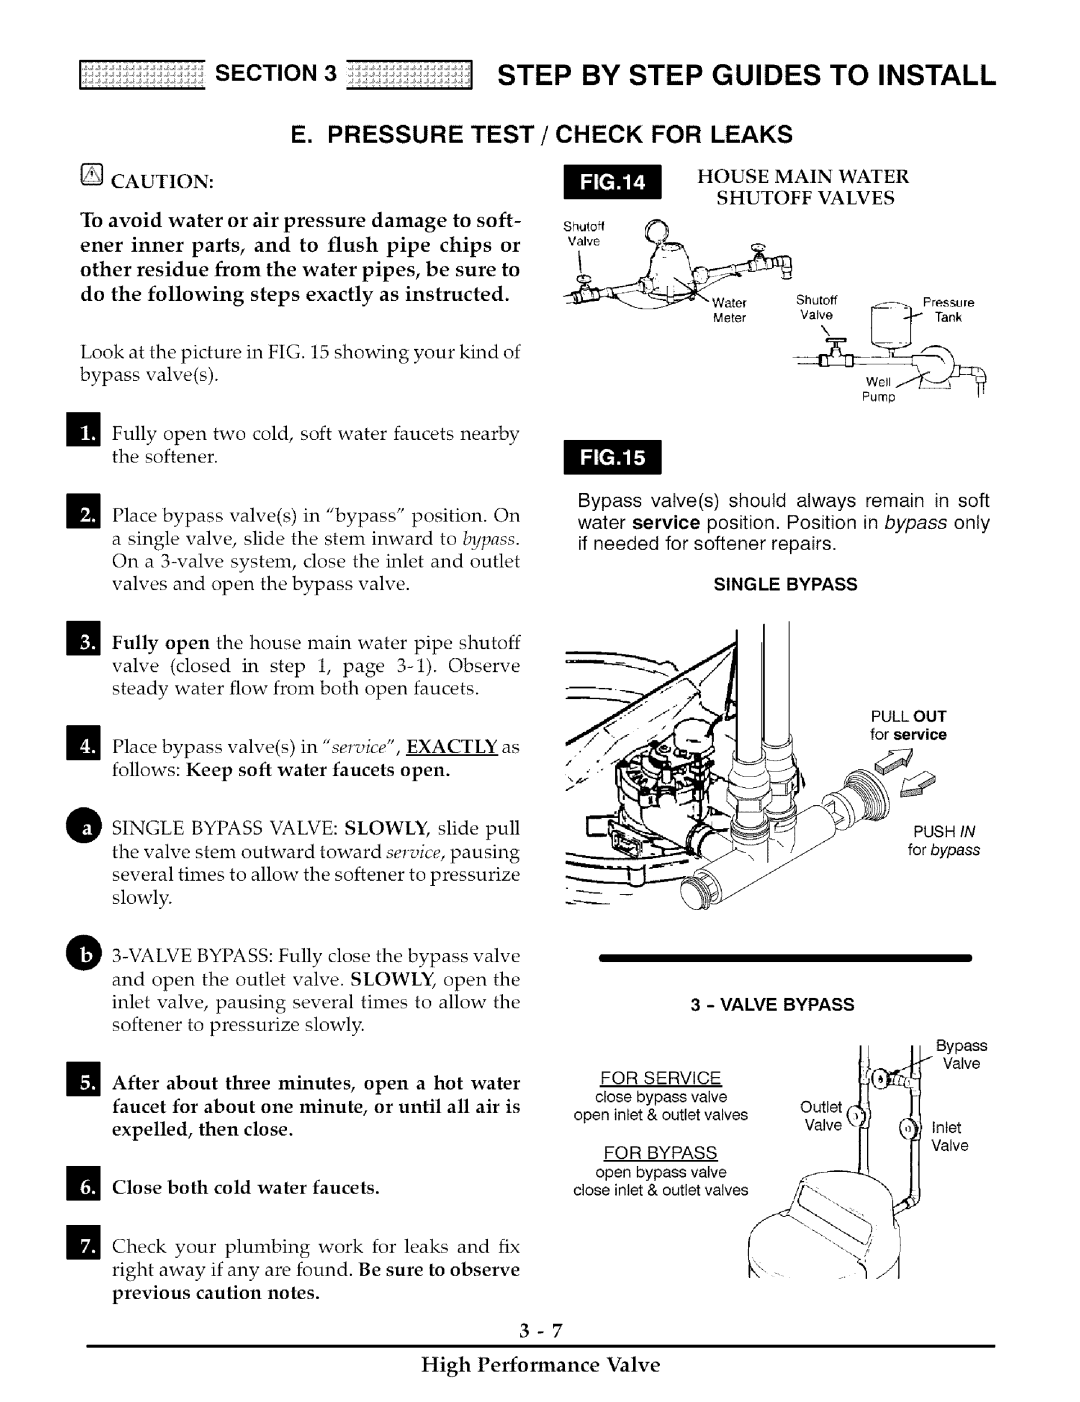
Look at the picture in FIG. 15 showing your kind of bypass valve(s).
Shutoff _)
_ | _ Water | Shutoff |
_1_ | Fully | open two cold, | soft | water | faucets | nearby | |||
| the softener. |
|
|
|
|
|
|
| |
_J_ | Place | bypass | valve(s) | in | "bypass" | position. | On | ||
| a single valve, | slide the stem inward | to | bypass. | |||||
| On a | system, | close the | inlet | and |
| outlet | ||
| valves and open the bypass valve. |
|
|
| |||||
_ Fully open the house main water pipe shutoff
valve (closed in step 1, page
_ Place bypass valve(s) in "service", EXACTLY as follows: Keep soft water faucets open.
O SINGLE BYPASS VALVE: SLOWLY, slide pull
the valve stem outward toward service, pausing several times to allow the softener to pressurize slowly.
@
inlet valve, pausing several times to allow the
softener to pressurize slowly.
_ After about three minutes, open a hot water faucet for about one minute, or until all air is
expelled, then close.
_t_ Close both cold water faucets.
_1 Check your plumbing work for leaks and fix right away if any are found. Be sure to observe
previous caution notes.
Bypass valve(s) should always remain in soft
water service position. Position in bypass only if needed for softener repairs.
SINGLE BYPASS
PULL OUT
for service
PUSH IN
for bypass
|
| 3 - VALVE BYPASS |
|
|
|
| Bypass |
FOR | SERVICE | / Valve | |
| |||
close | bypass | valve |
|
open inlet & outlet valves | Inlet | ||
|
|
| |
FOR | BYPASS | Valve | |
| |||
open | bypass | valve |
|
close inlet & outlet valves |
| ||
