Front Installation
I
Some models are shipped in a removable sleeve, please follow the supplied Installation Instruction before installing the Decorative front and accessories.
Installing the Vent Control (on some models)
The vent control handle is included in the decorative front kit. The handle must be installed before the decorative front is attached.
I.Insert the handle with the "etchings (VentlAir)" facing to the left.
2. Slip the black door extension into the split at the end of the handle.
3. For ease of assembly, push the handle in while pressing the door extension against the foam until the two pieces lock together.
4. Move handle in and out to be sure vent is operating properly.
Installing the Front Frame
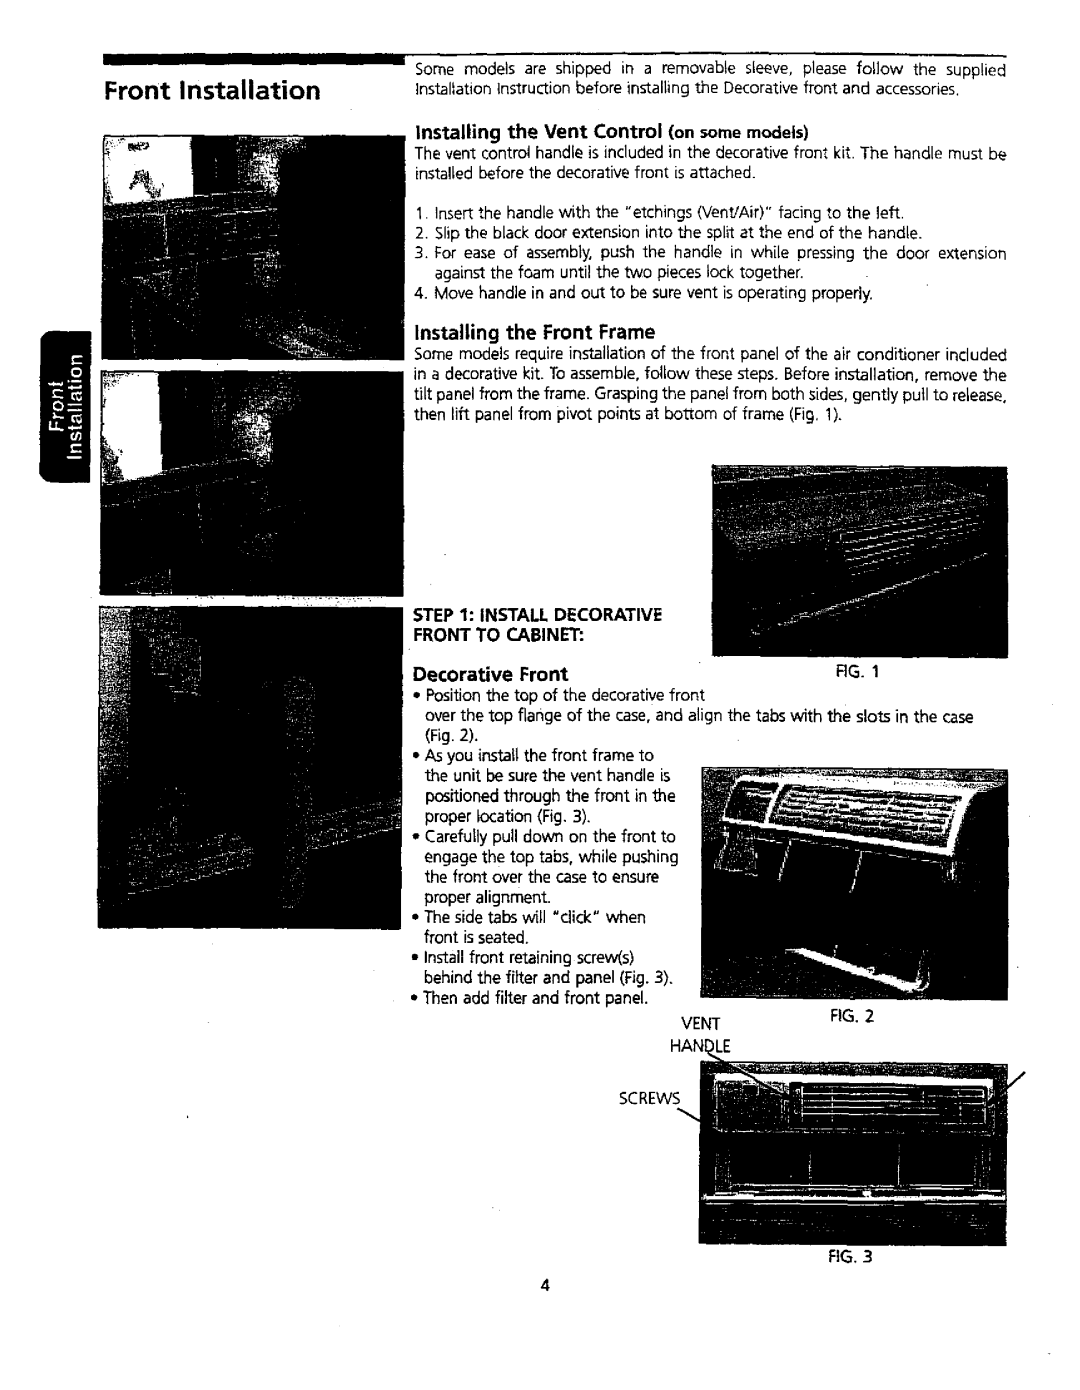
Some models requireinstallation of the front panel of the air conditioner included in a decorativekit. To assemble,follow these steps. Before installation, remove the tilt panel from the frame. Grasping the panel from both sides, gently pull to release, then lift panel from pivot points at bottom of frame (Fig, I).
STEP 1: INSTALL DECORATIVE
FRONT TO CABINET:
FIG. 1
•Position the top of the decorative front
over the top flange of the case, and align the tabs with the slots in the case (Fig. 2).
•As you install the front frame to the unit be sure the vent handle is
positioned through the front in the proper location (Fig. 3).
•Carefully pull down on the front to
engage the top tabs, while pushing the front over the caseto ensure
proper alignment.
•The side tabs will "click" when front is seated.
•Install front retaining screw(s) behind the filter and panel (Fig. 3).
•Then add filter and front panel.
VENT | FIG. 2 |
| |
LE |
|
SCREWS
FIG. 3