Turntable Installation
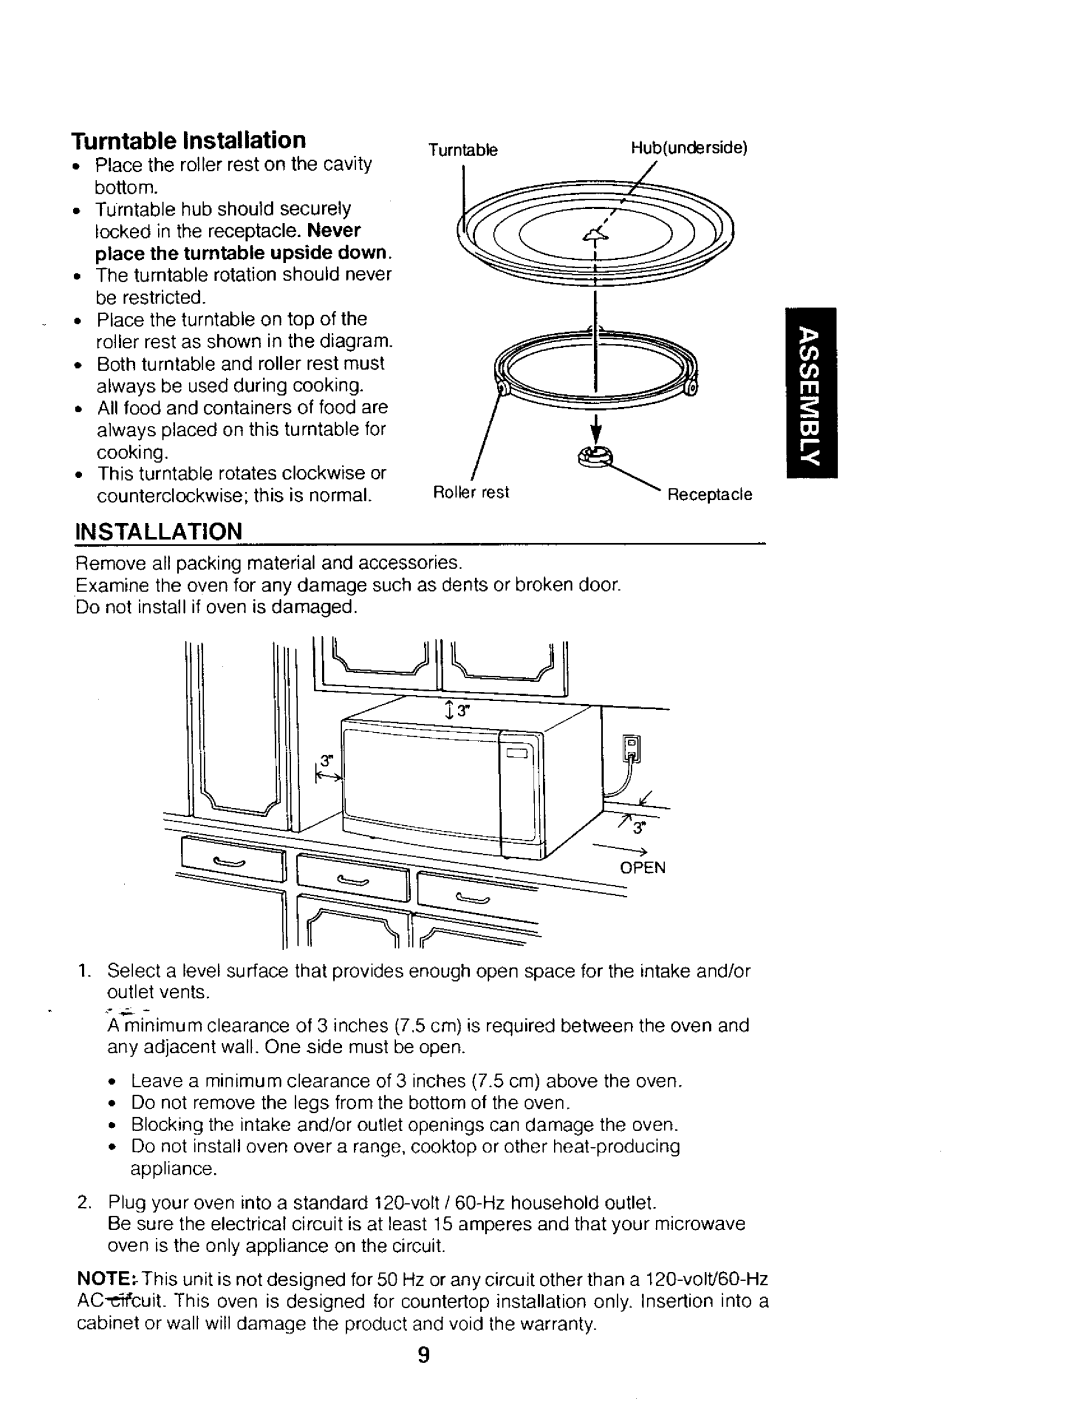
•Place the roller rest on the cavity bottom.
•Turntable hub should securely locked in the receptacle. Never place the turntable upside down.
•The turntable rotation should never be restricted.
•Place the turntable on top of the roller rest as shown in the diagram.
•Both turntable and roller rest must always be used during cooking.
•All food and containers of food are always placed on this turntable for cooking.
•This turntable rotates clockwise or counterclockwise; this is normal.
TurntableHub(underside)
Roller rest | Receptacle |
|
INSTALLATION
Remove all packing material and accessories.
Examine the oven for any damage such as dents or broken door. Do not install if oven is damaged.
. Select a level surface that provides enough open space for the intake and/or outlet vents.
A minimum clearance of 3 inches (7.5 cm) is required between the oven and any adjacent wall. One side must be open.
•Leave a minimum clearance of 3 inches (7.5 cm) above the oven.
•Do not remove the legs from the bottom of the oven,
•Blocking the intake and/or outlet openings can damage the oven.
•Do not install oven over a range, cooktop or other
2.Plug your oven into a standard
Be sure the electrical circuit is at least 15 amperes and that your microwave oven is the only appliance on the circuit.
NOTE;This unit is not designed for 50 Hz or any circuit other than a
AC_cuit. This oven is designed for countertop installation only. Insertion into a cabinet or wall will damage the product and void the warranty.
9