=plex
SYMBOLS, Words
Aboutsafety Labels IHSTROCTiONS
Sears MaintenanceAgreement
Sears InstallationService
Il lE IANCli, GREEMEHT$
U.S.A
Full Five Year Warranty on Sealed Refrigeration System
Full One Year Warranty on Refrigerator
Rranty
Productrecord
Franais
Never transportrefrigeratoron its
Unit Total Clearance Volume Top Sides Rear
Recommended
Length Extruded Handles
Mounted Handles
Removing Front Mounted Handles
Removihgthedoors
IHSTALLIHGYOURRfRIGRATOR,OHT
Removing Panels
Installing Panels
Toihstallahd
Importantdo not overtighten, Cross threadingmay OCOUr
Materials Needed
Hex heeddriver Lever
Dial Controls
FOODSTOrAG
Electronic Controls
Fresh Food Storage
Water Filter
Installing Water Filter
Replacing
HLTERONT.oo
Specifications
Performance Data General USE Conditions
35 ps1138kPa
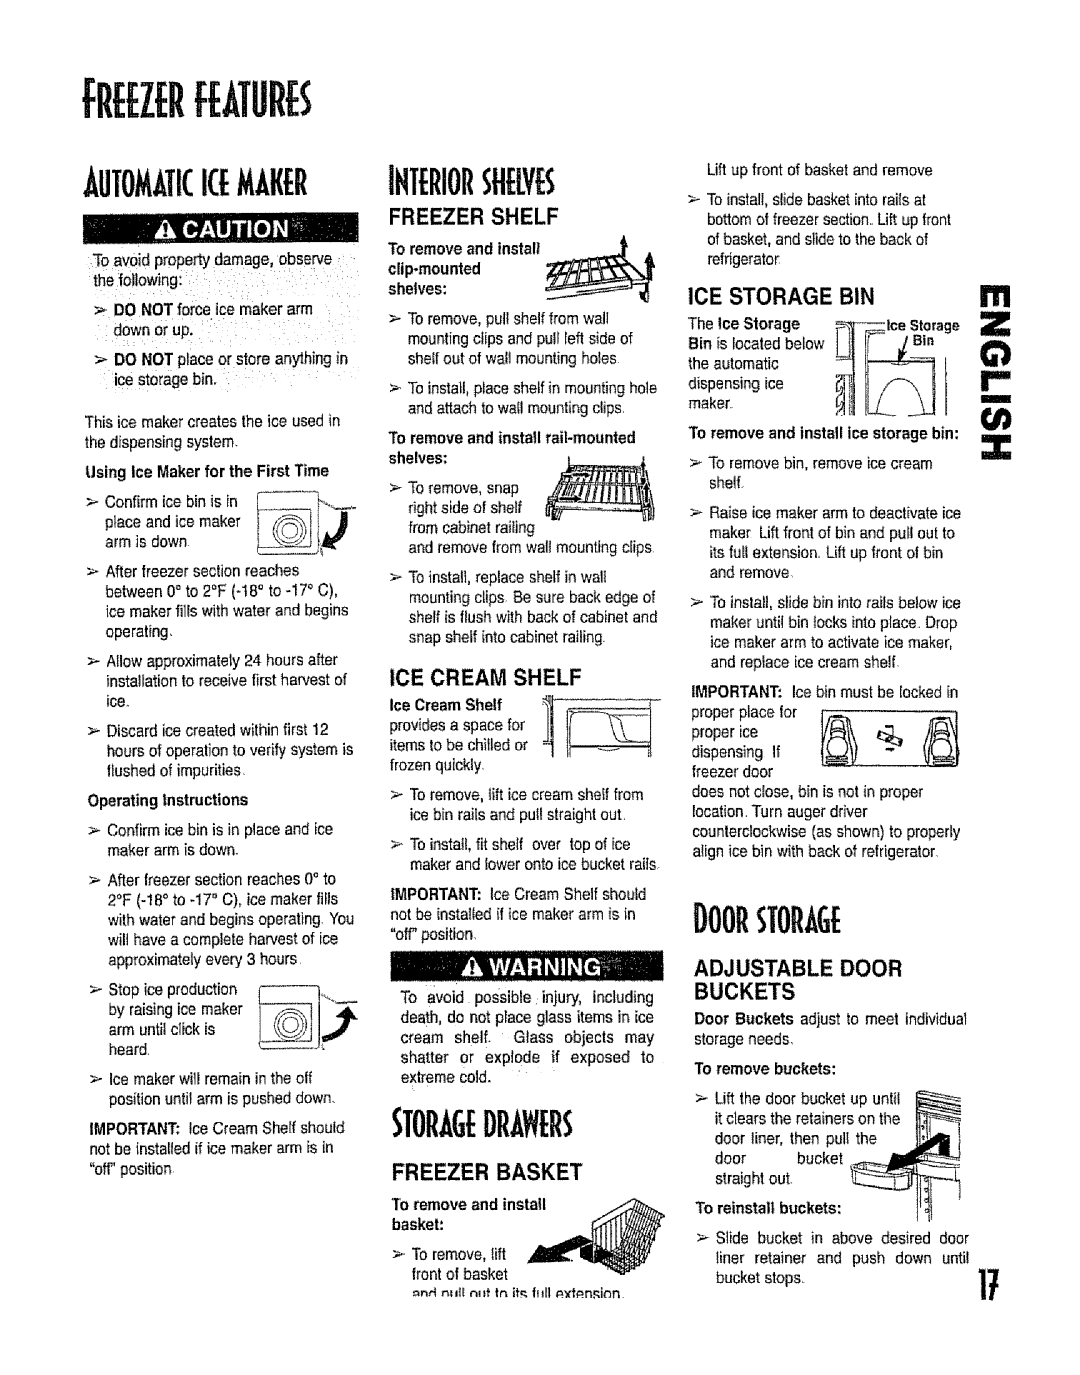
I0011STOflAGE
FflESHFOODFEATURES
HUMIDITY-CONTROLLED
Temperature
Crisper Drawers
Produce Storage Tips
Shelves
Adjustable Door Buckets
FiiEEZEllFE UflES
Dhphserfatures
FiVE-BUTTOHCONTROLFEATUflES
Indicator Light Mode
Dispenser Operation Filter Status
Sabbath
Temperature Keys
Indicator
Light Function
Operation
Vacation Mode
Display ON/OFF @ Alarm OFF
ELECTflOF!ICCOHTflOLFEATUflES,COHT
MAX Cool
Auto Display
Sabbath
Hidden
Upper Keypad
Stainless Steel Doors and Exterior
Exterior
Grille
Do not USE
Section
Upper Fresh Food
Lower Fresh Food Sectionb
Freezer Section
Noise while operating Freezerfan C slows to a stop
Freezerfan C makesthis
As the freezerdoor is opened EvaporatorE andheat
Humming
OPEflATIOH
Troubleshooting
IcEANDWATEr
ANDWATER,com
TROUBLESHOOTIHG,ONT
¢CURITE
CES SYMBOLES,MOTS .ET
AVERTISSEMENT-Dangersoupratiques
DmQnterlesportes
Pourlinstallationgarantieparlos
ServicedinstallationSears
AUX I TATS-UNIS
AU Canada
Garantiecompleteduneannie surle rfrigrateur
Garahtie
Garantiecompletede cinqanssur le systmede rfrigrationscell6
Sears,RoebuckandCo, Dept 817WA, HoflrnanEstates,IL
Garantie
Installationdurfrigrateur 33-38
40-41
42-43
TOUJOURSfairereposertec6teou
Volume Dgagement
Retirez LES Poignie
Pose Dunepoigncede
Produits Frais MONT#E ,& Lavant
LES
Enlever?escharniressuprieuresen MmetempsqueesportesZ
Retirerla grilleet lescouvre-chamires inf6rieurs
Risquerdendommagernibriserle
Charni6ressup6rieures
Pose DES Panneaux
DI Montage DES
Panneaux
Compartimenteong1ateur7 kg
Est i?lustr
ACCOiIDrDEMEBT Mati Riel Necessaire
LALIMENTATIOBEl!EAU dediamtreextrieur
SilfautraccorderIafimentationeauau
Materiel NI Cessaire
Pourprotegerlesbiensmaterielsou Ee
Tournezlesdeuxvisder6glagearrire
Glageinitial
Temperature
Remplacement DU Filtre a EAU
Dfposeetihstallatiohinstallation DU
Filtre a EAU
Distdbuteurpg
Spicifications DU Systime ET Caractiristiques
CARACTERISTIQUESDESflLTRES.&EAU
Caractiristiques
DE Performance
Balconnets
Boisson
DE Flaque
Casier Pour Produits Laitiers
BAC .&,COLLATIONS
Contrli E
Plateau Canettes
Certainsmodeles
Tablette a Creme Glacee
CLAYE.TTE DE Congelateur Fixe
BAG DE Congi Lateur
Balconnets RI=GLABLES
Unelumiresallume&proximit6du
Delagtace Lospetites6daboussureset peut6tre
Vidange
Pourvitertoutrisquedeblessuresoude
FONCTION.NEMENT DE LA Machine a Glace
Mode Sabbat
Verrouillage DU Distributeur
Lumineux DU Statut DU Filtre
Fonction
FONCTION.NEMENT DE LA Machine a
VOYANT,LE
Tempirature
Maximum Frais
DISTRI@TUl,sunE
IEOMMAHDE,UiTE
NE PAS Utiuser
Refrigerateur
Rtie
Rtie NF! Rieure
Congi Lateur DU
Gargouillement Bruitsourd
Uair est propuls
Lecompresseurt emetunbruitde
Pulsationpendantle fonetionnement
Cause Possible
Solution
FOFtCTIONNEMENT
ICTIONHEMEHT,suite
Yaen.op..,o
GLACEETEAU,SUITE
Iemarques
LAS Palabrasy LAS Etiquetasde Seguridad
COHSERVEEST,IHSTRUC10HES
EN Canada
EN LOS EE.UU
Serviciodeinstalaei6nSears
EconSmico ElcontratodemantenimientoSears
Garantiacompletade unafio parael refrigerador
Informacibnsabreelfiltrode agua 68-69
Ajustedeloscontroles
Datosdelflltrodeagua
70-71
SELECCllF!DEAMUOr
DEL Alimentos Frescos
Para Quitar LAS Asas Montadas POR EL Frente DE LA Seccicn
Para Quitar LAS Asas Extruidas DE Largo Completo
Para Instalar LAS Asas Extruidas DE Largo Completo
Inferiores
LtIli
Paneles
Dimensionesdel pane+deY+16am
Panels
Puerlaconun
Deagua
CONEXIOHDELSUMIHISTflO
Necesarios
Refrigeradorantesde instalarel dispositre
Girelosdostorniflosposterieresde ajuste
REFtlIGErADOr
Materiales Necesarios
Alimentos Frescos
Temperatura DEL Dial
Electronicos DE LA Temperatura
Alimentos
Retirela tapadoderivaci6nazuly
Instalacion DEL Filtro DE Agua
Reemplazo DEL Filtro DE Agua
Generales
Dates DE Funcionamiento
Especificaciones
Los reglamentosy leyeslocalesy estatales
Recipientes Inclinables DE LA Puerta
Bandejas a Prueba DE Derrames
Bebida
Lacteos
Cajones DE LAS Verduras CON Control DE Humedad
Lima
Cajon CON Temperatura Controlada
Cajon DE Bocadillos
TIACEfltULO REPll a Fija DEL
AQUINAAUTOM, Detica
Ehie
Surta
DesrnotaNe
Cristatdelicado
GRACTERJSTICA5DELCONTROLCINCOBOTONE5
Traba DEL
Configuracion DE
Funcion Ligera DEL Dispensador
Foco Indicador .,L. DEL Estado DEL Filtro
Modo DE LA
ARATRtSTIADSURHDOR,$ ONT
Ocultado Para Superior EL Telclado Numi Rico
Sabbath Bloqueo
Medida DE LA Temperatura
LOCK/UNLOCK7ON/OFF
LIMPIEZADESUrEfrIGErADOr
COHSEjOSY
No USE
USE
SIJGRHCIAsP. RA
Losmos
Gorgoreoo
Aire corrlenteo
Ebuliici6n
Murmullo
In=coeetcapiioostlamao ne,.e ae. Re,eo pare
Loscantraneaesita,aias=rse
Umededoo!osiere,eiadeodederuyaltca.Funcionareenlonormal
OCALIZACIONYSOUOONDEAVEfllAS,CONT
Solu i6N
AGUA,me
Page
Rrl r.n
Page
I11
Www=searsoca
Get it fixed, at your home or ours