Installation
LEAK TEST
To check for leaks, complete the following steps:
1. Fully open two nearby cold water faucets down- stream from the softener.
2. Observe steady weater flow from both open faucets. 3 After about three minutes, open a hot water faucet for about one minute, or until all air is expelled, then close.
4. Close both cold water faucets.
5. Check your plumbing work for leaks, and fix right away if any are found. Be sure to observe previous caution notes.
NOTE: If this procedure is performed on a new softener, water coming from the taps may initially be dis- colored. This normally occurs the first time water runs through the resin bed. The discol- ored water is not harmful, and the discoloration will not last more than a few minutes.
RESTART THE WATER HEATER
Turn on the gas (or electric) supply to the water heater and light the pilot.
YOUR PLUMBING INSTALLATION AND ELECTRICAL WORK ARE NOW COMPLETE.
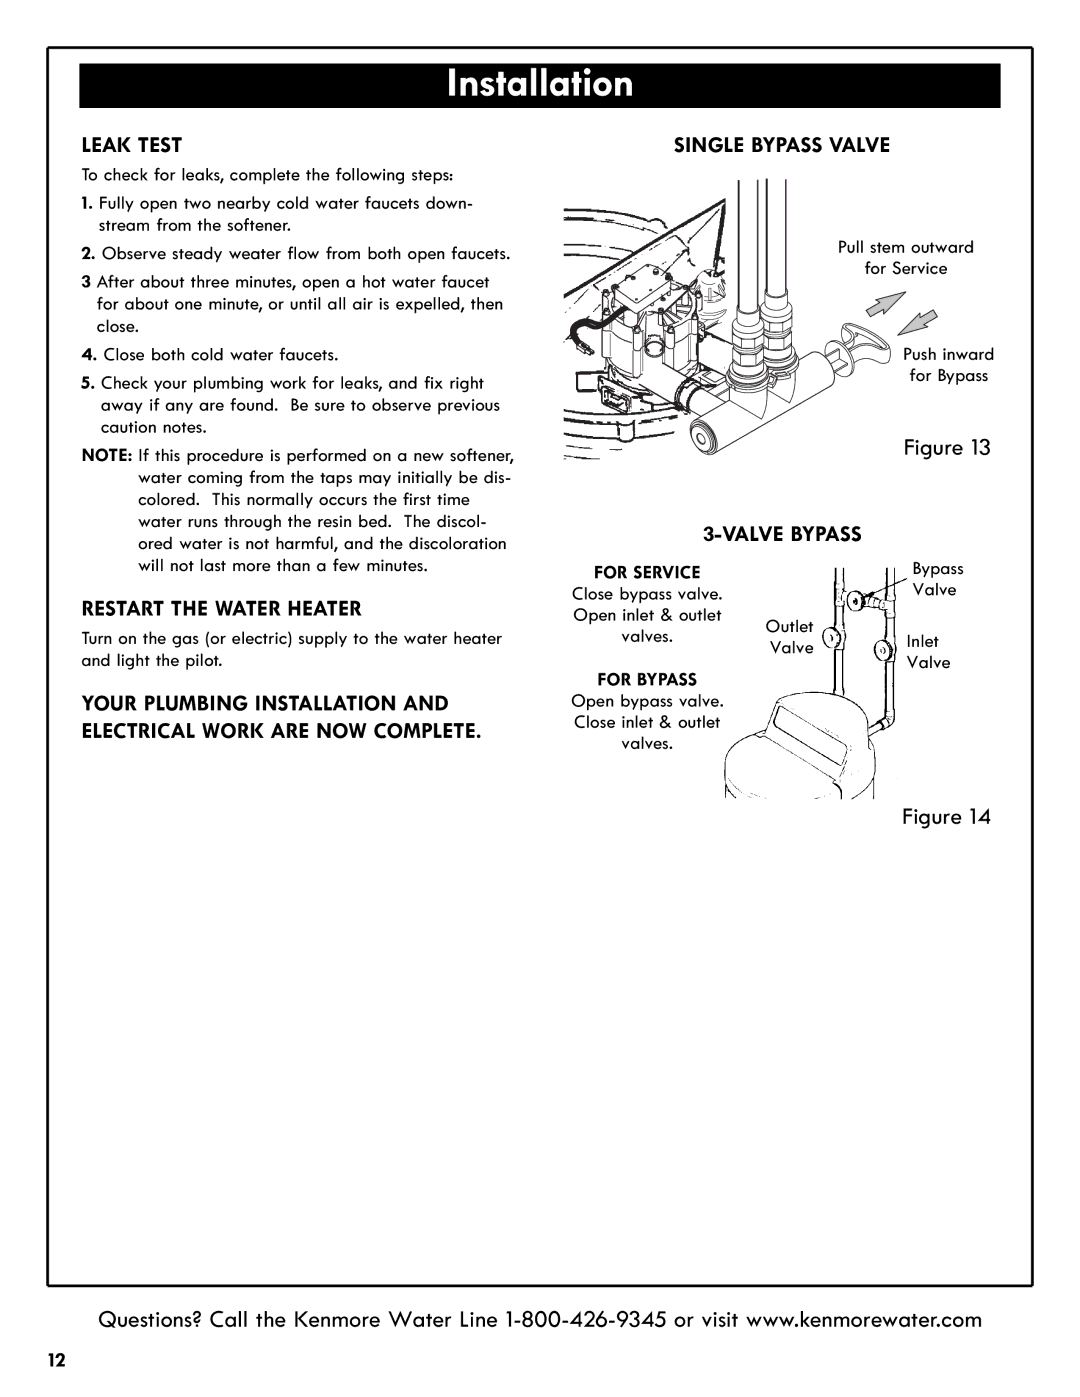
SINGLE BYPASS VALVE
Pull stem outward
for Service
![]()
![]()
![]()
![]() Push inward
Push inward ![]()
![]()
![]()
![]() for Bypass
for Bypass
Figure 13
3-VALVE BYPASS
FOR SERVICE |
| Bypass | |
Close bypass valve. |
| Valve | |
Open inlet & outlet | Outlet |
| |
valves. | Inlet | ||
Valve | |||
FOR BYPASS |
| Valve | |
Open bypass valve. |
|
| |
Close inlet & outlet |
|
| |
valves. |
|
| |
|
| Figure 14 |
Questions? Call the Kenmore Water Line
12
