
790.4804, 790.4802, 790.4803 specifications
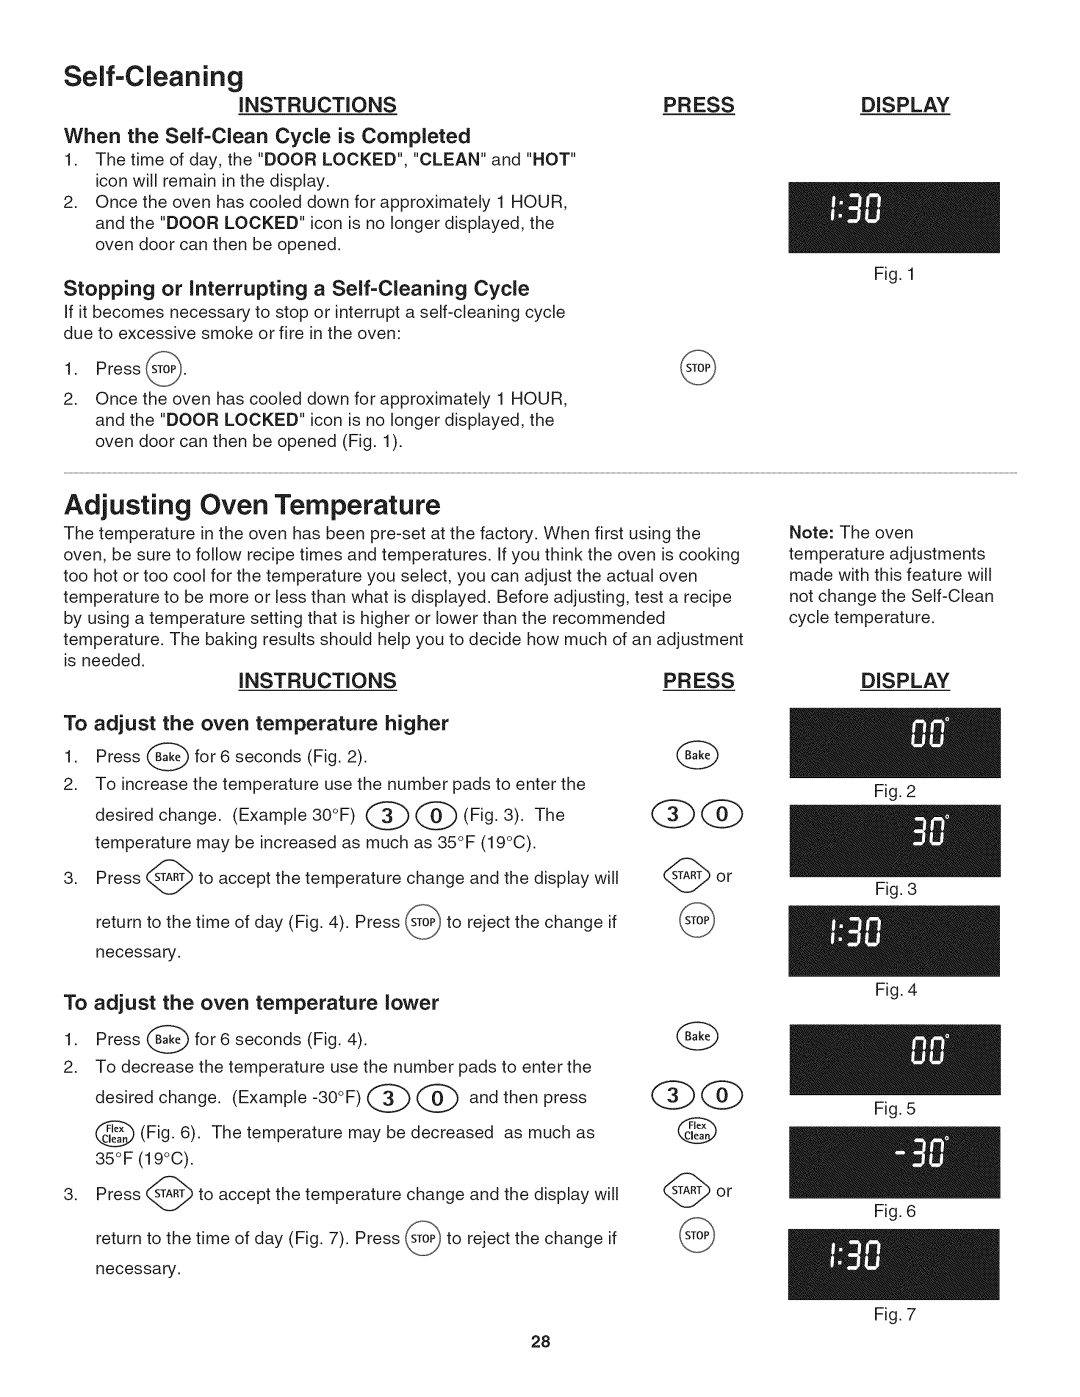
The Kenmore 790.4803, 790.4802, and 790.4804 are part of Kenmore's well-regarded line of freestanding ranges, designed for both functionality and style. These models stand out in the kitchen with their sleek design, user-friendly interfaces, and a plethora of features aimed at enhancing culinary experiences.One of the main features across these models is their versatile cooking capabilities. Each range comes equipped with a powerful convection oven, which circulates hot air to ensure even cooking. This technology allows for quicker baking times and more evenly baked goods, making it ideal for both novice cooks and seasoned chefs. The ovens also feature a self-cleaning function, which saves time and effort in maintaining hygiene and cleanliness.
In terms of stovetop features, the Kenmore 790.4803, 790.4802, and 790.4804 include multiple high-performance burners that offer various heat outputs. This allows users to simmer delicate sauces on low heat and sear meats on high heat, providing flexibility for different cooking techniques. Additionally, some models feature a power burner, which generates intense heat for boiling water quickly, an essential feature for busy kitchens.
The design of these ranges is also worth noting. With a clean and modern stainless-steel finish, they can seamlessly integrate into any kitchen decor. The large oven windows provide a clear view of the cooking process, while the smooth surface stovetop is easy to clean and maintain.
User convenience is a key consideration in these models. They come equipped with intuitive controls and backlit knobs, making it easy to adjust settings even during low-light conditions. The digital display provides clear information about cooking times and temperatures, enhancing user experience.
Furthermore, the Kenmore 790 series incorporates safety features such as an automatic shut-off function and a child lock, ensuring peace of mind for families. The range's ability to accommodate different sizes of cookware, from small saucepans to large baking dishes, makes it a versatile choice for any home chef.
In summary, the Kenmore 790.4803, 790.4802, and 790.4804 are reliable, efficient, and stylish cooking appliances. Their combination of advanced technologies, user-friendly features, and thoughtful design makes them an excellent addition to any kitchen, appealing to both casual cooks and culinary enthusiasts alike. Whether preparing a simple weeknight dinner or hosting a festive gathering, these ranges offer the performance and features to tackle a variety of cooking challenges.