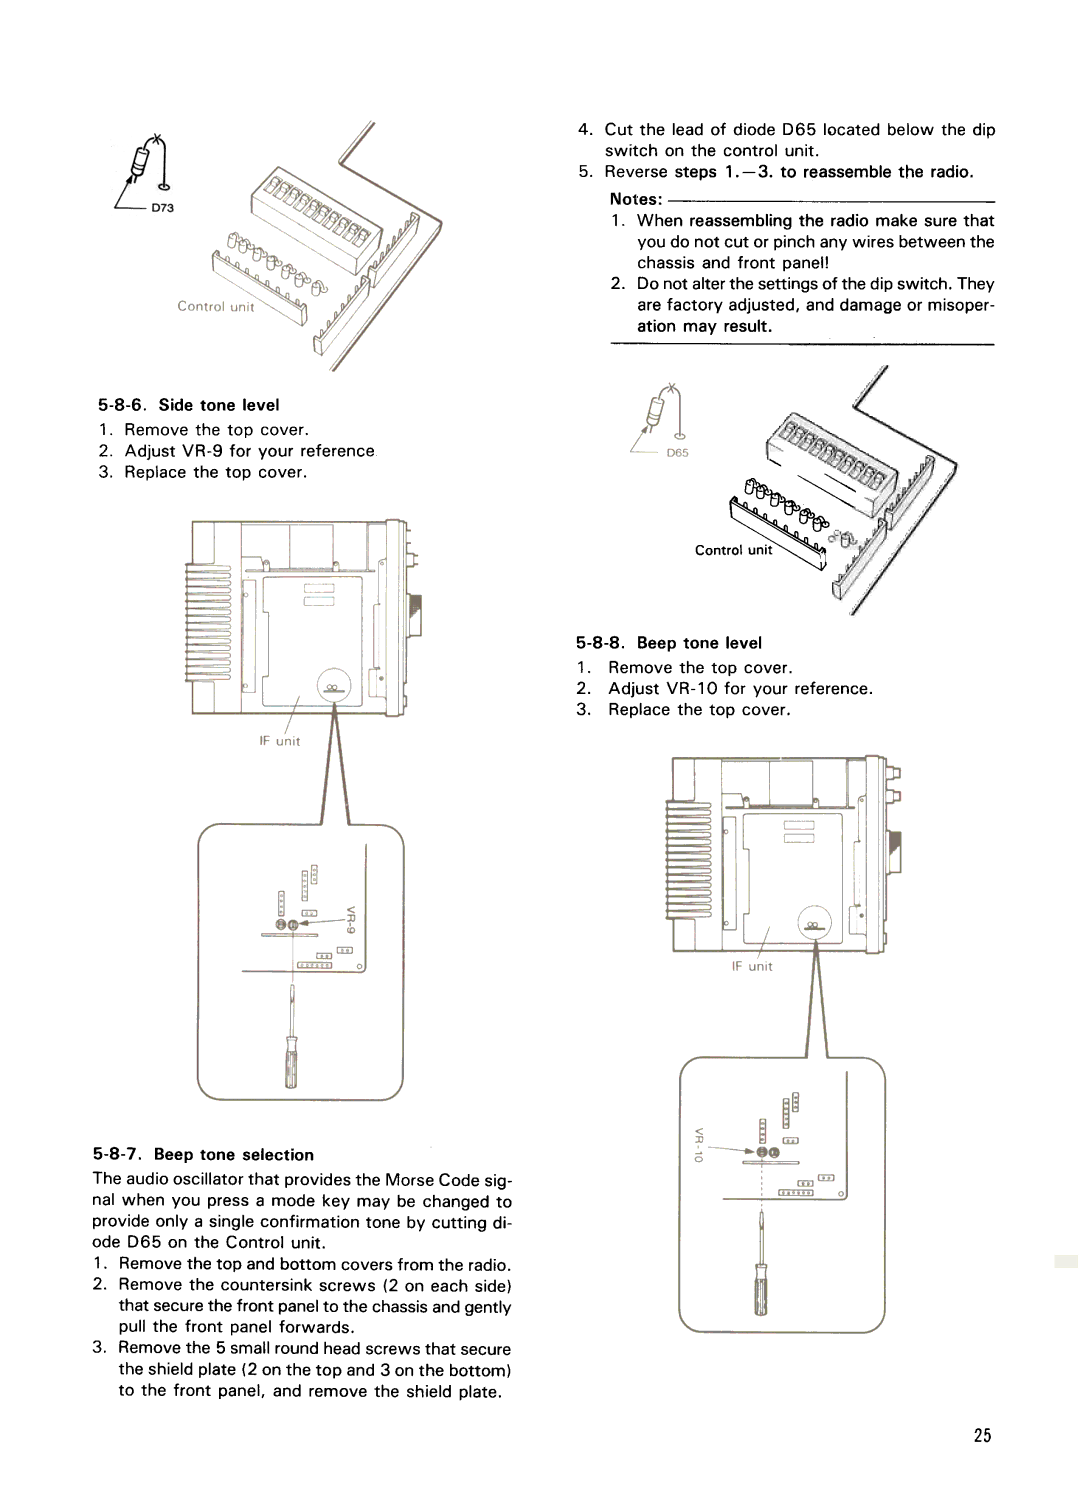
4. Cut the lead of diode 065 located below the dip switch on the control unit.
5. Reverse steps
Notes:
1. When reassembling the radio make sure that you do not cut or pinch any wires between the chassis and front panel!
2. Do not alter the settings of the dip switch. They are factory adjusted, and damage or misoper- ation may result.
1.Remove the top cover.
2.Adjust
3.Replace the top cover.
![]() '"
'"![]()
![]()
![]()
![]()
![]()
![]()
~~
CO"t,~ 


1 .Remove the top cover.
2. Adjust
3. Replace the top cover.
The audio oscillator that provides the Morse Code sig- nal when you press a mode key may be changed to
provide only a single confirmation tone by cutting di- ode 065 on the Control unit.
1.Remove the top and bottom covers from the radio.
2.Remove the countersink screws (2 on each side) that secure the front panel to the chassis and gently pull the front panel forwards.
3.Remove the 5 small round head screws that secure the shield plate (2 on the top and 3 on the bottom) to the front panel, and remove the shield plate.
25