
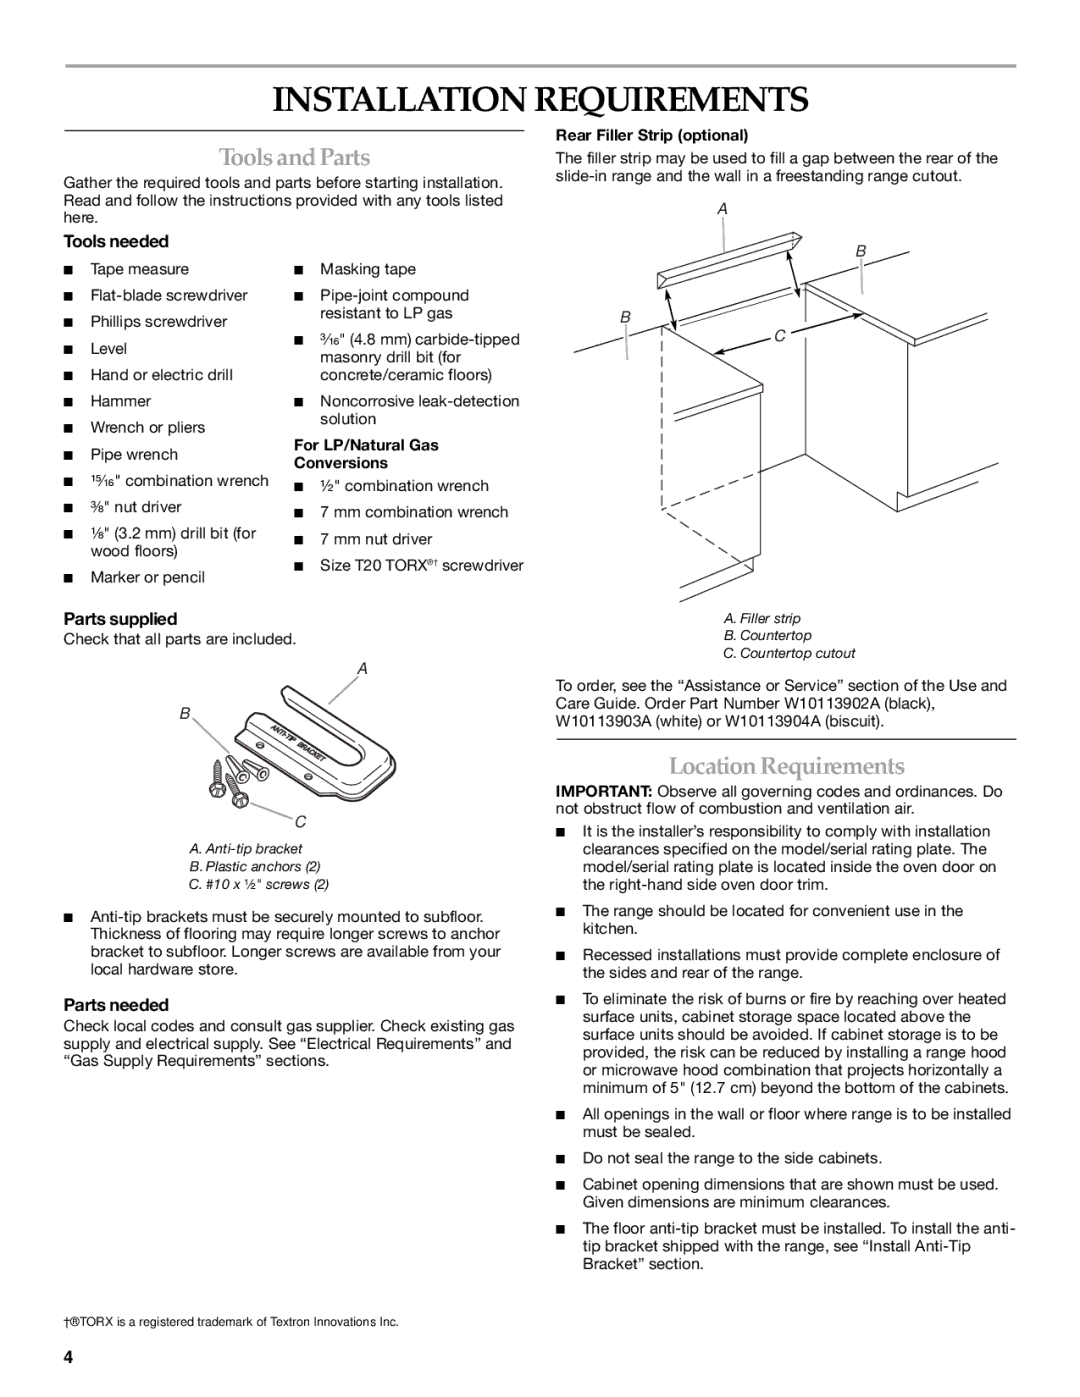
2 CM), 30"(76 specifications
The KitchenAid 30" (76.2 cm) range is a stunning addition to any culinary space, merging professional-grade performance with sleek design. Designed for those who are passionate about cooking, this range offers a comprehensive suite of features that enhance both functionality and style.One of the standout features of the KitchenAid 30" range is its powerful cooking capabilities. It comes equipped with a variety of burners that provide ample options for simmering, boiling, or searing. The range's high-performance burners deliver precise heating, thanks to the dual-fuel technology that combines the benefits of gas and electric cooking. This allows for quick temperature adjustments and consistent cooking results that every home chef strives for.
The oven capacity of the KitchenAid 30" range is impressive, with generous space that accommodates multiple dishes simultaneously. Its convection oven provides even cooking by circulating hot air, ensuring that pastries rise perfectly and roasts cook evenly. With several cooking modes, including bake, broil, and self-clean, this oven guarantees versatility for any recipe.
Additionally, the KitchenAid range features an innovative steam rack, which enriches dishes with moisture and prevents drying during the cooking process. This technology is particularly beneficial for baking, imparting a professional touch to homemade breads and pastries.
The exterior design of the KitchenAid 30" range is both elegant and durable. Constructed from high-quality stainless steel, it resists scratches and smudges, ensuring a polished look in any kitchen. Seamless edges and professional knobs provide a contemporary aesthetic, making it not just an appliance but a centerpiece in the kitchen.
For safety and convenience, the range includes a cooktop lock feature that prevents accidental ignition, along with a temperature gauge that provides real-time readings. This ensures a worry-free cooking experience.
The KitchenAid 30" (76.2 cm) range is a perfect blend of style and performance, making it an ideal choice for anyone looking to elevate their culinary experience. With its robust features, innovative technologies, and sophisticated design, it stands as a testament to KitchenAid's commitment to quality and excellence in kitchen appliances.