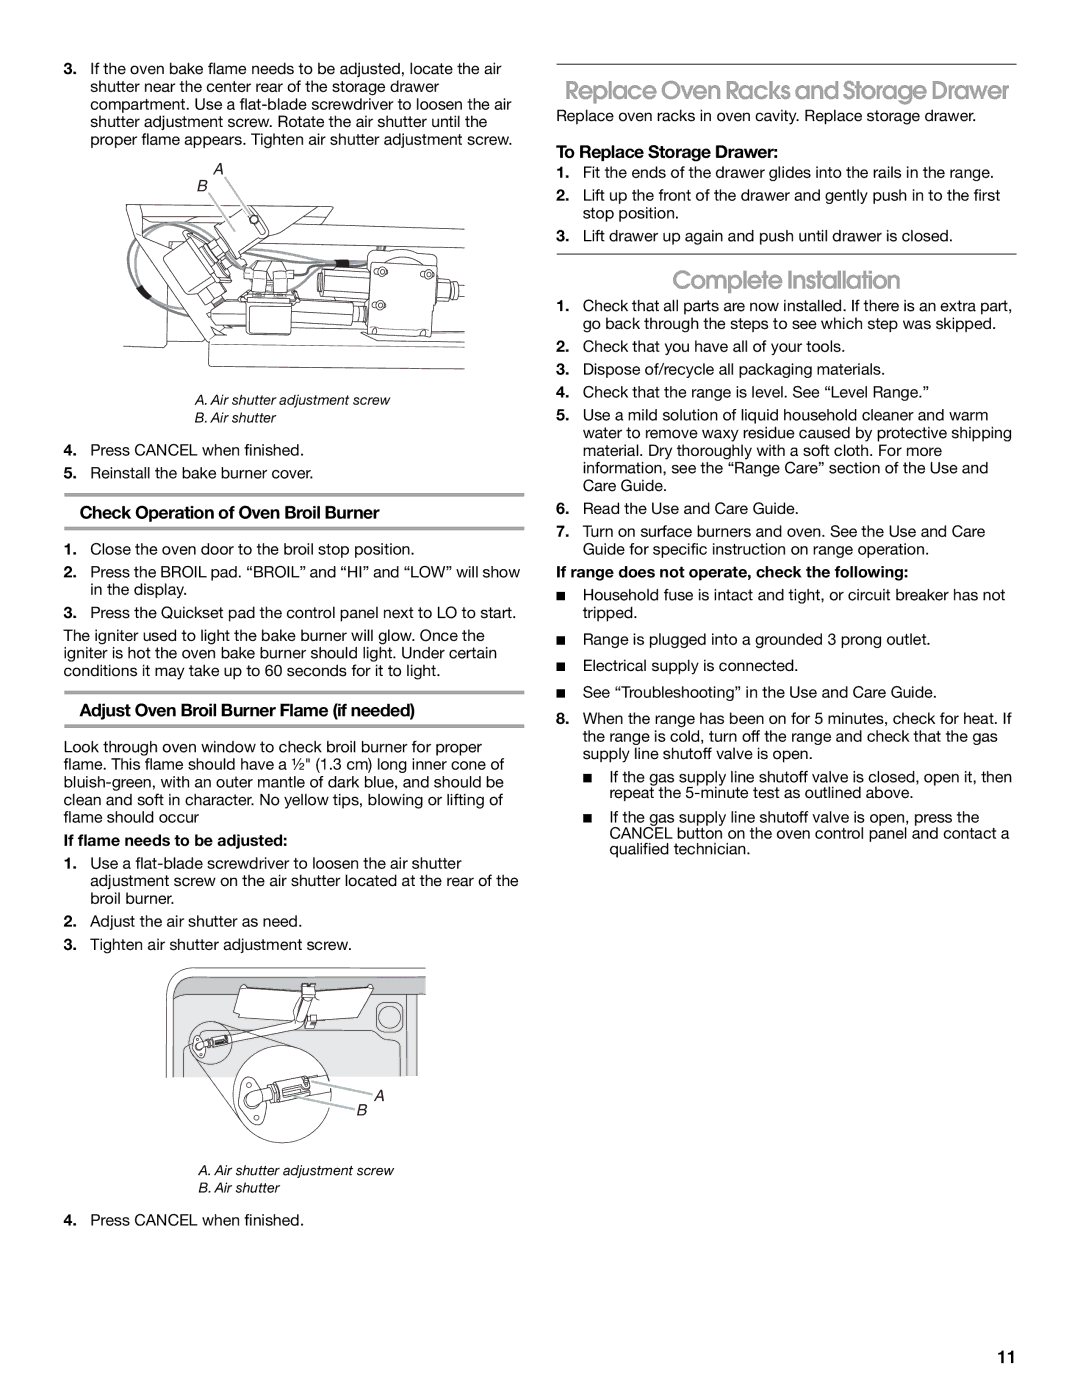
3.If the oven bake flame needs to be adjusted, locate the air shutter near the center rear of the storage drawer compartment. Use a flat-blade screwdriver to loosen the air shutter adjustment screw. Rotate the air shutter until the proper flame appears. Tighten air shutter adjustment screw.

A

B

A. Air shutter adjustment screw

B. Air shutter

4.Press CANCEL when finished.

5.Reinstall the bake burner cover.

Check Operation of Oven Broil Burner

1.Close the oven door to the broil stop position.

2.Press the BROIL pad. “BROIL” and “HI” and “LOW” will show in the display.

3.Press the Quickset pad the control panel next to LO to start.

The igniter used to light the bake burner will glow. Once the igniter is hot the oven bake burner should light. Under certain conditions it may take up to 60 seconds for it to light.

Adjust Oven Broil Burner Flame (if needed)

Look through oven window to check broil burner for proper flame. This flame should have a ½" (1.3 cm) long inner cone of bluish-green, with an outer mantle of dark blue, and should be clean and soft in character. No yellow tips, blowing or lifting of flame should occur

If flame needs to be adjusted:

1.Use a flat-blade screwdriver to loosen the air shutter adjustment screw on the air shutter located at the rear of the broil burner.

2.Adjust the air shutter as need.

3.Tighten air shutter adjustment screw.

A

B

A. Air shutter adjustment screw

B. Air shutter

4.Press CANCEL when finished.

Replace Oven Racks and Storage Drawer

Replace oven racks in oven cavity. Replace storage drawer.

To Replace Storage Drawer:

1.Fit the ends of the drawer glides into the rails in the range.

2.Lift up the front of the drawer and gently push in to the first stop position.

3.Lift drawer up again and push until drawer is closed.

Complete Installation

1.Check that all parts are now installed. If there is an extra part, go back through the steps to see which step was skipped.

2.Check that you have all of your tools.

3.Dispose of/recycle all packaging materials.

4.Check that the range is level. See “Level Range.”

5.Use a mild solution of liquid household cleaner and warm water to remove waxy residue caused by protective shipping material. Dry thoroughly with a soft cloth. For more information, see the “Range Care” section of the Use and Care Guide.

6.Read the Use and Care Guide.

7.Turn on surface burners and oven. See the Use and Care Guide for specific instruction on range operation.

If range does not operate, check the following:

Household fuse is intact and tight, or circuit breaker has not tripped.

Range is plugged into a grounded 3 prong outlet.

Electrical supply is connected.

See “Troubleshooting” in the Use and Care Guide.

8.When the range has been on for 5 minutes, check for heat. If the range is cold, turn off the range and check that the gas supply line shutoff valve is open.

If the gas supply line shutoff valve is closed, open it, then repeat the 5-minute test as outlined above.

If the gas supply line shutoff valve is open, press the CANCEL button on the oven control panel and contact a qualified technician.

11

Page 11
Image 11
KitchenAid Freestanding Gas Ranges Replace Oven Racks and Storage Drawer, Complete Installation, To Replace Storage Drawer

Freestanding Gas Ranges specifications

KitchenAid Freestanding Gas Ranges are designed for both amateur home cooks and seasoned culinary enthusiasts, providing a blend of performance, style, and innovative technology. These ranges stand out in the kitchen not just for their functionality, but also for their sleek, professional appearance that can elevate any kitchen decor.

One of the flagship features of KitchenAid Gas Ranges is the Even-Heat True Convection system. This technology utilizes a unique fan and a third heating element to ensure that hot air circulates evenly around the oven, allowing for consistent baking results. Whether you’re roasting meats or baking pastries, this feature guarantees thorough cooking and browning across all racks, significantly enhancing culinary outcomes.

Another notable characteristic is the versatility offered by the various burners. KitchenAid Freestanding Gas Ranges typically include multiple burners with varied BTU outputs, providing options for simmering delicate sauces as well as high-heat cooking for searing and sautéing. The powerful burners are designed to accommodate large pots and pans for family meals or entertaining guests.

The Professional-style design is complemented by features like the premium matte black finish and sturdy grates, which provide a professional-grade cooking surface. Many models come with a large capacity oven, allowing for the cooking of multiple dishes simultaneously. The steam rack, available on certain models, enables more cooking techniques, including steaming vegetables or infusing moisture into baked goods.

Smart capabilities are another important aspect of KitchenAid Gas Ranges. With features like Wi-Fi connectivity, home cooks can control their ovens remotely, preheat the oven from their smartphone, or even receive alerts when their dish is ready. These intelligent technologies not only add convenience but also enable users to multitask effectively.

Safety is paramount in KitchenAid Gas Ranges, which come equipped with features such as a flame failure device that automatically shuts off the gas supply if a burner goes out. The easy-to-clean surfaces and removable grates ensure that upkeep is hassle-free, allowing users to maintain a clean and organized kitchen.

In conclusion, KitchenAid Freestanding Gas Ranges offer a wealth of features that enhance both cooking performance and convenience. With innovative technologies, a professional aesthetic, and a commitment to safety, they provide a comprehensive cooking solution that meets the demands of modern lifestyles. Whether you're preparing a simple weeknight dinner or hosting a festive gathering, KitchenAid delivers the tools and technology needed to inspire culinary creativity.