OVEN DOOR EXTERIOR
Cleaning Method:
■Glass cleaner and a soft cloth or sponge:
Apply glass cleaner to soft cloth or sponge, not directly on panel.
■
See “Assistance or Service” section to order.
OVEN DOOR INTERIOR
Cleaning Method:
■
For optimal door cleaning result, wipe away any deposits with a damp sponge before running cycle.
CONTROL PANEL
Cleaning Method:
■Glass cleaner and soft cloth or sponge:
Apply glass cleaner to soft cloth or sponge, not directly on panel.
■
See “Assistance or Service” section to order.
To avoid damage to the control panel, do not use abrasive cleaners,
OVEN CAVITY
Do not use oven cleaners.
Food spills should be cleaned when oven cools. At high temperatures, foods react with porcelain and staining, etching, pitting or faint white spots can result.
Cleaning Method:
■
OVEN RACKS AND ROASTING RACKS
Cleaning Method:
■
See
■
BROILER PAN AND GRID (on some models)
Do not clean in the
Cleaning Method:
■Mildly abrasive cleanser: Scrub with wet scouring pad.
■Solution of ¹₂ cup (125 mL) ammonia to 1 gal. (3.75 L) water: Soak for 20 minutes, then scrub with scouring or
Porcelain enamel only, not chrome
■Dishwasher
OvenLights
The oven lights are
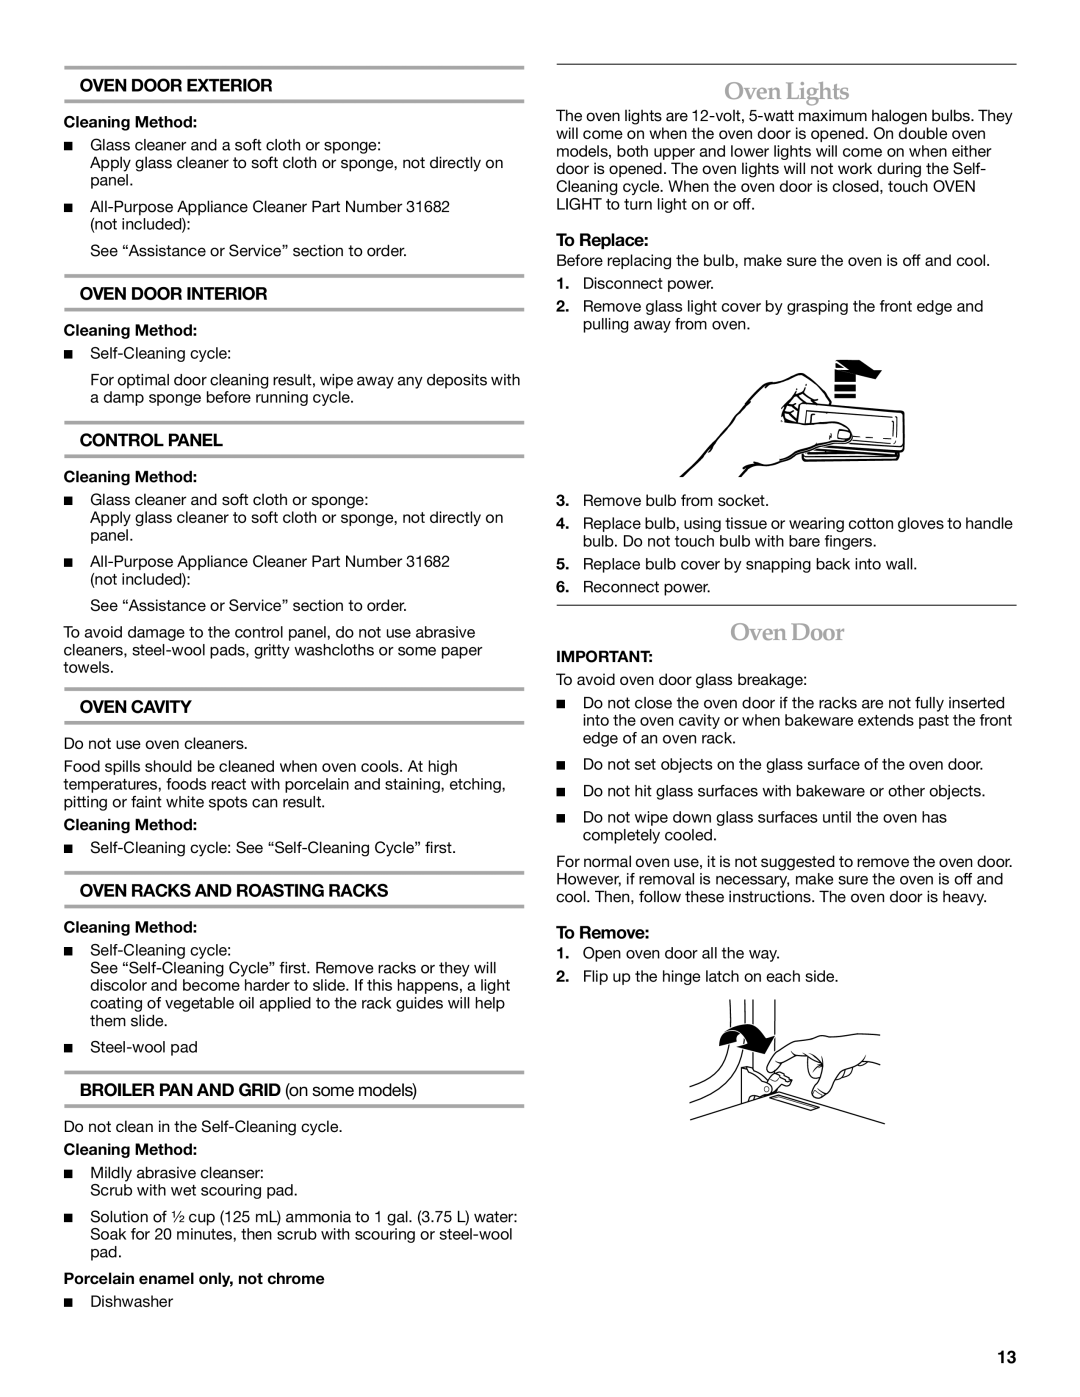
To Replace:
Before replacing the bulb, make sure the oven is off and cool.
1.Disconnect power.
2.Remove glass light cover by grasping the front edge and pulling away from oven.
3.Remove bulb from socket.
4.Replace bulb, using tissue or wearing cotton gloves to handle bulb. Do not touch bulb with bare fingers.
5.Replace bulb cover by snapping back into wall.
6.Reconnect power.
OvenDoor
IMPORTANT:
To avoid oven door glass breakage:
■Do not close the oven door if the racks are not fully inserted into the oven cavity or when bakeware extends past the front edge of an oven rack.
■Do not set objects on the glass surface of the oven door.
■Do not hit glass surfaces with bakeware or other objects.
■Do not wipe down glass surfaces until the oven has completely cooled.
For normal oven use, it is not suggested to remove the oven door. However, if removal is necessary, make sure the oven is off and cool. Then, follow these instructions. The oven door is heavy.
To Remove:
1.Open oven door all the way.
2.Flip up the hinge latch on each side.
13