
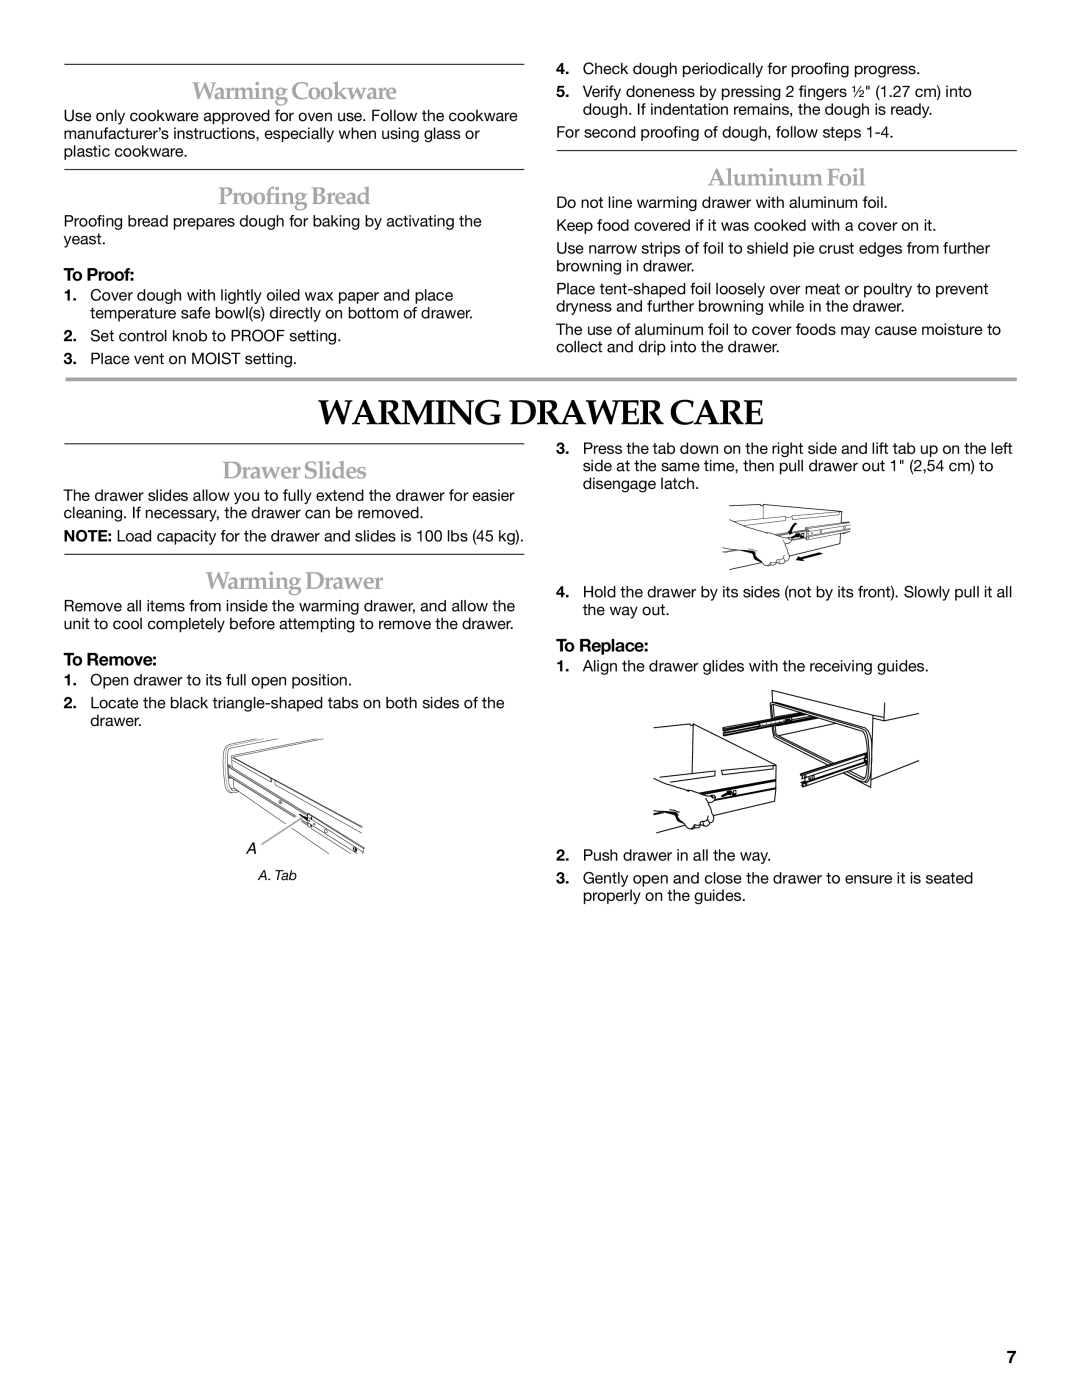
KEWV105, KEWD175 specifications
The KitchenAid KEWD175 and KEWV105 stand out in the crowded appliance market with their innovative designs, practical features, and superior performance. These kitchen products are designed to enhance cooking experiences, making meal preparation both efficient and enjoyable.The KitchenAid KEWD175 is a versatile countertop oven that acts as a multifunctional cooking system. It features a spacious capacity that can accommodate various dishes, making it perfect for roasting, baking, and even broiling. One of its main highlights is the even-heat technology, ensuring that food is cooked evenly with no cold spots. This is particularly beneficial for baking, where precision is required for the perfect rise and golden crust.
The KEWD175 also offers a digital display for easy temperature and time settings, giving users accurate control over their cooking processes. Additionally, its sleek design and stainless steel finish not only provide durability but also add a modern touch to any kitchen décor. With multiple cooking functions, including a convection setting, this oven allows for shorter cooking times and improved heat circulation, which is ideal for busy households.
On the other hand, the KitchenAid KEWV105 is a sleek and efficient wall oven designed for those who prioritize both functionality and aesthetics. It features a self-cleaning cycle, which takes the hassle out of maintenance, allowing users to focus more on cooking and less on cleaning. The touchscreen interface is intuitive, making it easy to navigate through various settings and cooking modes.
The KEWV105 utilizes smart oven technology, enabling users to monitor and adjust their cooking from a smartphone. This feature is particularly useful for individuals with busy lifestyles, as it allows them to manage their meals remotely. The spacious interior coupled with multiple rack configurations offers flexibility for preparing large family meals or multiple dishes at once.
Both models prioritize energy efficiency, utilizing advanced technologies to minimize power consumption while maintaining high performance. The combination of precision engineering, user-friendly controls, and thoughtful features make the KitchenAid KEWD175 and KEWV105 essential additions to modern kitchens.
In summary, whether you are a home cook looking to streamline your kitchen experience or a culinary enthusiast aiming for professional results, the KitchenAid KEWD175 and KEWV105 deliver innovation and reliability in every meal. With their blend of technology, design, and versatility, they promise to elevate your cooking practice and enhance your kitchen’s functionality.