CONTROLS
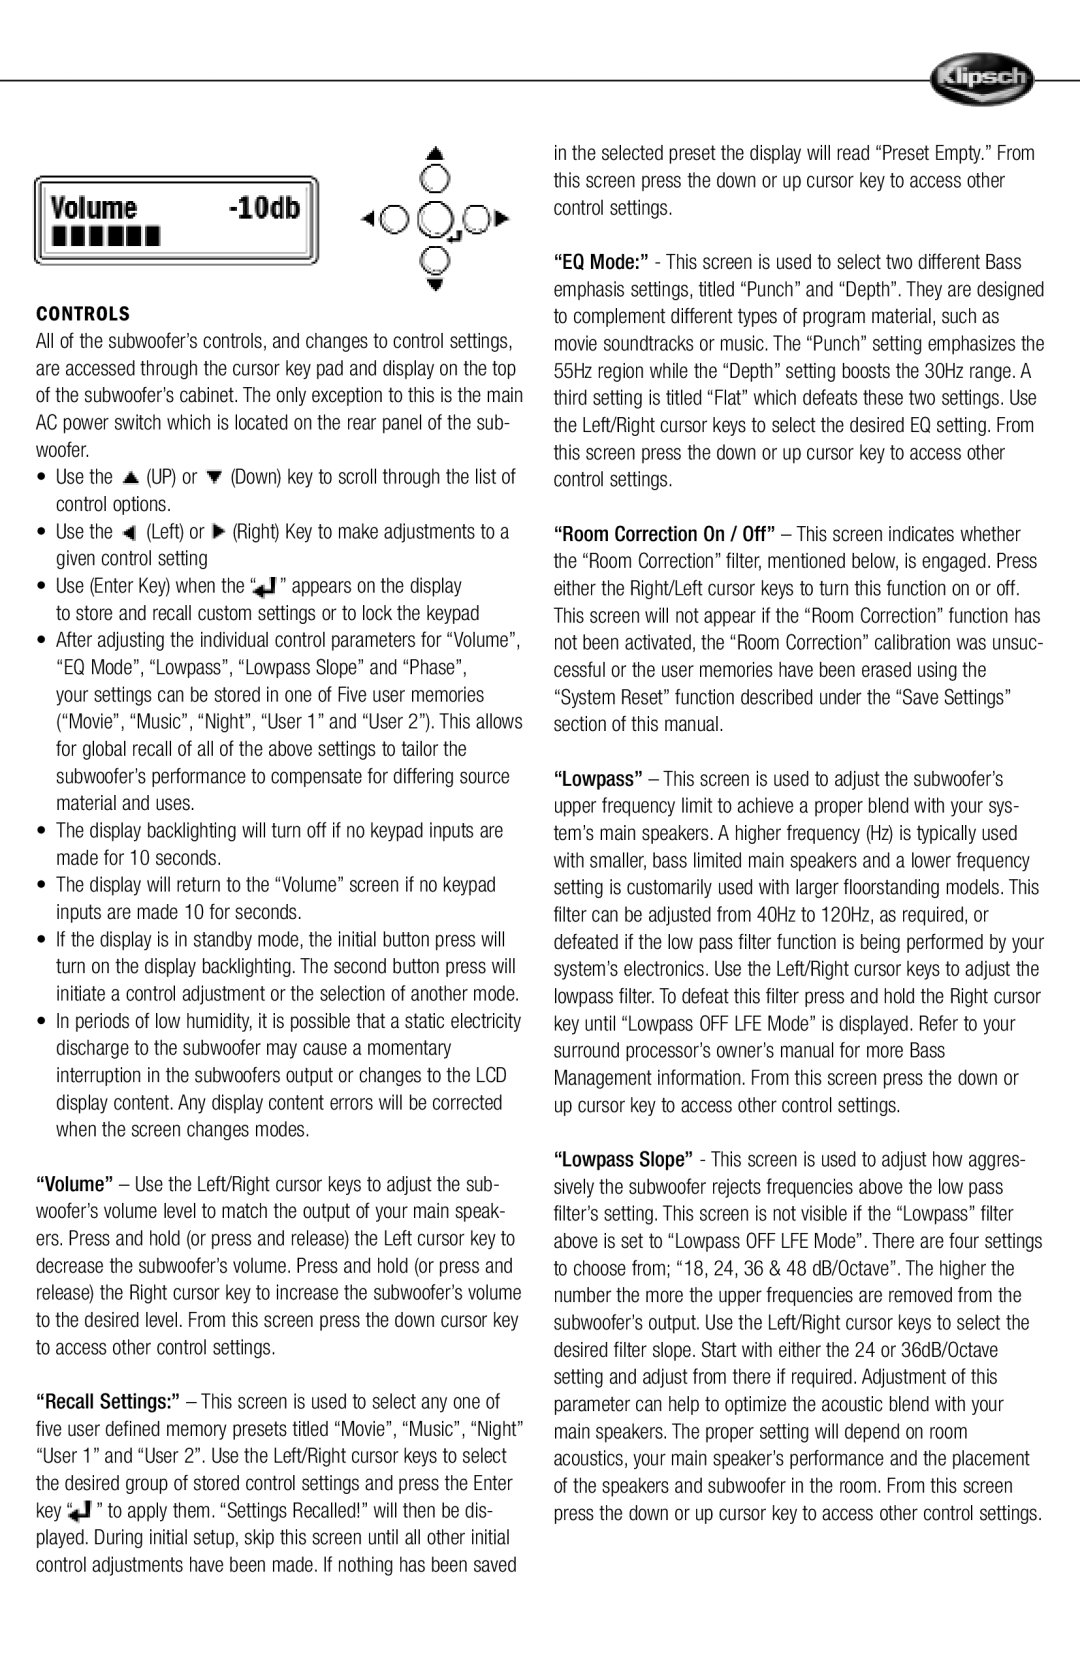
All of the subwoofer’s controls, and changes to control settings, are accessed through the cursor key pad and display on the top of the subwoofer’s cabinet. The only exception to this is the main AC power switch which is located on the rear panel of the sub- woofer.
•Use the ![]() (UP) or
(UP) or ![]() (Down) key to scroll through the list of control options.
(Down) key to scroll through the list of control options.
•Use the ![]() (Left) or
(Left) or![]() (Right) Key to make adjustments to a given control setting
(Right) Key to make adjustments to a given control setting
•Use (Enter Key) when the “ ” appears on the display to store and recall custom settings or to lock the keypad
•After adjusting the individual control parameters for “Volume”, “EQ Mode”, “Lowpass”, “Lowpass Slope” and “Phase”,
your settings can be stored in one of Five user memories (“Movie”, “Music”, “Night”, “User 1” and “User 2”). This allows for global recall of all of the above settings to tailor the subwoofer’s performance to compensate for differing source material and uses.
•The display backlighting will turn off if no keypad inputs are made for 10 seconds.
•The display will return to the “Volume” screen if no keypad inputs are made 10 for seconds.
•If the display is in standby mode, the initial button press will turn on the display backlighting. The second button press will initiate a control adjustment or the selection of another mode.
•In periods of low humidity, it is possible that a static electricity discharge to the subwoofer may cause a momentary interruption in the subwoofers output or changes to the LCD display content. Any display content errors will be corrected when the screen changes modes.
“Volume” – Use the Left/Right cursor keys to adjust the sub- woofer’s volume level to match the output of your main speak- ers. Press and hold (or press and release) the Left cursor key to decrease the subwoofer’s volume. Press and hold (or press and release) the Right cursor key to increase the subwoofer’s volume to the desired level. From this screen press the down cursor key to access other control settings.
“Recall Settings:” – This screen is used to select any one of five user defined memory presets titled “Movie”, “Music”, “Night” “User 1” and “User 2”. Use the Left/Right cursor keys to select the desired group of stored control settings and press the Enter key “ ” to apply them. “Settings Recalled!” will then be dis- played. During initial setup, skip this screen until all other initial control adjustments have been made. If nothing has been saved
in the selected preset the display will read “Preset Empty.” From this screen press the down or up cursor key to access other control settings.
“EQ Mode:” - This screen is used to select two different Bass emphasis settings, titled “Punch” and “Depth”. They are designed to complement different types of program material, such as movie soundtracks or music. The “Punch” setting emphasizes the 55Hz region while the “Depth” setting boosts the 30Hz range. A third setting is titled “Flat” which defeats these two settings. Use the Left/Right cursor keys to select the desired EQ setting. From this screen press the down or up cursor key to access other control settings.
“Room Correction On / Off” – This screen indicates whether the “Room Correction” filter, mentioned below, is engaged. Press either the Right/Left cursor keys to turn this function on or off. This screen will not appear if the “Room Correction” function has not been activated, the “Room Correction” calibration was unsuc- cessful or the user memories have been erased using the “System Reset” function described under the “Save Settings” section of this manual.
“Lowpass” – This screen is used to adjust the subwoofer’s upper frequency limit to achieve a proper blend with your sys- tem’s main speakers. A higher frequency (Hz) is typically used with smaller, bass limited main speakers and a lower frequency setting is customarily used with larger floorstanding models. This filter can be adjusted from 40Hz to 120Hz, as required, or defeated if the low pass filter function is being performed by your system’s electronics. Use the Left/Right cursor keys to adjust the lowpass filter. To defeat this filter press and hold the Right cursor key until “Lowpass OFF LFE Mode” is displayed. Refer to your surround processor’s owner’s manual for more Bass Management information. From this screen press the down or up cursor key to access other control settings.
“Lowpass Slope” - This screen is used to adjust how aggres- sively the subwoofer rejects frequencies above the low pass filter’s setting. This screen is not visible if the “Lowpass” filter above is set to “Lowpass OFF LFE Mode”. There are four settings to choose from; “18, 24, 36 & 48 dB/Octave”. The higher the number the more the upper frequencies are removed from the subwoofer’s output. Use the Left/Right cursor keys to select the desired filter slope. Start with either the 24 or 36dB/Octave setting and adjust from there if required. Adjustment of this parameter can help to optimize the acoustic blend with your main speakers. The proper setting will depend on room acoustics, your main speaker’s performance and the placement of the speakers and subwoofer in the room. From this screen press the down or up cursor key to access other control settings.